I am wondering if you need to use the sterilization bath for the jars and lids before freezing as you would for canning home grown foods.
The Perfect Strand: Drawing Hair with Charcoal
When drawing a portrait, you can spend more time drawing the hair than it takes to draw the facial features. Hair can be time consuming and difficult to draw realistically, especially with graphite. Drawing portraits with charcoal not only gives a more tonal value than graphite, it’s easier to draw realistic hair.
Whether the subject’s hair is long, short, straight, wavy, in pigtails or ponytail, or blowing in the wind, hair doesn’t have to be tricky to draw.
I use two different methods of drawing hair- baton and dry brush- and there’s no particular reason that I chose one over the other. If I have a good stockpile of charcoal powder, I tend to use the dry brush method. That’s why it’s good to save the residue from sharpening batons. I save mine in a short, wide mason jar. They are quite convenient for storing the charcoal residue and it’s easy to access the powder without making a mess.
If using the dry brush method, a watercolor paper with a fine grain texture should be used for the best results. Just as with a baton, there has to be enough tooth to hold the charcoal. I always begin a portrait with a quick sketch of my subject so that I can erase and refine as I need to. Once I’m satisfied with the drawing, I begin the portrait without having to worry about excessive erasure.

To the left is a quick sketch I did of my daughter before drawing the final portrait. I put in enough of the detail to be sure that I am going to have the desired look on the final drawing. Although I didn’t complete the hair, I did do enough so that I would know where the light falls. Whether using a brush or a baton, the method is pretty much the same. The baton should be sharpened to a point. If using a brush, use short, flat bristle brush.
Once you have the initial sketch drawn, with hair placement outlined, begin by laying down the charcoal on the darkest values. This is usually at the crown and sometimes can be found near the ear, if the ear is showing. The darkest values aren’t necessarily in one place, but it’s best to begin at the crown and work down to avoid dragging the charcoal into other parts of the drawing.
It’s best to lay down the charcoal in blocks, following the direction of the hair. You don’t need to pay attention to every single strand of hair. Once the dark areas are filled in, begin to draw the hair, again in the direction of the strands. If using a brush, keep moving in the direction of the strands. Draw using both gesture (quick) strokes and contour (slow) strokes.
Adding Highlights
Using an eraser, lightly remove some of the charcoal for the highlights. This process may have to be repeated a number of times. Working in sections is much easier, being sure to start each new block about a half-inch into the previous block to avoid noticeable lines between blocks. The transition from block to block should be smooth.
I use a kneaded eraser brought to a fine point to draw highlights. When the eraser gets too loaded with charcoal, I simply make a new point. The cleaner the eraser, the better the stranding and highlights will be because the charcoal on the eraser won’t be pulled back into the drawing. It’s also important to make sure you are lifting the charcoal and not blending or dragging.
When I reach the desired look in each block, I spray with a workable fixative and move on to the next block. The workable fixative will allow you to rework the sprayed area but will prevent smudging.
White Charcoal
There shouldn’t be a need to use white charcoal if working on white paper, but if the portrait is drawn on a colored paper, then white charcoal can be used to draw in the highlights instead of an eraser. White charcoal is good for portraits done on tan or gray paper.
Hair can be tricky but with practice, it becomes as easy to draw as the rest of the portrait.
As a tip to those who like to do a pre-sketch before tackling a project, I use my worn down Nitram batons for this. I use the chopstick method for securing the baton. Just place the baton between the chopsticks and secure with thread or string. It makes a great holder if you don’t like working with short batons. When the batons are too short to sharpen or work with, sand the stump on fine sandpaper and add the residue to your powder collection. There’s never any waste!
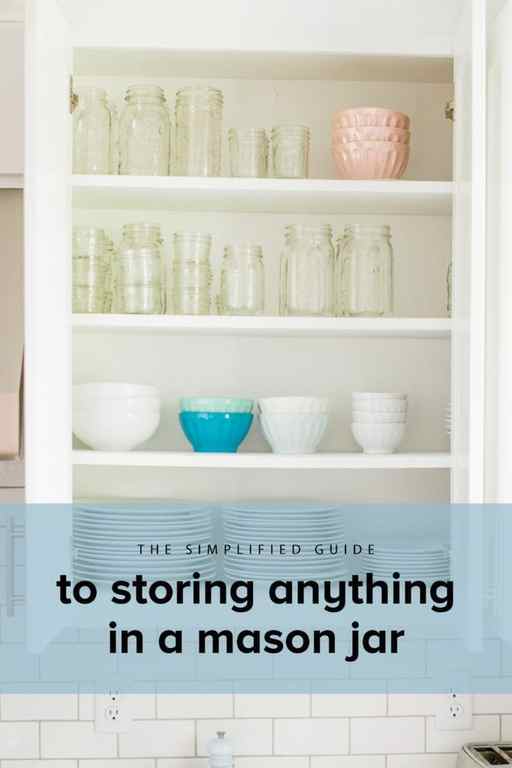
Why Mason Jars are the Perfect Storage Solution
Mason jars (or Bell Jars)are a workhorse in the kitchen, and are the perfect simplified storage solution because they can be used in so many different ways.
They’re durable, are plastic-free, inexpensive, and work perfectly in the pantry, fridge and in the freezer.
As a bonus, the tight sealing lids means you can take soups and stews with you on-the-go without worrying about spills or leaks.

The Mason Jars I Use
It may be cheaper to buy them at your local hardware store or grocery store, but you can definitely buy them on amazon if you can’t find them near you. Here’s the one’s I like best for freezing 1-2 portions of soup, stew, or leftovers!
How to Store or Freeze Anything in a Mason Jar
1. Select the Right Size Mason Jar
For best results, use wide mouth mason or bell jars to freeze one to two portions of soup, stews, or leftovers.
These are my favorite mason jars for freezing one to two servings Wide-Mouth 16-oz Mason Jars
Quart sized mason jars are a great size for storing larger amounts of leftovers, and are also a great choice for pantry organization or creating mason jar salads: Wide-Mouth Quart Mason Jar
2. Allow the Soup, Stew, or Main Dish to Cool
Avoid adding steaming hot liquid to the mason jar. Instead, allow the soup or stew to cool slightly before adding to the jar.
3. Transfer to the Mason Jar
Fill each mason jar with the soup, stew, or leftovers using a stainless steel ladle and wide mouth funnel.
The funnel prevents a mess and makes the process so much easier; definitely worth the small investment.
Again, a wide-mouth mason jar is your best best when it comes to freezing anything, especially when it comes to soups and stews.
This is my favorite Wide Mouth Funnel for filling mason jars to freeze.
4. Leave Enough Room
Be sure to leave at least a two inch clearance between the top of the jar and whatever you’re filling it with.
Remember, frozen liquids expand, so don’t overfill, or you will end up with a cracked jar.
5. Cool Completely in the Refrigerator
Screw on the lids and refrigerate the filled jars and allow to cool completely to avoid cracking. Do not skip this step, as freezing hot or warm liquids may cause the jar to crack.
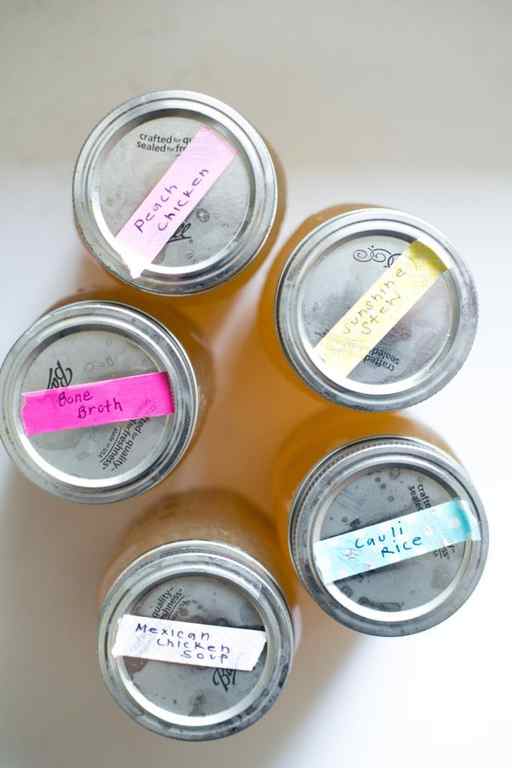
6. Add a Label
Don’t forget to label your jars.
Particularly if you plan to store in the freezer, clear labeling will ensure you know what’s what.
Labeling couldn’t be easier: simply write the name of the item along with the date on a small piece of washi masking tape with a permanent marker.
Then affix the tape to the top of the lid and you’re good to go.
When you’ve used the contents of the jar remove the tape and wash the lid.
7. Freeze the Mason Jars
Freeze contents for three to five months.
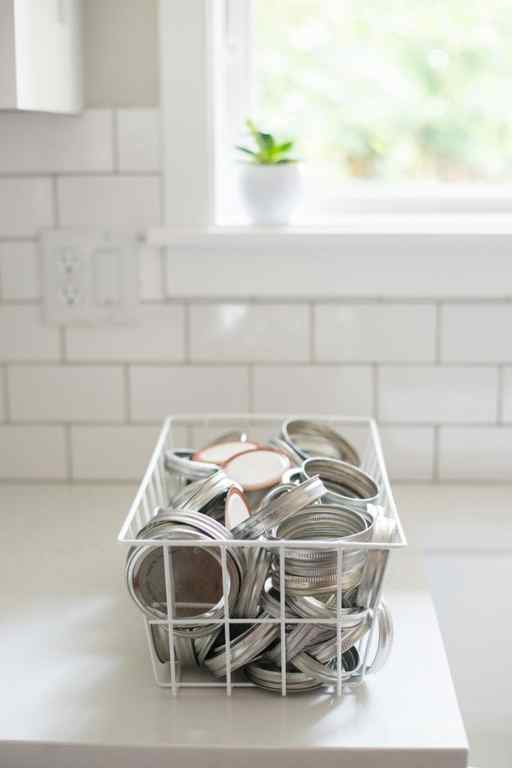
Lid Storage Tip :
Bonus Tip for Mason Jar Lid Storage: Consider storing mason jar lids in a wire basket when not in use to keep things organized.
Mason and Canning Jar Freezing 101 & FAQs
Can you put mason jars in the freezer?
Yes! See the full step-by-step tutorial on how to freeze anything in a mason jar
How do you know if mason jars are freezer safe?
Make sure you’re using a wide mouth jar like the ones above. Also make sure the liquid is cooled completely prior to freezing, and leave 1-2 inches of space between the liquid and the lid. See the full step-by-step: how to freeze anything in a mason jar
Can you freeze glass jars of spaghetti sauce?
No, not in same sauce jar as the store – but you can decant your storebought sauce into a freezer safe mason jar & use that instead. Here’s a homemade sauce recipe I love: tuscan pumpkin pasta sauce
Can you freeze mason jars with smoothies?
Yes, but you need to make sure there’s enough headspace in the jar – the more liquid something is the more it will rise. See the full step-by-step: how to freeze anything in a mason jar
Can you freeze soup in a mason jar?
Yes, freezing 1-2 portions in a freezer safe mason jar is a great way to save leftover soups, stews, and chilis! Here’s some soups & stews that freeze well.
Can you freeze milk in a mason jar?
Yes! Follow the directions above to avoid jar breakage. See the full step-by-step: how to freeze anything in a mason jar
Can you freeze broth in a mason jar?
Yes. Follow the directions above to avoid jar breakage. See the full step-by-step: how to freeze anything in a mason jar
Can I freeze mason jars with metal lids?
How can I avoid broken glass when freezing in jars?
Make sure you’re using a wide mouth jar (like the ones linked above). Also make sure the liquid is cooled completely prior to freezing, and leave 1-2 inches of space between the liquid and the lid.
I followed the directions and my mason jar still cracked in the freezer. What went wrong?
Double check that you were using wide mouth jars (like the ones linked above) that the liquid was completely cool, and that you left enough space between the liquid and the lid. If the jar still cracked, it was most likely an old jar with an existing crack, so it’s time to replace those jars!
Can I freeze cooked pasta, rice, or grains in a mason jar?
Absolutely! Grains can be frozen using the same steps. See the full step-by-step: how to freeze anything in a mason jar
How do you defrost frozen food in glass containers?
First, you can use a microwave on defrost, then dump into a bowl and heat. If you’d rather not use a microwave, put the frozen jar in the fridge overnight (it should thaw within a day) or place in a container of lukewarm water. Then reheat on the stove top!
Can I store raw meat in Mason jars in my freezer?
Yes, just as you’d use any freezable container, if you have raw meat it should work to freeze–keep in mind you’ll need to leave room at the top, as things expand when they freeze–to avoid cracked jars. See the full step-by-step: how to freeze anything in a mason jar
Share this Post
This post contains affiliate links. Please see our Terms & Conditions.
originally published on Aug 20, 2018 (last updated May 10, 2023)


