The overall flow of Gitflow is:
Gitflow workflow
Gitflow is a legacy Git workflow that was originally a disruptive and novel strategy for managing Git branches. Gitflow has fallen in popularity in favor of trunk-based workflows, which are now considered best practices for modern continuous software development and DevOps practices. Gitflow also can be challenging to use with CI/CD. This post details Gitflow for historical purposes.
Gitflow is an alternative Git branching model that involves the use of feature branches and multiple primary branches. It was first published and made popular by Vincent Driessen at nvie. Compared to trunk-based development, Gitflow has numerous, longer-lived branches and larger commits. Under this model, developers create a feature branch and delay merging it to the main trunk branch until the feature is complete. These long-lived feature branches require more collaboration to merge and have a higher risk of deviating from the trunk branch. They can also introduce conflicting updates.
Gitflow can be used for projects that have a scheduled release cycle and for the DevOps best practice of continuous delivery. This workflow doesn’t add any new concepts or commands beyond what’s required for the Feature Branch Workflow. Instead, it assigns very specific roles to different branches and defines how and when they should interact. In addition to feature branches, it uses individual branches for preparing, maintaining, and recording releases. Of course, you also get to leverage all the benefits of the Feature Branch Workflow: pull requests, isolated experiments, and more efficient collaboration.
related material
Advanced Git log
SEE SOLUTION
Learn Git with Bitbucket Cloud
How it works
Develop and main branches
Instead of a single main branch, this workflow uses two branches to record the history of the project. The main branch stores the official release history, and the develop branch serves as an integration branch for features. It’s also convenient to tag all commits in the main branch with a version number.
The first step is to complement the default main with a develop branch. A simple way to do this is for one developer to create an empty develop branch locally and push it to the server:
git branch develop
git push -u origin develop
This branch will contain the complete history of the project, whereas main will contain an abridged version. Other developers should now clone the central repository and create a tracking branch for develop.
When using the git-flow extension library, executing git flow init on an existing repo will create the develop branch:
$ git flow init


Initialized empty Git repository in ~/project/.git/
No branches exist yet. Base branches must be created now.
Branch name for production releases: [main]
Branch name for "next release" development: [develop]


How to name your supporting branch prefixes?
Feature branches? [feature/]
Release branches? [release/]
Hotfix branches? [hotfix/]
Support branches? [support/]
Version tag prefix? []


$ git branch
* develop
main
Feature branches
Step 1. Create the repository
Each new feature should reside in its own branch, which can be pushed to the central repository for backup/collaboration. But, instead of branching off of main , feature branches use develop as their parent branch. When a feature is complete, it gets merged back into develop. Features should never interact directly with main .
Note that feature branches combined with the develop branch is, for all intents and purposes, the Feature Branch Workflow. But, the Gitflow workflow doesn’t stop there.
Feature branches are generally created off to the latest develop branch.
Creating a feature branch
Without the git-flow extensions:
git checkout develop
git checkout -b feature_branch
When using the git-flow extension:
git flow feature start feature_branchContinue your work and use Git like you normally would.
Finishing a feature branch
When you’re done with the development work on the feature, the next step is to merge the feature_branch into develop .
Without the git-flow extensions:
git checkout develop
git merge feature_branch
Using the git-flow extensions:
git flow feature finish feature_branchActivity 2: Parts of a Tree
Trees are living organisms just like us who need nutrients, air, water and sunlight to survive.
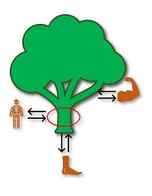
Trees are the largest plants on the planet, and they are perennial (which means they live more than 2 years). They have limbs, trunks and roots. Think of the limbs like our arms, the trunks like our bodies and the roots as our feet.
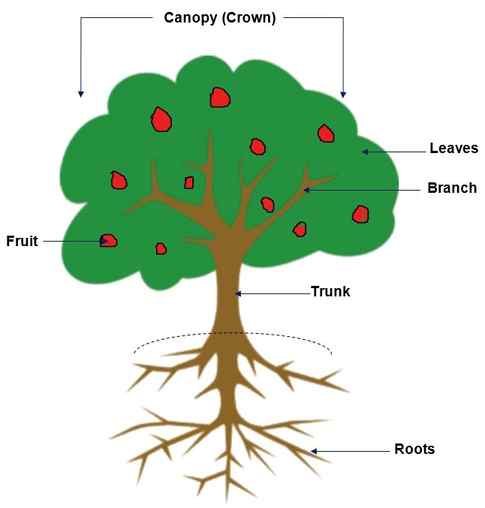
There are 6 parts that make up a tree. *See image below:
- Roots-Secure the tree to the ground. While these parts are underground, they help to collect water and nutrients from the soil to transport up the tree to the other vital parts.
- Trunk– The main stem of the plant that connects the roots to the limbs (branches) which supports the crown of the tree. The trunk also acts as a large pipe that allows for the transportation of water and nutrients to flow upward towards the leaves from the roots.
- Branches– Grow from the trunk of the tree and help the transport water, sugar and nutrients to the leaves and canopy (crown) of the tree. They also help support the leaves that make up the canopy (crown).
- Leaves-Grow from the stem which are attached to the branches to make up the canopy (crown) of the tree. They can be flat or needle-like and are usually green from a substance called Chlorophyll, which absorbs light from the sun to give the leaves their color. A leaf’s sole function is to convert energy from the sun into food (sugar), which is also known as photosynthesis.
- Canopy (Crown)-This is the top part of the tree where the leaves and branches lie, which provides shade for the roots.
- Fruit-Can also be known as a seed which helps with the production of new trees. However, some trees grow edible fruit (food) for animals and humans. Fruit usually grow from a bud or flower on the stem of a tree near the leaves.
Labeling Parts of a Tree Activity:
To complete this activity, you will want to use the Parts of a Tree Worksheet, to label the parts of a tree. Follow the instructions below:*Note the instructions are also on the worksheet.
- First you will want to color in the tree with crayons.
- Next, with parental supervision, you will want to cut out the words from the word bank.
- Then using a glue stick, glue the words to the correct box to label the parts of the tree.
- Once, you have finished you can hang up your finished artwork on your refrigerator or somewhere in your house!
Preparing a Live Tree for Decorating
- Avoid shaving the bark off of a tree trunk to get it to fit into a smaller tree stand opening. You want to leave on the outer layers of wood, which are the most efficient in taking up water. [6] X Research source
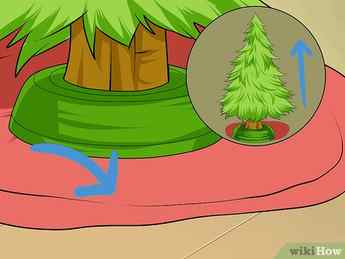
- Use a tree skirt to cover up the tree stand and create a visually appealing place to put presents. Just remember to lift the skirt up periodically to check and fill the water.
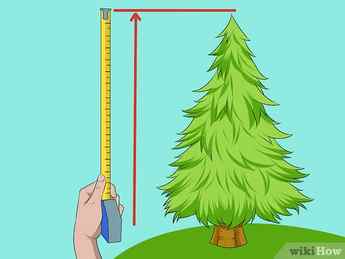
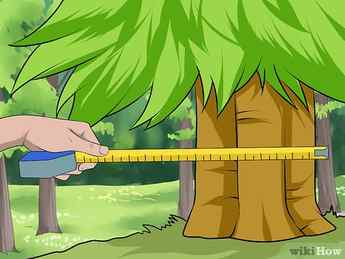
- A good indication of how much water your tree needs is to measure the diameter of the trunk at its base. The number of inches is the same number of quarts that should be available to your tree in the tree stand. [7] X Research source
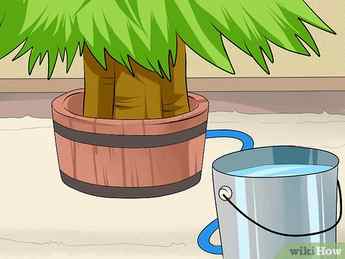
- If your tree doesn’t get enough water after being cut, it will form a seal of sap over the cut end, which you will need to cut off to allow it to absorb more water. Try to place your tree in water as soon as possible after it is cut.
- A Christmas tree watering system will increase the water capacity of your stand and make it easy to add water.
- Despite some common theories, adding sugary drinks or any other substance to the water in the tree stand does not help the tree to maintain its freshness. Always fill with clean, pure water. [8] X Research source

- You can also lower the temperature of the room that the tree is in to help keep it from drying out as quickly. The branches will dry more and the water will be taken up and evaporate quicker in high heat. [9] X Research source
- If you can’t place a tree near a power outlet, try using an extension cord with a power strip. This will also act as a safety and convenience feature, as you can easily turn off Christmas tree lights once you’ve put them on the tree by using the on/off switch on the power strip.
Advertisement
Part 4
Part 4 of 4:
Decorating Your Christmas Tree
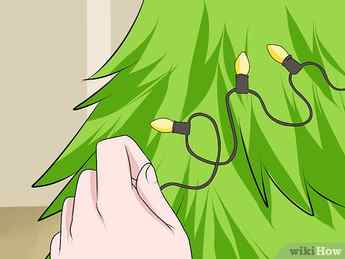
- Try opting for a longer string than you think you need, or multiple strings, as the tree will look best with lights weaved into the inside of the tree, not just the outside branches. A good rule is to have a string of 100 lights for every vertical foot of the tree. [10] X Research source
- You can mix and match colors and styles of lights on the same tree. Try smaller traditional incandescent lights in multi-color along with a string of larger white globe lights, for example, to add variety to your tree.

- Try making your own traditional garlands by stringing popcorn kernels or cranberries together.
- A good rule is to hang a thin garland of berries, beads, or popcorn by draping it across the branches, while a thicker ribbon or foil garland should be wrapped loosely around the tree.
- You can also add loose tinsel to hang on the garlands, strings of lights, or the branches themselves. Or, find a string of tinsel to hang like a garland for less fallen mess.
- Try placing your favorite ornaments, whether they’re sentimental or just visually pleasing, up front and in the middle of the tree where you will see them most often. Then space all of your largest ornaments around the tree before filling in with smaller ones.
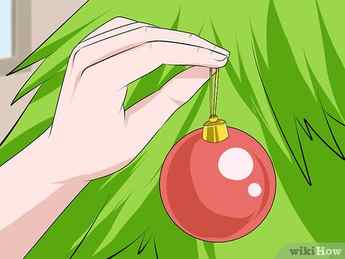
- Make sure to hang ornaments, especially fragile ones, securely on the tree by pinching the wire hanger (either provided or one you’ve made with a paper clip) securely around the branch you’re hanging on.
- Try to hang heavy ornaments close to the tree trunk so they’ll be more stable and better supported.
- You can also add other touches to the tree at this point, like a star or angel tree topper, poinsettia flowers, or other adornments like icicles and snowflakes.
Advertisement
Community Q&A
Search
Question
Can I trim my tree in November?
HumanBeing
Top Answerer
Yes! A real Christmas tree might not last from November until 12th Night, you will need to water it. An artificial tree can be decorated or trimmed any time and displayed until 12th Night, in line with tradition, (the 12th day after the 25th of December), or you can take down your tree as early as Boxing Day if you wish.
Thanks! We’re glad this was helpful.
Thank you for your feedback.
As a small thank you, we’d like to offer you a $30 gift card (valid at GoNift.com). Use it to try out great new products and services nationwide without paying full price—wine, food delivery, clothing and more. Enjoy! Claim Your Gift If wikiHow has helped you, please consider a small contribution to support us in helping more readers like you. We’re committed to providing the world with free how-to resources, and even $1 helps us in our mission. Support wikiHow
Question
Do I start to string my lights from the top of the tree or the bottom?
Community Answer
It is up to you, but it is probably easier to start at the top. If you start from the bottom, you may have a surplus of lights at the top.
Thanks! We’re glad this was helpful.
Thank you for your feedback.
As a small thank you, we’d like to offer you a $30 gift card (valid at GoNift.com). Use it to try out great new products and services nationwide without paying full price—wine, food delivery, clothing and more. Enjoy! Claim Your Gift If wikiHow has helped you, please consider a small contribution to support us in helping more readers like you. We’re committed to providing the world with free how-to resources, and even $1 helps us in our mission. Support wikiHow
Question
When do I put the angel on top?
Community Answer
I recommend you put it on last so you do not jostle it while adding your other decorations, causing it to fall.
Thanks! We’re glad this was helpful.
Thank you for your feedback.
As a small thank you, we’d like to offer you a $30 gift card (valid at GoNift.com). Use it to try out great new products and services nationwide without paying full price—wine, food delivery, clothing and more. Enjoy! Claim Your Gift If wikiHow has helped you, please consider a small contribution to support us in helping more readers like you. We’re committed to providing the world with free how-to resources, and even $1 helps us in our mission. Support wikiHow