Here’s my finished painting, matted and signed.
How To Paint Realistic Watercolor Roses
Today I’m going to show you how to paint gorgeous, luminous roses in a realistic way, using watercolor paint and glazing techniques.
As reminder on painting before we get into the thick of it, one of the best ways to learn to create realistic paintings is to start by creating realistic drawings. We created a new guide, How to Draw EXACTLY What You See in order to teach realistic drawing foundations.
Aside from a good foundation, let’s talk supplies.
Assemble your paint, brushes, and paper
You can use any brand of paint that you like, but I’m using Winsor Newton watercolor paint, unless otherwise stated. (I also like to use professional grade paint whenever possible, since student grade paints have less pigment and more fillers, taking twice the effort to get the same “punch” of color. Here’s some more information on buying watercolor paint, if you’re just starting out.)
My standard flower palette is as follows: Aureolin, New Gamboge, Quinacridone Gold, Raw Sienna, Cadmium Orange, Scarlet Lake, Alizarin Crimson, Permantent Rose, Cobalt Violet, Permanent Magenta, Cobalt Blue, French Ultramarine Blue, Marine Blue, Cerulean, Burnt Sienna, and Burnt Umber. You can get most of these in Blick’s 12-color watercolor set here.
Of course, you’ll also need both round and flat watercolor brushes—I use round brushes to do detail work, and flat brushes to wash larger areas like the background. Round brushes in 12, 8, 6 & 4 are fine. Depending on the size of the painting and the amount of backgrounds space you’ll be covering, just one half-inch flat brush will do.
Lastly, make sure your watercolor paper is of good quality. I use Arches 140# paper for most all my work, and when doing a painting with lots of washes, you’ll need at least 140# paper that has been stretched or taped down. If a paper is not good quality (i.e., not heavy enough) it will not take repeated washes without buckling. I also tend to “lift” color at the end of my paintings to get my values right, and give my work softer edges. Poor quality papers do not stand up well to scrubbing out color.
A quick note on glazing
Glazing is the technique of laying down successive washes and building up color and value in a painting in order to create glowing, luminous color. Because watercolor is transparent, each layer shows through the next, creating rich, complex color mixes.
I use a wide range of colors when I paint glazes, and generally, I don’t mix colors—I just tend to use colors straight from the tube (plus water). The reason for this is because if you are covering a large area it is too hard to mix enough color for more than one sitting. The colors from a tube are always consistent so you always have the right color when you’re ready to continue.
It is very important that each wash you lay down is completely dry before the next one is applied, or the next wash will lift your previous wash and muddy your color. I allow several hours (or overnight) for each layer to thoroughly dry. A hair drier can be used to speed this process, but many times I find that stepping away from the work is also helpful. When I come back I have fresh eyes to see what needs to be done next.
Practice your watercolor washes a few times to get the hang of it before starting on your painting (here is a more detailed tutorial on creating watercolor washes). If I am doing a larger area, I wet the area with clean water first and allow it to dry just until the sheen is gone. The paper will be damp but not too wet, which allows the color to flow and gives some time to work before the paint dries or starts to leave a hard edge.
How to paint a rose – how to paint roses
I love to share how to paint a rose as I am very passionated about painting roses in watercolor or oil. My free demonstrations and DVDs show you all the secrets to get a three dimensional look, no matter which medium I use, if it is oil or watercolor. I always want my roses to be realistic and glowing in colour, I want to capture the soft and light petals, I want the light showing through the petals. But I also want to create a three dimensional form, so I use colour temperature. With colour temperature I mean warm and cool colours. Often our highlights are cool and the petals in shadow are warm. I also use lights and darks. I don’t want my rose paintings looking flat. I want to share my knowledge about how to paint a rose. I am offering a lot of free lessons with step-by-step-demonstration-photos to show you how to paint roses . Also my available Watercolor DVDs show you excactly what I am doing and give you much more indepth information. If you always wanted to paint stunning realistic roses then I hope you enjoy my free tutorials as well as the step-by-step-demonstration photos.
The rose at left is the ‘Heidi Klum Rose’. I love the deep purple magenta pink colours of this rose. I did a free step-by-step tutorial about how to paint a rose in watercolor and I also show you which colours I am using. Looking at the finished Watercolor Painting of this beautiful Rose you can see that the Rose looks three dimensional, it has form and depth. You also notice that I used warm and cool colours on the Rose. But also on the leaves you see that I used warm and cool colours to paint the leaves. For more information about how to paint this beautiful purple magenta pink rose just visit the free tutorial page.
How to paint a single creamy white rose with leaves and background
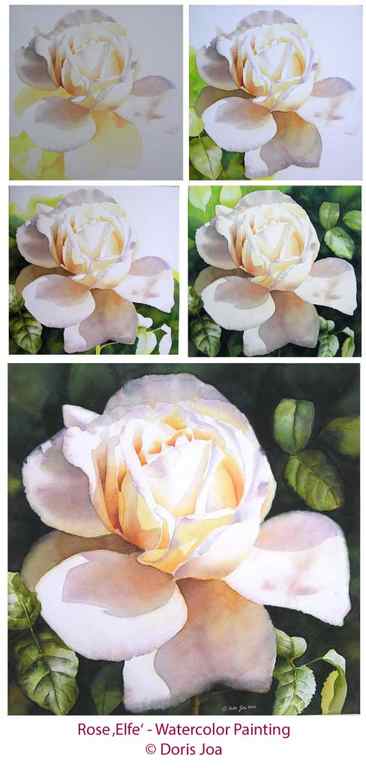
When I want to start to paint roses I then have a look through all my reference photos to figure out what captures me in this moment. There is no deep meaning behind my roses paintings, no philosophy. It is just my pleasure, I just have fun to paint them and to show their beauty through my art. I always start with the petals which have a lot of colour. I never start with the petals in light. At this stage on the white paper I find them boring. I want to use colour. And I also want to see the roses developing on the white paper. I start at the base of the petals – where it meets the other petals. I have a close look and want to analyse all the colours which I am seeing there.
Use yellow to create a glowing underwash
I then start with my first wash. Mostly it is yellow because I want to make those parts glowing. When this part is dry I then start with the next layer and use now the colours for the rose. In this rose there are mixes of yellow and red and also some blue for the darkest parts. I paint each petal separately. To acchieve a realistic three dimensional look it is necessary to paint each petal separately. I also want to have glowing shadow colours. I want to have my shadows dancing on the paper. In the photo displayed here you can see that – although it is a white rose – there are many colours in my shadow areas. You can see Indian Yellow, Alizarin Crimson and Phthalo Blue and of course mixes of them. I create depth with adding more layers of colours and I make sure that I safe the white of the paper for my white highlights. I start early with the background. I make sure that some of my rose petals are integrated in the background with soft washes. Very important is that some of the background colour flows over the edges of the petals. To make a white rose really pop it is often the best to paint a dark background.
There is another free step-by-step-demonstration available on my website. In this free tutorial I show you how to paint a pink rose with leaves without background. This is a botanical rose study and again I share my colours and the steps of my painting process. For more informations on how to create this beautiful pink rose study just visit the Free Tutorial.
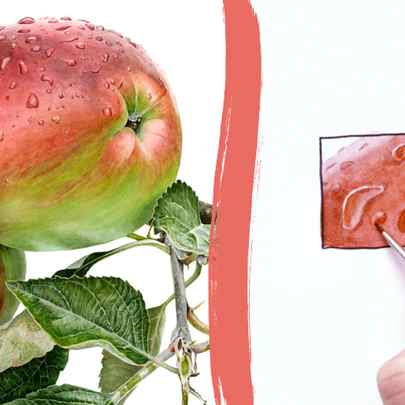
How to paint a green and red apple – without making it brown
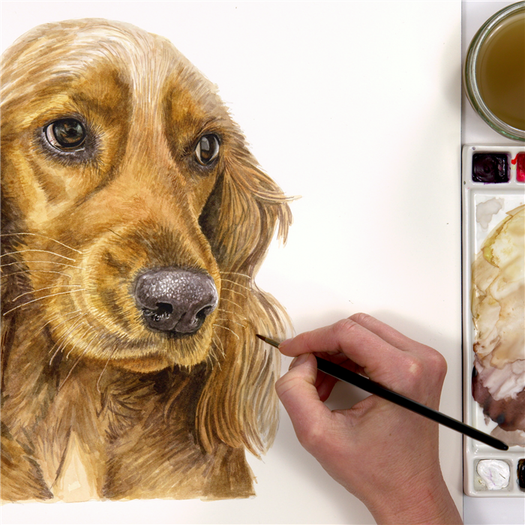
How to paint dog fur


How to bring back watercolor highlights
Share this post!
28 Comments
YO on September 10, 2015 at 10:54 am
Hi Anna. First congratulations on your watercolors and for sharing your experiences.
My question is a bit simple but that strikes me: As copies the drawing cardboard, exactly as in relation to photography? Thank you very much Anna
Anna Mason on September 10, 2015 at 12:17 pm
Hi there, I’m not quite sure I understand the question you had?
YO on September 10, 2015 at 2:49 pm
Sorry for my bad English, it’s just a detail. I see in the video that drawing is idem to the original photo, as if silhouetting, transferred or similar. No one seems a drawing made with photo as reference, but exactly the same. What method do you use for drawing?
Candy on September 11, 2015 at 5:17 pm
I believe she used transfer paper / tracing paper. laid that over the original photo and using a pencil she traced it. this video should help
https://www.youtube.com/watch?v=Cz2Kwz6JwPk
hilda on September 10, 2015 at 12:30 pm
Thank you so much for the rose tutorial. Beautiful. I love painting rose.
Joanne on September 10, 2015 at 12:53 pm
Thanks Anna appreciate the demo and the fact that you need to build the flowers tones I tend to try and do it in a couple of washes and either overdo it or just end up a mess. Very interested in your move into Craftsy look forward to seeing you there thanks again
Joanne
Candy on September 11, 2015 at 5:17 pm
I believe she used transfer paper / tracing paper. laid that over the original photo and using a pencil she traced it. this video should help
https://www.youtube.com/watch?v=Cz2Kwz6JwPk
Christine Albright on September 13, 2015 at 2:10 am
I enjoy watching your tutorials so much! This one is especially beautiful in it’s details, and because the rose is my favorite flower!
glow on September 13, 2015 at 2:51 am
yes… more painting and inking techniques of the trade. would be wonderful to learn but i dont have the dough which i would like to support you in…i love the coloring tech you did..and all that yummy info…..
Kim McEvilly on September 13, 2015 at 3:18 am
Thanks, this was – again – terrific!!
So motivating! Kim
Paul Hopkinson on September 14, 2015 at 8:21 pm
Hi Anna, for many years I’ve been an animal/bird artist however the past few weeks I have been watching your videos on here and YouTube, I am going to have a go at botanical work soon and this is all due to you. So fingers crossed I may be able to paint some resembling a flower of sorts, certainly not to the standard of this beautiful rose. LOL
Have a great time in Seattle, Paul
http://www.devonartist.co.uk
Jane Robinson on September 18, 2015 at 8:43 am
Absolutely stunning Anna, I am learning to do very detailed work in my painting
and have found this is what I love most and it is so therapeutic!
Thank you for sharing your tutorials.
Maysoon on November 7, 2015 at 12:10 am
Hi Anna
Water colour painting is very challenging to me. I watched your video with great interest and enjoyed it,Luna lot. You made it look so simple and easier than I thought . Many thanks for sharing your experience. One issue , I prefer the normal motion of the videos as it gives better opportunity for understanding and following the artist steps. Many thanks again.
Pat on February 18, 2016 at 7:34 pm
What colors did you use in the entire rose? Thanks beautiful. Pat
Charlie Afford on June 9, 2016 at 2:09 am
What type of brush works best for these type of projects?
William on February 20, 2017 at 3:05 am
Hi Anna,
Thanks for your post. The painted rose flower is so beautiful.
I will learn to make one for my girl friend. What is the name of the tiny brush you used? Many thanks,
William
Caroline (team Anna Mason Art) on February 20, 2017 at 10:36 am
Hi William, the smallest brush that Anna uses tends to be the size 000. You can find out more about Anna’s brushes on the equipment page: https://www.naturestudio.com/equipment
Carly Ritchie on October 2, 2017 at 9:56 am
This is beautiful Anna! I’ve been toying with the idea of getting into watercolours myself as I’ve only ever used sprayers for much (much) larger projects, but I really love the delicacy to painting smaller pieces by hand rather than just blasting paint all over the show! The depth you’ve achieved in the flowers are incredible!! Great work girl Carly Ritchie x
https://paintsprayerguide.com
Samreen Fatimah on June 19, 2018 at 10:00 pm
Hi Anna love your work.
Where can i find the three hour tutorial?
Anna Mason on June 21, 2018 at 8:19 pm
Hi Samreen, it’s here: https://www.naturestudio.com/free-class-sign-up/
Jennifer on February 24, 2020 at 9:21 am
Hello Anna, I love all of your tutorials, thank you so much for your generosity of time and work I have a question of what colours did you use in this rose? Thank you Jennifer
Amy Adams (Team Anna Mason Art) on February 24, 2020 at 9:55 am
Hi Jennifer, thanks for your comment and question. This tutorial uses the following colours of paint: Burnt Sienna, Cobalt Violet, Olive Green, Opera Rose, Payne’s Gray, Permanent Alizarin Crimson, Permanent Rose, Permanent Sap Green, Transparent Orange, White gouache, Winsor Blue (Green Shade), Winsor Green (Yellow Shade), Winsor Lemon and Yellow Ochre.
https://thuocladientu123.com on February 13, 2021 at 4:01 am
Best view i have ever seen !
Judi Gibbs on July 27, 2021 at 4:21 pm
Hi Anna: This note really helped. Talking about painting/drawing often and small takes the pressure off always trying to complete something wonderful. It WORKS for me. And although your paintings are AMAZINGLY detailed, suggesting that perhaps just painting a small part is another great idea! You have definitely got ME started. Today. And about getting the colors mixed? I am often scrambling to do that partway through a painting. And it is never very successful. Another little something I can work on. GREAT suggestions. Best email I have read in a while. Thank you.
Bonnie Hastings on July 28, 2021 at 3:38 am
Love your work! In this rose video, do you only use wet on dry paper as it appears to me? If so, how are you able to get the final blended look? If I do not use some wet on wet I end up with hard lines.
Lara on February 22, 2022 at 6:08 pm
WOW. Amazing job!
Thank you so much for the rose flower tutorial. Can you please paint more flowers?
I love flowers painting and you guided me so well. Keep shinig Anna! https://holapaints.com/best-paint-sprayers-uk/
Patti on March 22, 2022 at 11:58 pm
I paid for the tutorial and downloaded it on my laptop, can I download it to my iPad so I can take it on the go?? I can’t wait to dive in but I’m waiting to collect all the paints I need first!
Camille Franklin on April 3, 2022 at 9:11 pm
Hope I can do this rose!
Leave a Comment Cancel Reply
Take our free classes!
Sign up below to receive FOUR hour-long video classes on a range of subjects.


Free Pear Class [Organic]
The information you provide here will be used only to deliver the videos, along with other relevant updates from me. You can unsubscribe anytime. CLICK HERE for our privacy policy.
Share this post!
Subscribe to blog updates
Blog Updates
The information you provide here will be used only to deliver the email course, along with other relevant updates from me. You can unsubscribe anytime. Click here for our privacy policy.
Member? Login here.
© 2023 Anna Mason Art Ltd. All Rights Reserved. Registered in England number 09616196. Registered Office: 106 London Road, East Grinstead, West Sussex, RH14 1EP.
We use cookies (not the yummy ones) to give you the best possible experience on our website.
You can find out more about which cookies we are using or switch them off in settings .
Okay, I accept
Close GDPR Cookie Settings
- Privacy Overview
- Strictly Necessary Cookies
- Optional 3rd Party Cookies
- Targeting Cookies
- Cookie Policy
Privacy Overview
This website uses cookies so that we can provide you with the best user experience possible. Cookie information is stored in your browser and performs functions such as recognising you when you return to our website and helping our team to understand which sections of the website you find most interesting and useful.
Strictly Necessary Cookies
1) Cookies for the working functioning of the website including:
- Membership & Account Cookies. When you log into the website, cookies are stored on your machine which securely identify you as the user for the duration of your session. Without these cookies you would not be able to view any Members Only content, nor would you be able to manage anything related specifically to your user account such as uploaded images, bookmarks or forum posts.
- Cookies to help with e-commerce. This site offers e-commerce facilities and some cookies are essential to ensure that your order is remembered between pages so that we can process it properly, and that your order can be processed in your own currency.
2) Cookies for monitoring the effectiveness of the website:
- We use Google Analytics which is one of the most widespread and trusted analytics solution on the web for helping us to understand how you use the site and ways that we can improve your experience. These cookies may track things such as how long visitors spend on the site and the pages that they visit so we can continue to produce engaging content. The data collected is anonymised. For more information on Google Analytics cookies, see the official Google Analytics page .
3) Strictly necessary 3rd party cookies:
- Our public website contains videos which play through our site directly from YouTube. If you watch videos on our site, YouTube will use analytics cookies to count how many views the video has received. For information on YouTube and privacy, please refer to their guide on how to control your data in YouTube.
- Our site also contains videos for the full length tutorials, which play through our site directly from Vimeo. If you watch any of these videos, Vimeo will use analytics cookies to count how many views the video has received. You can find out more by reading Vimeo’s Privacy Policy.
Enable or Disable Cookies
If you disable this cookie, we will not be able to save your preferences. This means that every time you visit this website you will need to enable or disable cookies again.
Optional 3rd Party Cookies
These are cookies that provide information to other companies. We use:
- Social media buttons and/or plugins on this site that allow you to connect with these social networks to share blog posts and images. For these to work the following social media sites including; Instagram, Facebook and, Pinterest, will set cookies through our site which may be used to enhance your profile on their site or contribute to the data they hold for various purposes outlined in their respective privacy policies.
- We use the Facebook Pixel to track the effectiveness of any Facebook or Instagram Ads we run.
For more information on Facebook and privacy, please refer to Facebook’s Privacy Policy. You can control how Facebook tracks your web data in the Privacy Settings of your Facebook account.
Enable or Disable Cookies
Please enable Strictly Necessary Cookies first so that we can save your preferences!
Targeting Cookies
Targeting cookies help us to provide you with tailored content and special offers, based on your past interactions with the site.
The only targeting cookies we use are:
- Active Campaign Website Tracking Cookies: if you are on our email list we track your engagement with our website in order to, for example, email you a link to a free video on a topic, because you have visited a page of our website also about that topic. Though this website visitor information is held at the level of your account in our email software, we do not view it at an individual level. Rather we would set an email to send to everyone who had visited a certain page if we thought they may be interested in a new piece of content.
Enable or Disable Cookies
Please enable Strictly Necessary Cookies first so that we can save your preferences!
Cookie Policy
You can find out more about how we use cookies in our Cookie Policy


