ART DESCRIPTION: During this season of thankfulness, let the beauty of change and joy of the harvest permeate your home with this autumn reminder of all things we love about fall and Thanksgiving. This Amanti Art canvas art print was created by Amanti Art Portfolio and printed by Amanti Art in Madison WI. The canvas is stretched by hand and finished with a float frame. Individually made using traditional custom framing techniques, it has the quality you would expect from your local frame shop. Because of our attention to detail and focus on artistry, architects, interior designers, and homeowners alike choose this framed canvas artwork to create beautiful living spaces.
22″ x 22″ Hello Fall Pumpkin Portfolio Framed Wall Canvas – Amanti Art
CUSTOM CANVAS ARTWORK DETAILS: Hello Fall Pumpkin by Amanti Art Portfolio. DESCRIPTION: During this season of thankfulness, let the beauty of change and joy of the harvest permeate your home with this autumn reminder of all things we love about fall and Thanksgiving.
FRAME DETAILS: The canvas is framed in the Sylvie Maple frame, which is a modern, float frame with natural maple woodgrain coloring and dramatic depth. The frame measures 1 in. wide and stands 2 in. off the wall. The canvas appears as if it is floating in the frame because it has a narrow gap between the edge of the canvas and the frame. The overall size of this framed canvas print measures 22 in. W x 22 in. H.
QUALITY AND AUTHENTICITY: Canvas is printed with high-quality, fade-resistant inks for picture-perfect detail and incredible depth of color. Canvas is stretched across a solid surface to resist sagging. We use only premium, high-tension canvas. Our exclusive stretching techniques hide corner folds and provide a taut canvas surface. The artwork is authentically licensed.
HASSLE-FREE HANGING: Ready to hang for easy installation.
FOR HOME OR COMMERCIAL USE: Because of our attention to detail and focus on artistry, architects, interior designers, and homeowners alike choose this framed art print to create beautiful living spaces. ASSEMBLED IN THE USA: Amanti Art assembles each piece to order in Madison, WI USA.
Make a Fall Canvas with Pumpkin Seeds
Learn how to make a fall canvas with an unusual material – pumpkin seeds! This wall art project is easy and makes great art for the autumn season. Leave it up through Thanksgiving!
Skills Required: Beginner. We’re going to teach you the technique for making the painted background, which is very simple.
After carving pumpkins this year, I thought to myself . . . what can I do with the seeds? Have you ever had those sort of crazy thoughts?
You know, when you want to save something a little strange, because you don’t really know what you want to do with it. Note that I have a bag of pistachio shells currently in my craft closet. I think I’m using those at Christmas.
Anyhoo, I found a beautiful fall leaves garland at the craft store shortly after pumpkin carving, and let them be my inspiration for this project. I thought, “what if I could shape pumpkin seeds into leaves and make something a bit unique?”
This fall canvas is the result.
Keep reading to learn how to make this canvas idea. Even if you don’t have any painting skills, you’re going to be able to do this project (and you’ll enjoy it). Here’s how.
DIY Fall Canvas
Gather These Supplies
- Folk Art Acrylic Colors: Coffee Bean, Orange Poppy, Pure Orange, Turners Yellow
- Mod Podge – any finish
- Unfinished wood letters (Scrabble tiles would be cute too!)
- 12″ x 12″ canvas
- Ashland Fall Garland (from Michaels)
- Paintbrushes – flat brush, liner brush
- Transfer paper
- Pencil
- Tracing paper
- Craft glue
- Hot glue gun
- 1 1/2″ orange sheer ribbon
Before you begin, wash and dry your pumpkin seeds. Then place Pure Orange and Turners Yellow next to each other on your paint tray.
The first step is to dip your paintbrush in BOTH colors at the same time . . . with orange on half the brush and yellow on the other (you can see on my brush above).
This is called double loading.
After you double load your brush, go ahead and brush back and forth across the canvas (re-loading as needed). This is a simple way to cover a canvas quickly, and you don’t need painting skills to do it.
Don’t “overwork” an area with your brush. This means don’t brush back and forth in the same area too many times . . . otherwise this muddies the colors and they’ll start to just blend together.
The best way is to load your brush, make a few strokes, load again, etc. Good news – if you don’t like the way it looks, let dry and just add color where you see fit. It’s that easy!
I used a leaf from the inspirational garland and made a pattern of one large leaf on some transfer paper. I used the pattern to “test” my pumpkin seed placement, to see if my idea would work.
After deciding it would work, I made several leaf patterns and arranged them on the canvas to find the right design.
Then I used a piece of transfer paper and transferred the patterns of leaves to the canvas.
Then I edged the leaves of my canvas with the Orange Poppy.
I wet my brush, then side loaded with paint by putting the paint just on the outside edge as you can see in the image above. I wanted to shade outside the lines of the pattern, just to add some color and interest to the project.
Repeat with all leaves and let dry.
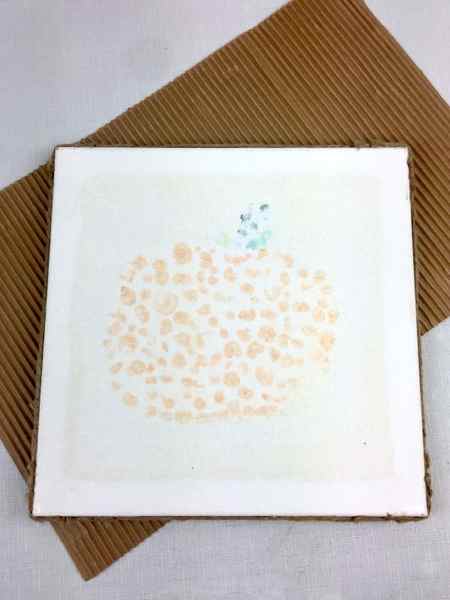
I started making the leaves by gluing the pumpkin seeds to the outside line of the pattern. I didn’t do anything special to the seeds after removing them from the pumpkins, really . . . just washed them very well and left them to dry on paper towels (and then brown craft paper) for about 5 days.
After the outlines were done, I started filling in the pattern with the seeds. I just put a dab of craft glue on the fat end of the seed and placed it in the pattern. It was very easy and didn’t take too long!
To seal your fall canvas, use the Mod Podge. Paint a thin layer over the entire canvas (including the seeds) and let dry.
I decided as a finishing touch I would add a bit of sheer ribbon to the top left corner of the canvas. Then I added a couple of those inspirational leaves from the garland.
I also found some pretty wood letters to attach to the fall canvas, that I thought were a nice touch. They were painted Orange Poppy and glued to the bottom right corner of the canvas below the leaves.
What do you think about this DIY fall canvas? Is it cool, or not for you? Let me know in the comments!
If you like fall decor, you might also like these fall signs! I’d also love for you to check out these other posts:
- 30+ Dollar Tree Fall Crafts Perfect for Decorating!
- Fall Crafts for Adults: 40+ Fun and Easy Ideas!
- Paper Mache Pumpkins for Fall Decorating
- Make a Necklace with a Dollar Store Seed Packet
- Easy DIY Leaf Bowl Made with Stiffy
- Fall Leaves Frame for Pretty Autumn Decor
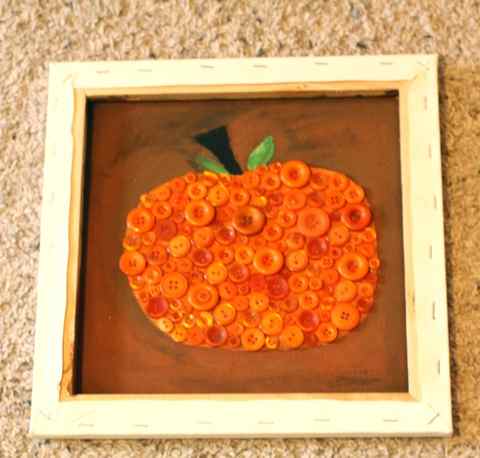
Fall button wall art for a farmhouse chic feel
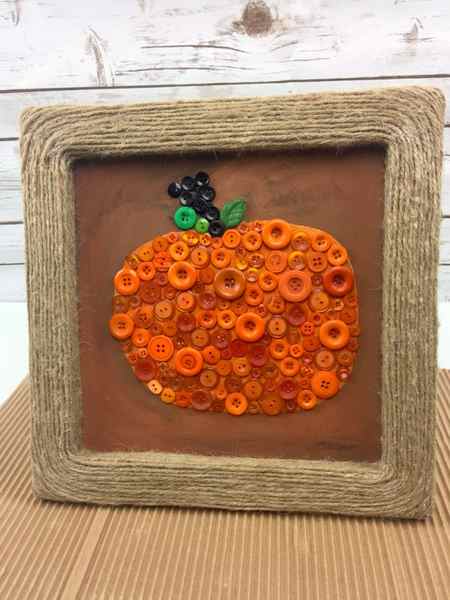
Fall button wall art is an easy and fun to make yourself using this easy to follow tutorial. Learn how to use Use DecoArt Paint to create a warm background to make this whimsical work of art. Make your home warm and welcoming by creating your own autumnal button wall art in an easy to follow tutorial.
Materials to make a make a button wall art Canvas:
Afilliate links below I earn a small commission with your purchase.
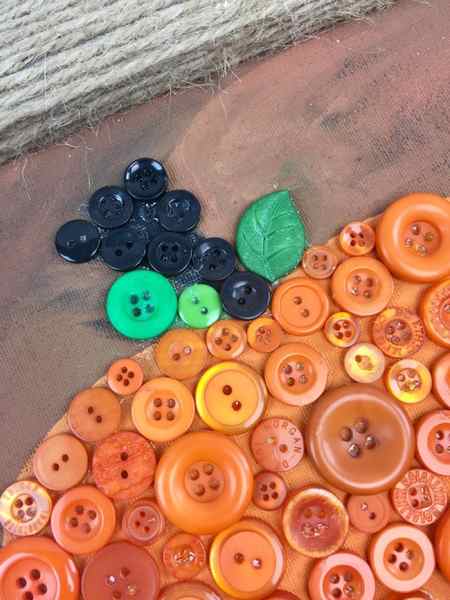
- Orange Buttons, Green Buttons, Black Buttons
- 12×12 Canvas
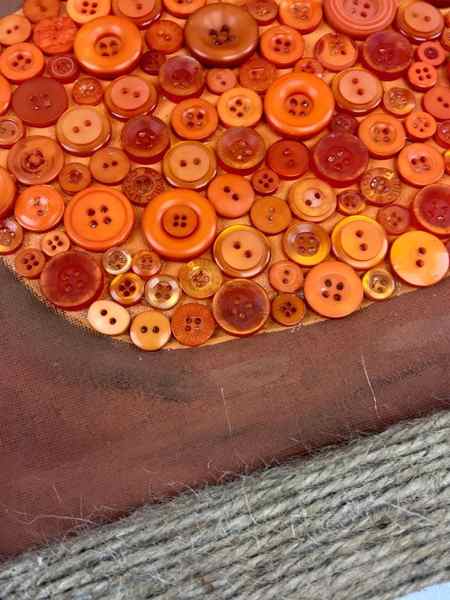
- Jute Cording
- Decoart Americana Paint
- Beacon Adhesive – Quick Grip Adhesive
- Paint brush
- a covered work surface, water, paper towels and a pencil
Directions to make fall button wall art:
Making a piece of fall button wall art is easier than you might think. Cover your work area before you begin.
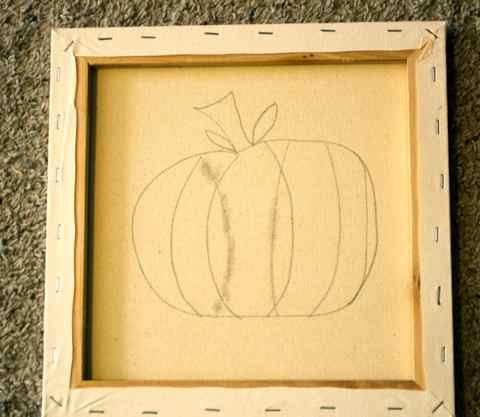
- Turn a 12×12 canvas backwards.
- Draw a basic pumpkin in the center. It does not have to be perfect. Trust me. Mine is far from it.
- Paint in your background and once you are satisfied allow the paint to dry.
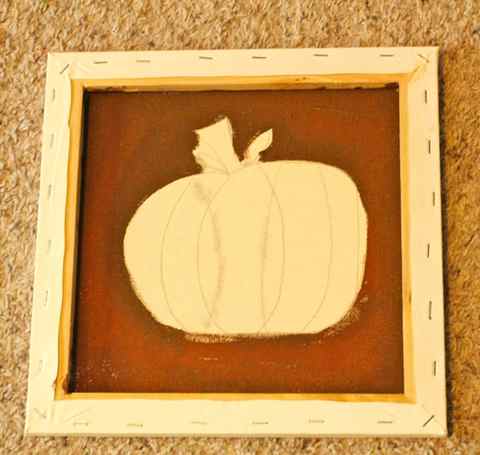
- clean your paint brush and then paint in your pumpkin, stem and leaves. Do clean your brush in between the colors. Again, it does not have to be perfect you are going to cover them with buttons and with the addition of the jute it looks a little rustic.

- Once you have the piece painted start add the buttons to the painting.
- Once you have the buttons arranged you can glue them down.
- Adhere the jute with glue and wrap around theinterior and exterior of the fra. Keep the jute spacing tight.
- Including dry time and the gluing of the jute cording, this piece took about 3 hours. If you take out the dry time I would say around two. Wrapping the jute took the longest time. It is tedious but it is a great effect. I hope you will make yourself some sort of wall art. Create a home that is all about you and your taste. It is more fun that way.


