51. “Painting is the silence of thought and the music of sight.” – Orhan Pamuk
Creative Painting Quotes to Inspire Your Artwork
Thesebrilliant quotes about painting and art will spark your creativity.
Painters and artists can express themselves through beautiful visuals and bold strokes of color and texture.
Tell us what you love about painting in the comment section below.
You may also enjoy our article on:
- Vincent Van Gogh Quotes
According to a study published in the journal Art Therapy, engaging in creative activities such as painting can positively impact our mental health, reducing stress and promoting feelings of well-being.
This highlights the potential therapeutic benefits of painting.
What are the benefits of reading these painting quotes?
Read these painting quotes about art to help you be creative and motivate yourself towards making masterpieces.
These inspiring words will open your mind to fresh perspectives and guide you on your path to artistic success.
These painting quotes will help you express yourself whether you’re using:
- watercolors
- oil paints
- acrylic
Think about these painting quotes the next time you’re looking for artistic inspiration and motivation.
Since art is all about self-expression, there’s no right or wrong to paint.
The advice and wisdom of successful artists can be invaluable.
These quotes about painting and creativity come from the minds of great creators and innovators.
Their words will help you intimately understand the art industry and the nature of expression.
Check out these inspiring painting quotes below and connect with your inner creativity.
For more inspiration, be sure to read our collection of quotes on the power of art, along with these inspirational blue quotes.
Check out our most popular quote article, a list of short inspirational quotes for daily inspiration.
Creative Painting Quotes to Inspire Your Artwork
A survey conducted by The Guardian found that over 70% of readers believe that art has the power to inspire and enrich our lives, with painting being one of the most popular art forms.
This underscores the widespread appeal and value of painting as a means of creative expression.
1. “Painting is self-discovery. Every good artist paints what he is.” – Jackson Pollock
2. “All you need to paint is a few tools, a little instruction, and a vision in your mind.” – Bob Ross
3. “I don’t paint dreams or nightmares, I paint my own reality.” – Frida Kahlo
4. “Painting is just another way of keeping a diary” – Pablo Picasso
5. “Painting is an illusion, a piece of magic, so what you see is not what you see.” – Philip Guston
6. “If you hear a voice within you say you cannot paint, then by all means paint and that voice will be silenced.” – Vincent Van Gogh
You will also enjoy our article on calligraphy quotes.
7. “A painting to me is primarily a verb, not a noun, an event first and only secondarily an image.” – Elaine de Kooning
8. “A painting requires a little mystery, some vagueness, and some fantasy. When you always make your meaning perfectly plain you end up boring people.” – Edgar Degas
9. “Painting is a source of endless pleasure, but also of great anguish.” – Balthus
You will also enjoy our article on michaelangelo quotes.
10. “I love to look at art, I love to look at paintings, and I almost feel like the experience isn’t complete until I’ve made something of my own.” – Cecily Brown
14 Acrylic Painting Techniques That Beginners Should Try
Painting as a group is a blast and on your own it’s an inspiring pastime. There are so many different ways to use paint! In this blog, we’ll show you how to create some really fun and unique images with these 14 techniques every beginner can try. Watch a couple of techniques for free in our Starry Night video tutorial below:
If you’re ready to try something new for your next paint party or spice up your canvas paintings, you’re in the right place. These basic techniques are super simple and many can be done using common household supplies.
1) Use More Water
Add water to your acrylic paint to make it thinner, drying like a matte-finish watercolor. You can use a thin layer of paint to create shadows and add interesting textures to your painting.
Keep in mind that this technique works best on very thick and absorbent paper (like watercolor paper). If you use it on a pre-gessoed canvas or water-resistant canvas, the thin paint may drip and pool instead of absorbing. You can also use thinner paint products and mediums like gouache or Liquitex to experiment with layering.
2) Dab With Stiff Bristles or Paper Towel
Dip a stiff-bristle paintbrush in thick paint and dab it on the canvas to create a sporadic, randomized texture that’s different from typical brushstrokes.
As you start dabbing the canvas lightly, you’ll notice just the tips of the bristles hit, creating a series of organic dots. The more you tap the brush in one area, the most solid the area will become. If you add a little more pressure, dabbing creates a much larger shape with fewer gaps and contrast.
You could create a sandy beach with a harder series of dabs with a round brush. Try using two tones of the same color (like greens for trees, tans for sand or white/blue for clouds) to create some color depth. Dab a paper towel, rag, or sponge to create different effects.
3) Try Stippling or Repetitive Dabbing
Stippling is when you paint tiny dots, usually in a variety of shades or colors, to create an interesting texture that your eye reads as a solid shape from a distance. It’s popular with abstract paintings and can also be used to give a realistic finish to subjects in your painting (more on that in a moment).
To try this technique, you just dip a long, pointy brush into a large dollop of paint and poke the canvas to create a tiny dot. Pushing harder, or using a wider, circular brush, will create larger dots.
Some artists use these dots to show that objects are shining, sparkling, or shimmering. You could use this technique to add highlights to things like waves, waxy fruit, and glass. Add depth to your starry night sky by making a variety of dot sizes in a few different colors, like yellow, gray, light blue, and white.
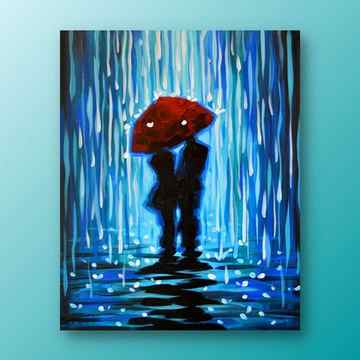
4) Experiment With Dripping and Acrylic Pouring
Want to make it look like it’s raining or show that something’s melting in your painting? Try spraying wet paint layers with water to create splashes and drips and help the paint run together. Or, add clear acrylic medium to your paint so that the color drips and runs.
You can also pour paint from different heights to make psychedelic backgrounds or add an eye-catching finish to your abstract art, depending on your color choices and pouring technique. Create puddles and pools of color resulting in swirls, waves, splashes, marble-like finishes, and bubbly textures.
Need a little inspiration? The Scream would be a great painting to try this technique out.
5) Lift Sections of Paint
“Lifting” is just another way to say “removing” or “erasing” paint from your canvas. Why would you want to do that? Because this acrylic painting technique lets you easily create soft backgrounds, cloud and water effects, the illusion of fabric folds, textured patches, and more.
Experiment with a wet or dry paper towel, rag, or sponge to lift the still-wet paint from your canvas. This technique will take some practice, but it’s great for beginner painters to loosen up and have fun with the experience!
6) Use Painter’s Tape for Clean Lines and Shapes
Painter’s tape is the perfect tool to keep paint off specific areas and create clean, sharp lines and shapes (without having a perfectly steady hand). Try this technique to paint buildings, bridges, stripes, geometric patterns, and more.
Here’s an idea to get creative: Tape off a simple shape for your subject (like a vase, building, animal, or a person’s silhouette), and create a vibrant gradient or repeating pattern that goes right through your subject without having to paint around the area.
Remove the tape and you now have an unpainted area, dry and ready to be painted as the subject you painted. Go back in and paint the blank area or leave it white for an art piece that really pops.
7) Splatter Your Acrylic Paints
Ready to have some fun? Load a brush with paint and fling it at the canvas. The splattering effect lets you create natural-looking splashes and explosions, or express movement. It can also be used to make texture for starry skies, sand and dirt, and more.
Some artists thin down the paint before pouring or splattering it onto the canvas. You can use a sponge or rag and see how the spray changes. If you don’t mind a little dripping, keep your canvas upright while you try this technique. Otherwise, lay it down flat.
8) Try Dry Brushing
Dry brushing is basically what it sounds like: You add paint to a dry canvas with a dry brush. It makes it easier to add distinctive shapes or layers because the paint won’t blend into all the layers you already have underneath.
This light, dry-brushed layer is ideal for painting plants, dirt, sand, rocks and other natural objects, as well rough-textured objects like jeans, TV static, and more — anything that looks good with a little bit of grit.
For more tips on acrylic paints, brushes, supplies, and techniques, check out our beginner’s guide to using acrylic paints.
9) Switch to Your Palette Knife
Palette knives, a great painter’s tool for mixing colors, can also be used to get creative on the canvas. Use the flat side of the knife to create smooth areas or thick ridges, waves, and dollops of paint. With just a touch of paint on the edge of the knife, you can even create lines that are thinner and straighter than a brush could achieve.
10) Add Details With a Fine, Wet Brush
If you want to add small, precise details to your point, you can’t go wrong with a fine, wet brush. While the bristles on a dry brush tend to spread out and create larger lines, the bristles on a wet brush hold together, creating a sharp point.
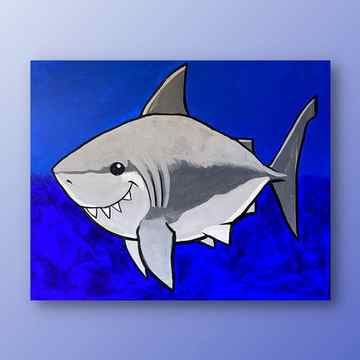
It’s easy to create a smooth outline or paint sharp teeth, like this Great White Shark painting. And the lighter your touch on the canvas, the thinner your lines and dots.
11) Use Lighter Layers of Paint To Highlight Dark Sections
Here’s another acrylic painting technique for beginners that will make you look like a pro. Within any dark area, use lighter colors to create highlights, depth, and texture.
Try adding layers of paint to the shadows and dark parts of your painting, such as dark storm clouds, a dog’s fur, or a wooden table. You should mix slightly lighter versions of your main dark color. Only use white in the very brightest highlights where you want your viewer’s gaze to go first.
12) Go Deeper with Layering
Acrylic paint dries quickly, so you can easily add thin layers on top of dry background layers when you want to add more detail to any parts of a painting. Professional artists often use thin layers of paint to create underpaintings, which are essentially sketches of the artwork you’re going to paint.
These layers also add depth and color to your finish painting, like deeper shadows or more pronounced highlights. Try a warm underpainting with a common acrylic paint color like burnt sienna (brown) or a cool underpainting with ultramarine blue (blue).
13) Mix Colors and Make a Color Mixing Chart To Remember Your Combinations
Primary colors (red, yellow and blue) along with white and black combine to make almost any other color. But with just these five colors, you can create hundreds of hues that you can’t buy off the shelf, allowing you to create a completely unique painting.
As you mix up your paints and discover new combinations, you don’t want to forget your discoveries. Make your own personal color mixing chart to remember the different hues you made and recreate them faster next time.
Grab a pencil or pen, get a piece of paper, and draw a chart with 1 x 1 inch squares. Write the names of your colors along the top and left side, and then in each square, mix together the two colors.
14) Use Different Tones of the Same Color
Here’s a final technique that beginners can perfect. You don’t have to use lots of different colors to create an eye-catching painting. Instead, try using different shades, tints, and tones of a handful of colors.
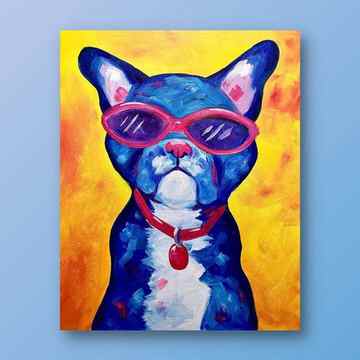
This Pop Art Dog painting is a great example. The variety of blues, yellows, reds, and whites create movement and energy throughout the painting.
Try These Acrylic Painting Techniques With Your Next Painting to Gogh Tutorial
Now that you’ve learned these simple techniques, what will you paint next?
Painting to Gogh’s step-by-step tutorials make it easy for you to start expressing yourself, experimenting with new methods, and building up your paint skills.
Our beginner-friendly painting tutorials are delivered right to your doorstep with artist-led video instructions to help you master all the different techniques we’ve covered. Simply choose a painting and order your kit to get started.
Beginner’s Guide to Painting on Canvas [+ 10 Tips To Get You Started]
Every professional artist started with a blank canvas and a bundle of questions. Do you opt for cotton or linen canvases ? Which art supplies work best on stretched canvas ? Do you opt for pre-primed or unprimed canvas?
Our short guide will go over the canvas painting fundamentals so you can start your work of art with confidence. Let’s dive in!
What You Should Know About Canvas Before You Get Started
When you paint on canvas, you’re participating in a centuries-old tradition in the art world. The medium became popular during the Italian Renaissance in the 1600s, and one of the oldest surviving oil paintings on canvas dates back to the 1400s.
Take a look at the most famous paintings in the world — like The Starry Night, Girl with a Pearl Earring, and The Birth of Venus — and you’ll discover they were all done on canvas.
Today, artists are spoiled for choice when it comes to painting mediums, but canvas is still one of the most common materials for oil and acrylic painting. In most cases, the canvas is tightly stretched across a wooden frame so it’s easy to paint on (and display later)!
Love The Starry Night? We do too! Get all the supplies you need to paint it, including an artist-led tutorial, with Painting to Gogh. Click here to see The Starry Night kit.
Pre-Primed vs. Unprimed Canvases
Canvases need to be “primed” before you start painting, which is when you apply a layer of material that creates a smooth barrier between the canvas and paint.
Priming makes it easier for the canvas to grip paint, keep the pigments bright, and stay rigid and usable as it gets wet. Without this process, the canvas would absorb too much paint, have dull patches, or sag too easily.
Most of the canvases that you can purchase are pre-primed so you don’t have to worry about any of this.
Priming Your Canvas
If you like DIY projects and want to prime your own canvas at home, then you’re going to need some acrylic gesso. Take a stretched canvas, put some gesso in a bowl or on a paint palette, then use your brush to evenly cover the canvas. Let the gesso dry and then do 1-2 more coats for the best results. Once it dries, you’re ready to paint.
Common Types of Canvas
Cotton Canvas
Cotton canvas is an affordable option for painters who are just starting out. A properly prepared cotton canvas will last a long time (and it’s what you’ll find in any of your Painting to Gogh kits). It’s naturally flexible and durable and is often primed with acrylic primer.
Linen Canvas
Linen is made from flax and is more durable, rigid, and longer-lasting than cotton. It’s also the more expensive option. Linen canvas is often primed with oil-based primers and doesn’t warp as much over time, so it’s the go-to choice of many professional artists . You don’t have to worry about this type of canvas becoming too brittle either as linen retains its natural oils.
Canvas Board
Canvas board is another common option for new and student painters. Some are made of primed cotton canvas that’s stretched over a fiberboard, while others are simply a board that’s been primed and stamped to have the texture of canvas. They’re cheaper and great for practicing before you start on your canvas art piece .
Our Top 10 Tips for Painting on Canvas
1. Angle Your Canvas To Paint Comfortably
First, decide whether you’ll be seated or standing when you paint. Many easels are easy to adjust so you can switch between both. Adjust your easel based on your height and how comfortable it is to hold the brush up to the canvas. For some painting techniques , you want to be able to make contact with the canvas at a 90-degree angle.
Make sure you can easily see your painting subject, whether it’s a video tutorial , a drawing, or a real-life object.
2. Take Advantage of Canvas Wedges
If you received a little packet of wood or plastic pieces with your store-bought canvas, they’re called canvas wedges, canvas tightening keys, or stretcher bar keys. They’re used to stretch and tighten the canvas if it starts to sag.
Canvas can get droopy from all the layers of wet paint, temperature changes, humidity, and age. If you notice sagginess after painting, wait until your canvas is completely dry and hammer the wedges in afterward.
3. Sketch Your Image or Underpaint
You know the saying, “Measure twice, cut once?” Set yourself up for success by sketching your image before you start laying down paint. Grab a pencil, color pencil, or charcoal and make a sketch on a piece of paper.
This is a helpful tip for any painting, but here’s the great thing about canvas: You can use a pencil (graphite) to lightly outline your art on the canvas and then paint over it. Another technique is to do an “underpainting” or “wash,” which is when you use very watered down paint to make a rough sketch.
Both tips give you more control over the final image. You can simply follow the lines as you go and you know it’ll be closer to what you want (compared to a freehanded attempt).
4. Lay Out Your Supplies Before You Get Started
The last thing you want is to be running around trying to find a Round 6 brush or more paper towels while you’re in the creative zone. Once you start painting, you want everything you need within arms’ reach so that you don’t lose inspiration or have your paint dry too much while you’re hunting for supplies.
Gather up your brushes, necessary paint colors (black, white, red, blue, and yellow are usually the minimum), paint palette, a cup of water, paper towels, and anything else you think you’re going to need.
5. Use Paintbrushes With Firm, Tough Bristles
The paint brushes you choose have to be able to withstand the hard, rough canvas surface. So, look for brushes with stiff bristles that are graded for acrylic and oil painting .
Avoid grabbing any watercolor brushes you have lying around — they’re known for being softer and are going to break down rather quickly when used on canvas. A bonus to using firm- bristle brushes? They make it easier to do unique acrylic painting techniques like dry brushstrokes .
6. Start With a Toned Canvas To Add a Unique Quality
Who says you have to start your painting on a plain white canvas? Try a toned background: Simply choose an interesting color, paint the canvas, let it dry, and then start on your artwork. It can make colors pop and enhance the painting’s luminosity.
For example, if you’re going to paint a lovely blue sky, you could start out by painting the canvas with a bright yellow. It may seem scary, but the yellow undertone could add a sunlit warmth to everything in your painting.
The fun is in experimenting with different colors to see what effect it has. Check out color wheels and color theory to get some ideas.
7. Get Creative With Solvents and Mediums
Canvas is extremely durable, which means you can use a wide variety of mediums (products that can thicken and change the texture of paint) and solvents (products that thin paint out and clean paint brushes ) to have fun with the look of your artwork.
When it comes to acrylic paint, you’re likely going to use water as your solvent. You can apply different mediums to make your painting look glossy, matte, transparent, 3D, and more. These tools give you the freedom to experiment and see what you come up with.
8. Easily Erase Mistakes With Water, Titanium White, or Sandpaper
Painter Bob Ross once said, “We don’t make mistakes, just happy little accidents.” So, if your canvas experiences a “happy little accident,” don’t worry. You can use water, titanium white paint, or sandpaper to fix painting mistakes fairly easily.
- If your painting is still wet: Try scraping off the unwanted paint with your palette knife or something with a sharp edge. Apply some water (or linseed oil for oil paints ), wipe the rest away, and paint over with titanium white. Let it dry and then keep painting.
- If your painting is dry: Use fine sandpaper to gently grind down the area with unwanted paint. Use a damp towel with water (for acrylics) or linseed oil (for oils) to clean the area and paint over with titanium white. Let it dry and then keep painting.
9. Choose a Safe Place To Dry and Store Your Canvas When You’re Done
The last thing that you want is for your new painting to get ruined while it dries! Find a location for the canvas to dry out of harm’s way, away from any water sources, heat sources, small children, or curious pets.
10. Order Your Canvas Paint Project From Painting to Gogh!
Now that you know how to paint on canvas, here’s our final tip: Avoid the hassle of researching canvases , primers, and brushes by ordering your painting supplies from Painting to Gogh!
Our painting kits and tutorials are designed for all skill levels and interests, from masterpieces like The Scream to a simple sunflower. They’re easy to follow along with so you can focus on having fun with your friends, family, coworkers, and more. Choose your favorite painting to get started.
Explore more
- Acrylic Painting Techniques
- Guides
- Painting Ideas
- Teambuilding


