If you have just started decorative painting and have gone for that first rose project class and did not manage to paint anything that remotely looks like a rose, DON’T WORRY – you’re not alone! And don’t feel bad as you look at your teacher stroking in that rose so effortlessly. You too can paint like her. It just takes the right tools, the right techniques and practise, practise, practise.
Beginner Friendly : Enhance Creativity with Flower Assets
Hey, friends! Today, I’m going to create a tutorial and share some tips on boosting creativity using flower assets in Clip Studio Paint. As we all know, flowers are often regarded as symbols of beauty and charm. They offer a rich visual source with captivating colors, shapes, and textures. Flowers hold aesthetic value, symbolism, and deep meanings. Moreover, they can influence, inspire creativity, and assist artists in conveying messages or stories through their art, bringing forth the beauty of nature, emotions, and cultural diversity.
You know, I believe Clip Studio Assets, especially the flower assets, are incredibly helpful; they make work more efficient and beautiful. Thanks to the creators of these assets. Once again, this time, I want to invite you all to enhance your creativity by using flower assets in Clip Studio Paint. Personally, I apply this to my webcomic projects and personal art illustrations. Therefore, the materials I recommend are undoubtedly ones I frequently use and enjoy. Alright! Enough for chit-chat; let’s move on to the next stage! ^^
Blossoming Creativity
I strive to optimize the use of flower assets in my illustrations and webcomics. Since I have a strong affinity for flowers, I use them quite frequently. For your information, the flower materials available in Clip Studio Assets consist of thousands of variations. As a result, I often find myself getting distracted and spending a lot of time sorting through and selecting materials.
Here, I won’t be including flowers solely for the purpose of adding an ‘effect’ as part of ‘Blossoming Creativity’ because I believe this is a very basic concept. I want to encourage my friends to delve deeper into their creativity. To maximize their work with flower materials and bring out a much more beautiful ambiance. Therefore, I’d like to share some recommendations and their use in illustrations to provide insight and evoke artistic sensitivity. Below are specific examples of how I incorporate flower assets as supporting elements in my work.
First things first. which rose to paint?
Looking through any decorative painting book or folk art magazine, you will find that there are many different types of roses you can paint, and certainly there are many different ways of painting them.
The first thing you need to do is to master the basic stroke rose. From there you can start varying the colours, paint additional petals, vary the way you use the brush and so on. Pretty soon, you will be able to create your very own rose.

These basic beginner “folksy” stroke roses were painted using a No: 8 flat brush.
And you must not worry if your rose “doesn’t look right ” in the beginning! It WILL change as you paint more. It takes practice, practice and more practice. Your rose will keep changing as you experiment and you will see your own style start to develop as you gain more and more confidence. BUT in taking that first step to learn how to paint roses, you must be willing to start with a very basic rose.
Tools and materials
A good brush – a good brush is very, very necessary to get a good start. A bad brush will only frustrate you. Brushes that have developed a “moustache” or which have dried paint where the hairs meet the ferrule will not help you when you’re trying to learn and master the strokes.
A flat brush or an angle brush? – you can paint beautiful roses with a synthetic flat brush or an angle brush. Some people find it easier to learn with the flat brush and others learn to paint the rose perfectly with an angle brush. Different techniques call for different brushes. It really depends on your instructor or the pattern you are following.

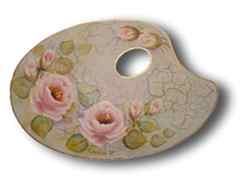
There are many different ways of painting roses but the structure is basically the same. These roses were painted with an angle brush.
A big brush or a smaller brush? – if using a flat brush you should start learning with a no: 8 brush. If you are learning with an angle brush, a 3/8″ is a good place to start. You will be tempted to think that its easier to paint stroke roses with a smaller brush as you can’t imagine how a no: 8 flat or 3/8″ angle can paint such a dainty rose. Don’t be fooled – a bigger brush is actually easier to paint with because it has more width to double load.
A well-prepared wet pallette – a wet pallette is absolutely necessary to prevent acrylic paint from drying up as you are painting but if your wet pallette has too much water in the sponge, your paint will gain more and more moisture as you go along and it will be too thin for rose painting. Make sure your wet pallette is properly set up before you start practising those strokes.
Not streaky, lumpy paint – if your acrylic paint comes out in lumps or streaks as you squeeze them onto your pallette, I suggest you discard them for rose painting as paint with the proper consistency is crucial in helping you get your strokes looking right. Your paint should be the consistency of double cream.
A surface to practise on – a rectangular A4 piece of MDF basecoated black or cream is a good surface to practise your strokes on. When you run out of space, basecoat it all over again and keep practising. Black paper is fine too for practising but you will find that since its an absorbent surface, you need to reload your brush more frequently. You’ll also find that when you do start to paint on your woodpiece that its quite different from painting on paper. Its best therefore to practise on an MDF or wooden practise board from the beginning.
Getting the basic technique right
Double load correctly – the basic stroke rose is painted using the double-loading technique as this gives the 3-dimensional effect. Start with two colours like Plum Pink and Warm White – this will give you the basic pink rose.
Squeeze only a bit of paint at a time onto your pallette so that you only use what you need. This ensures you always have fresh paint.
Clean your brush in water and pat on a paper towel to remove excess water. Ensure the brush is nice and flat. Place the hairs lightly between your left thumb and index finger to lightly smooth it – you also get to feel if the brush is too moist or not. If it still has too much water, pat on a paper towel again.
Dip one corner of the flat brush (the heel if you are using an angle brush) to pick up the pink paint and the other corner (the toe if you are using an angle brush) into the white – not too much and not too little. Stroke the loaded brush towards you, pressing the brush down towards the surface of the pallette paper, tile or wet pallette you are using for blending so that the hairs of the brush open – you are pushing the paint into the brush hairs. Do this a few times, try five. Then flip the brush over and repeat in another part of the pallette. Repeat the process.
Look at the brush and see if you have too much paint or too little. Is the brush still flat? Is there paint building up at the ferrule? Perhaps you have too much paint. If you have too much paint, wipe the brush and start over. If you wash the brush, make sure you pat it on the paper towel to remove excess water.
Practice the petal strokes many many times using this double loaded brush. Your strokes should have the pink on one side of the stroke getting lighter and lighter towards the centre with the white at the other side of the stroke.
Always paint with the white paint facing the edge of the petal you are painting. Practise painting the stroke both ways – to the right and to the left. Also practise the crescent stroke, the “U” stroke and the “S” stroke. Keep reloading the brush and follow the loading tips each time.
Practise all the strokes over and over until you know you are getting the strokes right. If you can’t get your strokes right you can’t get your rose right.
Sunrise Sunset
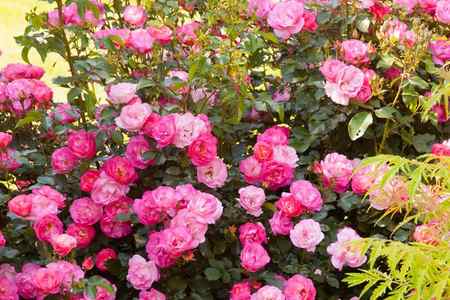
Performing beautifully in just about every climate, ‘Sunrise Sunset’ rose bears fuchsia-pink flowers that fade to apricot at the center. It blooms nonstop all season long and makes an excellent groundcover for a sunny garden bed. You’ll want to add this selection to your rose garden plans since it is also well suited to mass plantings.
Growing Conditions: Full sun and moist, well-drained soil
Size: To 3 feet tall and 3 feet wide
Zones: 3-9
16 of 17
Super Hero

With a name like this, you’d expect it to be great. This ever-blooming ‘Super Hero’ rose has large, beautifully formed flowers. One of the easiest roses to grow, it’s a disease-resistant shrub. Grow it in your cutting garden or add it to your foundation garden plan.
Growing Conditions: Full sun and moist, well-drained soil
Size: To 6 feet tall and 6 feet wide
Zones: 4-9
17 of 17
Sweet Fragrance
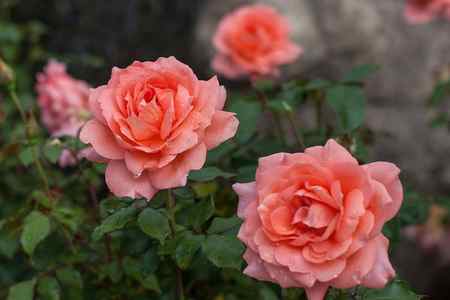
It’s hard not to fall for the luscious scent of ‘Sweet Fragrance’. This disease-resistant grandiflora rose bears 4-inch double blossoms in tones of apricot, orange, and yellow all season long. You’ll want to make this flower last as long as possible in your bouquets.
Growing Conditions: Full sun and moist, well-drained soil
Size: To 4 feet tall and 4 feet wide
Zones: 5-9


