The vast majority of artists work on canvas. You pick up pre-prepared canvases at a variety of high-street shops: they’re not terrific quality, but should be fine for beginners. Art stores like Cass stock ready-made canvases of a better quality.
Beginner’s guide to oil painting ideas

Oil painting is one of the most versatile and exciting mediums for artists of all levels. Its ability to create rich colors and textures has made it a favorite among painters throughout history. But with so many different styles and techniques to choose from, it can be overwhelming for beginners to know where to start. This beginner’s guide to different styles of oil painting aims to break down the basics and provide a foundation for those just starting on their oil painting journey.
First, we will explore some of the top oil paint artists throughout history and the present day, examining their styles and techniques to inspire your practice. Then, we’ll dive into the various styles of oil painting, from realistic to abstract, and guide beginners on how to discover their style. Finally, we’ll share essential tips and tricks to help you master your tools and achieve oil painting success. Whether you’re a complete beginner or a seasoned artist looking to try something new, this guide is the perfect place to start your oil painting journey.
The Most Famous Oil Paint Artists of All Time
The oil painting has a rich history spanning centuries, with many artists making their mark on the genre over the years.
Some of the most famous oil painters of all time include Vincent van Gogh, Leonardo da Vinci, Rembrandt van Rijn, and Johannes Vermeer. Each of these artists has left a lasting legacy in the art world, with their works being revered for their beauty, skill, and innovation. For instance, van Gogh’s famous painting, “Starry Night,” is instantly recognizable for its vibrant swirls of color and expressive brushwork. Meanwhile, da Vinci’s masterpiece, the “Mona Lisa,” has become an icon of Western art, with its enigmatic smile and intricate details capturing the imagination of viewers for centuries.
Whether it’s the powerful emotions conveyed in Rembrandt’s portraits or the luminosity and realism in Vermeer’s scenes, the works of these oil painting legends continue to inspire and captivate audiences to this day.
Discovering Your Style: A Guide to Oil Painting Styles for Beginners
Oil painting is a medium that has captivated artists for centuries and for good reason. With its rich, luminous colors, versatile texture, and ability to create depth and dimension, oil painting offers a wealth of creative possibilities for beginners to explore. But with so many styles and techniques to choose from, discovering your unique style of oil painting can be a daunting task. In this guide, we will explore some of the most popular styles of oil painting, along with tips and tricks for beginners to discover their voice as artists.
One of the most popular styles of oil painting is Impressionism. This movement emerged in the late 19th century and is characterized by lively brushwork, vibrant colors, and an emphasis on capturing the fleeting effects of light and atmosphere. Impressionist painters like Claude Monet and Pierre-Auguste Renoir created works that feel fresh, spontaneous, and full of life, capturing the beauty of everyday moments and scenes. To create an Impressionist-style painting, beginners can experiment with loose, expressive brushwork, and focus on capturing the effects of light and color in a scene.
For those who prefer a more traditional approach to oil painting, Classical painting offers a wealth of techniques and styles to explore. Classical painters like Johannes Vermeer and Jan van Eyck focused on creating highly-realistic images that capture the subtle nuances of light, color, and texture in their subjects. Their works are known for their meticulous attention to detail and their ability to create images that are almost photographic in their realism. To create a Classical style painting, beginners can focus on building up layers of color and texture to create a sense of depth and dimension and pay close attention to the details of their subject.
Another popular style of oil painting is Surrealism. This movement emerged in the early 20th century and is characterized by dream-like, symbolic works that challenge the viewer’s perception of reality. Surrealist painters like Salvador Dali and Frida Kahlo created works that are full of symbolism, allegory, and hidden meanings, inviting viewers to explore their subconscious minds and the mysteries of the world around them. To create a Surrealist-style painting, beginners can experiment with unusual color combinations, distorted perspectives, and surreal imagery that pushes the boundaries of reality.
Ultimately, discovering your style of oil painting is a personal and rewarding journey that requires practice, experimentation, and an open mind. By exploring different styles and techniques, beginners can gain a deeper understanding of the medium and find their unique voice as artists.
Here are some tips and tricks for discovering your style of oil painting:
1. Experiment with different styles
Try out different styles of oil painting, such as Impressionism, Classical painting, and Surrealism, to find the one that resonates with you the most.
2. Practice regularly
Regular practice is essential for improving your skills and developing your style as an artist.
3. Take inspiration from other artists
Look to other artists for inspiration, but don’t copy their style outright. Instead, take elements from different styles and incorporate them into your work.
4. Experiment with color and texture
Oil painting offers a wealth of possibilities when it comes to color and texture. Experiment with different color combinations and techniques to create unique effects.
5. Embrace your voice
Don’t be afraid to embrace your unique voice as an artist. Your perspective and experiences can inform and enrich your work in ways that no one else can replicate.
With dedication and a willingness to learn, the possibilities of oil painting are endless. So go ahead and discover your style today.
Mastering Your Tools: Essential Tips and Tricks for Oil Painting Success
Mastering the tools of oil painting is essential to achieving success in this medium. From brushes and palette knives to canvas and paint, each tool plays a crucial role in creating a successful painting. Here are some essential tips and tricks for mastering your tools and achieving success in oil painting.
One of the most important tools in oil painting is the brush. There are a wide variety of brushes available, each with its unique qualities and uses. For beginners, it’s important to start with a basic set of brushes, including flat, round, and filbert brushes in various sizes. Experimenting with different brush sizes and shapes can help you achieve a range of textures and effects in your paintings. It’s also important to keep your brushes clean and well-maintained, as dirty or damaged brushes can impact the quality of your work.
Palette knives are used to mix colors, apply paint, and create textured effects on the canvas. They come in a variety of shapes and sizes and can be used in combination with brushes to create a range of effects. To use a palette knife, simply load it with paint and apply it to the canvas in a sweeping motion. Experimenting with different pressure and angles can help you achieve a variety of textures and effects.
Choosing the right canvas is also essential to achieving success in oil painting. There are a variety of canvases available, including stretched canvas, canvas boards, and linen canvases. Each has its unique properties and qualities, and it’s important to choose the right one for your painting style and preferences. Stretched canvas is a popular choice for beginners, as it’s affordable and easy to work with. Canvas boards are also a good option for those who prefer a more rigid surface, while linen canvases are a premium choice that offers a smooth surface and excellent durability.
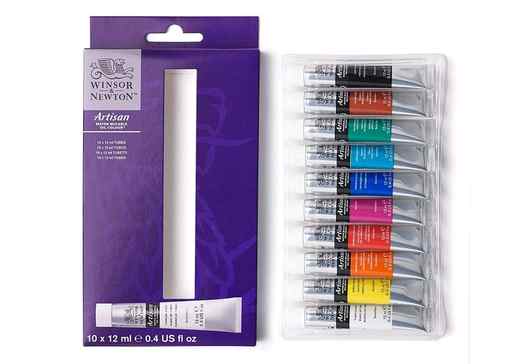
Choosing the right paint is essential to achieving success in oil painting. There are a variety of oil paints available, including student-grade and professional-grade paints. Professional grade paints offer higher quality pigments and more consistent color, but they can be more expensive. It’s important to choose paints that are compatible with your canvas and brushes and to experiment with different brands and colors to find the ones that work best for your style and preferences.
Our Concluding Thoughts
To wrap up this beginner’s guide to different styles of oil painting, we must emphasize the importance of studying the most famous oil painting artists of all time. As we have seen, these masters have left a lasting legacy on the world of art and have inspired countless artists throughout the centuries. By studying their works, techniques, and styles, beginners can gain valuable insights into the fundamentals of oil painting.
However, it’s important not to simply mimic the works of the masters, but to use them as a springboard to discovering your style. In our guide to oil painting styles for beginners, we explored some of the most popular styles, such as Impressionism, Realism, and Abstract Expressionism. But the possibilities are endless, and with experimentation and practice, artists can develop their unique style that reflects their personality and experiences.
Finally, mastering your tools is essential to achieving success in oil painting. Whether it’s selecting the right brushes and paints or preparing your canvas, each step is crucial in creating a successful painting. By following the essential tips and tricks for oil painting success, beginners can learn to control the medium and create stunning works of art.
In conclusion, oil painting is a medium that offers limitless possibilities for artistic expression. By studying the works of the most famous oil paint artists of all time, discovering your style, and mastering your tools, you can embark on a lifelong journey of creativity and self-discovery. So, grab your paints, brushes, and canvas, and let your imagination take flight!
Advantages of oil paint
Firstly, there’s that drying time. Oil paint will dry in anything between a few hours and – no, seriously – several years. It simply depends on how thickly you apply it, and how oil-rich the paint is. This gives you the joys of wet-in-wet painting. In a single session of painting, you can keep your picture in a wonderful state of flux, blending, smudging and reworking as you go.
The second major advantage of oil painting is that, unlike acrylic, watercolour or gouache, it doesn’t change colour when it dries. This, along with that slow drying time, gives you the luxury of mixing colours decisively and with care. Indeed, you can cover your palette in a host of pre-mixed colours before you start on your painting. This is something lots of portrait painters do, perfecting all those tricky flesh tones in advance.
More like this
Disadvantages of oil paint
The first problem with oil paints are the toxicity of the solvents that you’ll need to use, for both thinning your paints and for cleaning your brushes. These spirits are flammable and need to be stored away carefully, and they’re also highly toxic. They can also be an irritant to your skin, which is why lots of artists either wear disposable gloves or use barrier cream.
Oil painting involves a fair bit of setup, and lots of clearing up too. You might want to down tools and flee from your workspace after a hard session of painting – but your brushes will need thorough cleaning: first in turps, then with soap.
Then there’s the issue of all that wet paint. Often, artists who are new to wet-in-wet oil painting overwork their painting, loading too much paint onto the canvas, and blending bright colours until they’re a dull mud. If you’ve made a mistake while oil painting, you’re far better off scraping the paint off with a palette knife or rag than going over it.
Oil paint techniques
You only need to step into an art gallery (in normal times) to see the sweeping range of ways in which you can employ oil paint. Thick, thin, opaque, translucent: providing you know some basic principles, you can work it whichever way you like. You can apply it with a brush, or a palette knife, or even a rag.
The Impressionists, for example, typically painting alla prima, or all at once, working wet-in-wet. By contrast, artists of the Renaissance would build their paintings in sumptuous layers of medium-rich glazes, letting light reflect through each layer and giving their images an incredible luminosity.
One thing you’ll need to keep in mind is the ‘fat-over-lean’ rule, something we’ll admit can be tough for beginners. If you’re using oils in multiple layers, you need to make sure each layer is just as, or more oily, than the next. This is because the paint dries more slowly with oil, so if layers dry before those below, you’ll find your images cracking – perhaps not straight away, but over the course of time.
Yes, this stuff takes practice. But if you stick with oil painting, and grit your teeth during a few inevitable misadventures, the rewards will be more than worth it.

Is there a limit on the times I can view my Class?
No. You can view any Class as many times as you want, whenever you want – as long as your Membership to Craftsy is valid and paid, or if you elected to “Purchase-to-Own” a Class.
No problem. All newer-model smartphones or other mobile/tablet devices with an Internet connection are able to play the Class videos. Simply Log In to your Craftsy.com Account to view any Class if you’re a Craftsy Premium Member, or if you elected to “Purchase-to-Own” a Class.
How do I get access to the Bonus Materials for the Class?
Unless you are a Craftsy Premium Member, or until you purchase a Class, the Class Bonus Materials (any PDF download materials, etc.) will not be accessible. Once you join as a Member or purchase-to-own a Class, each individual bonus element is accessible by simply clicking on each item. You’ll find these elements within the “Bonus Materials” tab underneath your main Class viewer frame. As with the Class video, you can access the Bonus Materials as many times as you like – or you can print them out also.
Once you become a Craftsy Premium Member, or purchase-to-own a Class, you’ll have the ability to post a question, comment, or tip in the Class Discussion area. You’ll find the Class Discussion tab directly below the Class video frame. This is not a “live chat,” but a subject matter expert may answer posted questions. The responses may not be from the actual Class Instructor. You’ll be able to see all Class participants’ questions and input to take part in this virtual dialogue among others who have viewed the Class and are willing to share tips, answers, or ideas.
Can I print out Class Bonus Materials?
For any Bonus Materials element that is a PDF Download, yes you can. Found within the Bonus Materials tab, directly below the Class video frame, just click on the icon/button for any of the extra Class elements you want, download the asset, and print with your local printer.
Your Class video content is best enjoyed when viewed on a device manufactured in the past few years, with a good broadband Internet or WIFI connection (not dialup). We also highly recommend using the latest version of Firefox, Safari, Chrome, or Edge as your Internet Browser. The recommended screen resolution is 1024 x 768 or larger.


