Although best for preschool age children and up, this birch tree painting could easily be done with babies and toddlers with a little help from grown ups!
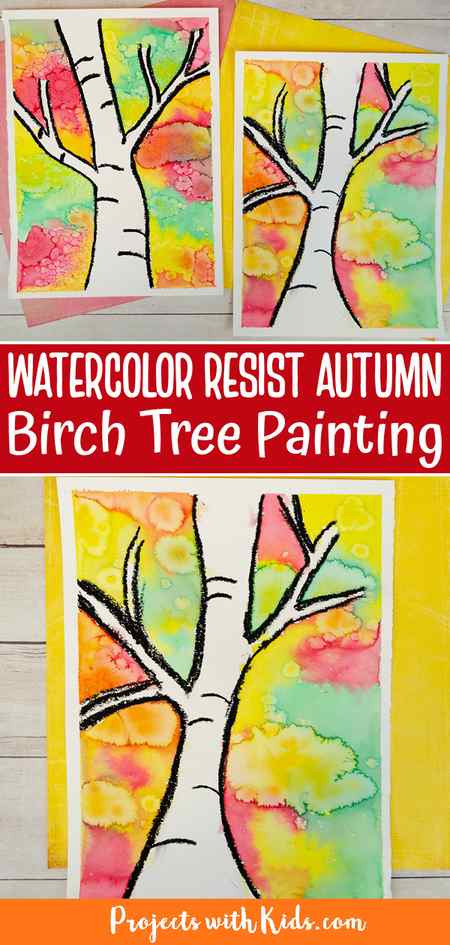
Easy Watercolor Resist Birch Tree Painting for Kids to Make

Create this beautiful watercolor birch tree painting for kids filled with all of the gorgeous colors of autumn! This project uses an easy oil pastel resist technique. Using black oil pastel creates a barrier with the paint so that the birch tree can remain white. This creates a nice contrast with all of the fall colors surrounding it and gives the painting a dramatic look.
Kids will also learn about mixing colors together using a wet-on-wet technique and using salt to create interesting patterns in the paint.
There are so many fun watercolor techniques for kids to try! Take a look at my collection of watercolor painting for kids for more fun and creative ideas.

We have used a watercolor resist technique many times! It’s a great way to provide a barrier between different sections of a painting or different colors or to create patterns that appear as you paint. You can use different colors of oil pastels depending on the result you want to achieve.
Take a look at this watercolor resist fall leaf painting and this watercolor resist spider web art for more fun fall painting ideas!
Create your own birch tree painting for kids
This post contains affiliate links. As an Amazon Associate, I earn from qualifying purchases. If you would like more information please review my privacy & disclosure policy.

Supplies
- Watercolor paper
- Watercolor paint
- Paintbrushes
- Paint palette and water dish
- Black oil pastel
- Coarse salt
- Pencil
- Wooden board and painter’s tape (optional)
Instructions for your fall tree painting
1. First, you want to prepare your watercolor paper. Tape it down to a wooden board using painter’s tape. This is an optional step, but it does help to keep the paper nice and flat as kids are painting and as the paper dries. If you don’t have a wooden board, try taping it down to a table.

2. Use a pencil to lightly draw in a birch tree. Start with a slightly curved line from the bottom of your paper going up to the top. This is the start of the tree trunk. Draw in another line next to it, to finish the trunk. You want your tree trunk to be slightly thicker at the bottom.
Remind kids to press lightly with their pencil so they can erase if they need to. Draw in a couple of branches on either side. Some kids might find it helpful to practice drawing their tree on a piece of scrap paper first.

3. Use black oil pastel to trace over your pencil lines. You want to press firmly and use thicker lines to achieve the best results with the resist technique. Draw in a few lines on the tree trunk and branches with the black oil pastel to finish off the birch tree.

4. Mix green, yellow and red watercolor paint in a paint palette. If you are using liquid watercolors, squeeze a few drops of color onto the palette and then add water.
You can use liquid watercolor paint as I did or use a watercolor set. If you are using a watercolor set, you can try using the paint straight from the set to get really vibrant colors. Test out your colors first on scrap paper, watercolors will always dry slightly lighter.
5. Start by painting your paper with clean water, being careful not to paint inside the tree. You want your paper to be wet but not soaking. You can always dab the paper with paper towels to soak up any extra water.

6. Using a medium to large round brush, start to dab on one color of paint at a time. You want to dab on the paint and let the wet paper mix the colors together rather than using a brush to mix the paint. This will help to avoid muddy colors and keep everything looking nice and bright.
This is called a wet-on-wet technique. For more details on this technique take a look at these 5 easy watercolor techniques for kids that produce fantastic results.

7. Once kids are finished painting they can sprinkle on some coarse salt. As the salt dries, it will make interesting patterns in the paint to create more texture. Some kids will choose to sprinkle on a lot of salt while other kids may only want to sprinkle their salt in a few places.
As the paint dries the colors will mix together creating different shades, colors, and patterns. Each painting will be unique!

Let your painting dry completely on a flat surface. Gently brush the salt off into the sink or the garbage taking care around the black pastel to avoid any smudging. Carefully take the tape off around the edges.

This fall birch tree painting is an easy project that kids will love to make!
If you are looking for more fall art projects take a look at my collection of creative fall painting ideas for kids! There are ideas for kids of all ages that use different types of art materials and techniques.
More fall art projects kids will love


Follow me on Pinterest for more amazing project ideas.
Pin this watercolor painting for later
Yield: 1 fall birch tree painting
How to Make an Easy Birch Tree Painting with Kids
Note: Crafting with kids encourages imagination and creative expression. It is also a wonderful opportunity for shared experiences and vocabulary development.
Although young children may not “remember” these experiences from their childhood, they are indeed extremely valuable in growth and development.
Materials Needed for the Easy Birch Tree Painting with Kids:
- White Cardstock
- Tape – we used Painters tape
- Kids Scissor s
- Washable Watercolors
- Paintbrush
- Salt
- Black crayon
1. Cut the tape if needed into thin strips. We stuck the tape to our shirts first, so it wouldn’t be so sticky on the paper.
Test your tape out first to see if you will be able to remove it before completing the entire birch tree painting.
2. Place the strips vertical like tree trunks. Add a few short pieces for branches on the birch tree.
Press lightly on the tape to stick it down.

3. Paint water colors over the entire cardstock. We used cool colors: purple, blues, and a little green. This would be a great time to talk about the color wheel and how different colors are made.
4. While the paint is still wet, sprinkle salt on the paint. This will create a sparkly effect.

5. When the paint is dry, carefully remove the tape. If part of the paper comes up, don’t panic. Try to remove it the best you can and glue any parts that ripped back down.

6. With a black crayon, outline the trees. Add multiple short horizontal lines to each trunk and branch.

7. With a watered down black paint, paint a line on the left side of the trunk and the bottom of the branches. See the top picture.
8. Let the birch tree painting dry. Then display.
To make this birch tree painting into a card for someone special, I’m guest posting at Red Ted Art! Stop by to see what steps to take next!
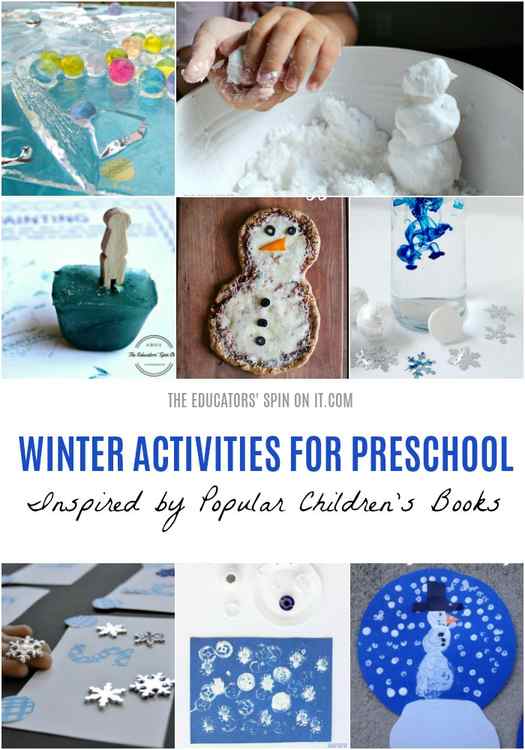
Click now for more Winter Activities for Kids
Want more activities for Winter? Sign up for our free January Activity Calendar!
Like this idea? Pin for later or share now with a friend!
- Pinterest 2.2K
- Twitter 8
- Facebook 974
ART Lesson: Birch Tree Painting

The students will work with both painting and printing techniques as they develop this birch tree project. Watercolor paint will be used to develop the sky area with the Wet-On-Wet painting technique. Tempera paint will be used to create the birch trees and ground areas. The students will mix a shade of green paint for the ground and then apply the appearance of grass texture with brush prints of yellow paint. The birch trees will be painted with white tempera paint and while still wet, black paint will be applied to create the bark texture. Printing objects such as a cotton swab, a sponge, or a crumpled piece of foil will introduce an interesting way to add the leaves or foliage onto the birch tree painting. The resulting artwork will be a simplistic, yet a beautiful spring/summer outdoor landscape painting. Terminology taught during this lesson includes Watercolor Wet-On-Wet technique, Base Color, Shade, Object Printing, and Implied Texture.
Each part of this lesson has been photographed and outlined in a step-by-step manner. Through the use of the PDF slides and the many instructional handouts, teaching the lesson will be done effortlessly and student understanding will be easily obtained. Materials needed for this lesson are basic painting supplies (Art Paper, Watercolor Paint Trays, Tempera Paint, Mixing Plates, Paintbrushes, Water Dishes, Paper Towels, and Newspapers) In addition to the art supplies, cotton swabs, plastic forks, twigs, foil, and sponges will be needed for the Object Printing part of the lesson.
A lesson plan has been included which outlines National Core Fine Arts Standards, Lesson Objectives, Material List, Vocabulary, as well as a detailed daily Teaching Procedure which outlines three days of instruction. Student activity handouts have been included to further the understanding of all concepts taught. In addition, two Exit Slips and a Project Reflection handout will require the students to respond to prompts which focus on vocabulary and their personal experience with this lesson.
Preparing for this lesson is very simple. Print enough copies of the student handouts and organize the art supplies needed for each instructional day. Project the PDF presentation during class time and use it to guide the students through each step of the lesson.
NOTE: This PDF presentation is non-editable


