We can’t wait to make more painted pumpkins this Fall.
DIY Easy Paint Pour Pumpkins
Have you seen all the AMAZING ink or acrylic paint pour videos out there? I always have to stop and watch the outcome every time! This painted pumpkin tutorial is so much fun! The best part is this family-friendly no-carve pumpkin craft is that it can be done in 10 minutes or less.
*Disclosure: I only recommend products I would use myself and all opinions expressed here are our own. This post may contain affiliate links that at no additional cost to you, I may earn a small commission. Read our full privacy policy.
When it came to painting our pumpkins as a family I knew that I really wanted to try to create colorful Halloween decorations! This project is perfect for those that do not carve our pumpkins. We like to paint pumpkins with our young children because who wants three kids under 5 using knives?
Paint Suggestion
The biggest thing to consider when wanting to create a paint pour is the fluidity of the paint. you do not want to use heavy-bodied acrylic paints. These will not spread as you want.
I did not want to spend a fortune on acrylic paint for a pumpkin that I wasn’t so sure would turn out. However, I love trying new and fun paint techniques.
You can’t be scared that they won’t turn out. One of my favorite “experiments” was another fun and easy painting technique on flower pots. I love how these turned out!
Another Paint Pour Resource
Here is a great article about using more advanced materials to create awesome abstract canvases and a resource I used even when experimenting with my own “dirty” paint pour pumpkin!
Recommended Supplies
- Acrylic Craft Paint-Like Apple Barrel or CraftSmart
- Dixie Cup
- Real Pumpkin or Fake Pumpkin
- Paper Towels or Work Surface
- Optional: Tablespoon Of Water To Thin Paints
Order Of Paints Placed In The Cup
You can do this paint pour technique with any color of paint. It is best to pick colors that you think may mix well together. You would not want to put complementary colors (like red and green) together. You would chance them making a muddy brown.
Step 1: Add Acrylic Paint To Cup
I was nervous to add colors that I knew would not mix well together. For the first round of paint pour, I added in this order: blue, turquoise, yellow, and then white into a disposable cup.
Step 2: Flip Cup Over
Flip the cup over on one side and let it drip out a little. Once you remove the cup, you can tilt the pumpkin to encourage the paint to drip.
Step 3: Repeat Until All Sides Are Covered
You will need to probably do around 3 different pours to cover your pumpkin completely if you have a stem. If you don’t have a stem on the top of the pumpkin you may get away with one bigger pour right on top.
In the image, the final pour was placed on top of the stem so that it would go on all sides.
Optional: Add A Little Water
I tried 3 other similar, but different color combinations in the same cup and in different areas of the pumpkin. My favorite was adding about a tablespoon of water before adding more turquoise, blue, yellow and then black.
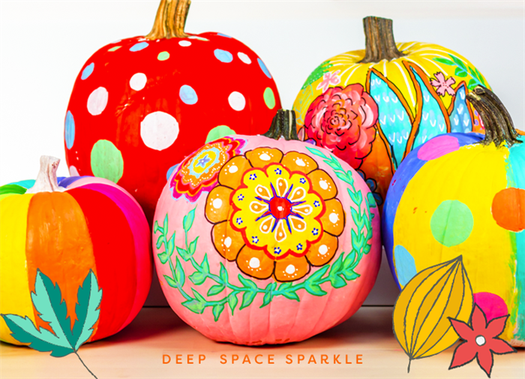
How to Paint a Pumpkin
Team Sparkle and I did a little project testing in the DSS headquarters yesterday and created our own painted pumpkins. These festive gourds looked pretty and relatively easy to make, so we gave the project the green light.
I have to confess that I don’t love carving pumpkins–the mess, slimy inners and slippery seeds are enough to steer me away from most pumpkin activities.
But these painted pumpkins are definitely more ✨sparkly✨ than a traditional Jack-O-Lanter.
We hit a few roadblocks on the way (that’s why we test these things out, right?) so here are my tips for creating these in your art room:
Clean Your Pumpkins
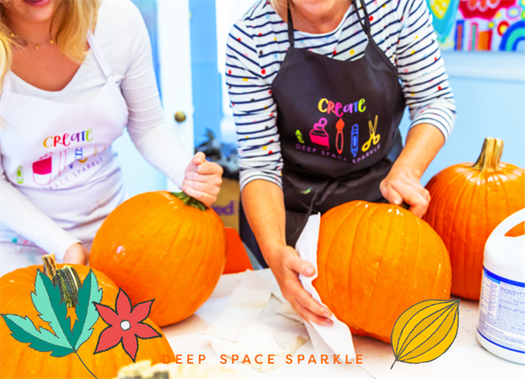
We are using real pumpkins here which require some cleaning. If you’re using pumpkins fresh from the pumpkin patch, no doubt they’ll have some dirt on them. A quick wipe with some bleach cleans the pumpkin well enough to apply the acrylic paint easily.
If you’re using fake pumpkins, this steps isn’t necessary but I would do it anyway.
Apply a Base Coat

It’s a white acrylic paint that is meant as a bonding agent so that acrylic paints cover a slick, shiny or flimsy surface with ease.
It’s a step you can do with your students but just make sure they are wearing smocks. Acrylic paint does not come out of clothing. Although if the paint does come in contact with fabric, a little acetone (fingernail polish) does a good job of removing it.
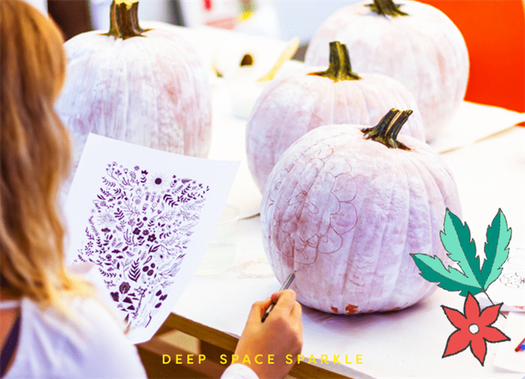
After the Gesso dries, pencil in a very light and basic design.
It REALLY helps to limit a child’s choice. It’s not stifling child’s imagination. Instead, think of it as being able to get to the fun part (painting) a bit faster.
I selected Frida Flowers or Kusama Dots. For either design, it helps to outline some shapes, with the intention of adding details later on.
Adding a Base Color

There are two schools of thought here:
- Add color to the basic shapes and then paint the background color OR
- Add the background color first.
I would opt for the 2nd one as it is easy to get carried away with painting your basic shapes that you often paint onto the white gesso with smaller details. Then, you have to paint around the details for the base coat.
This is harder to do, especially for kids.
Adding the background Color & Details
Once the solid shapes have been painted and the background color has been painted, you can go in and add details OVER the background paint.
Note: For the Kusama Pumpkin, Team Sparkle painted the segments of the pumpkin various colors, allowed to fully dry and then painted dots over the dry paint.
Adding Details with Posca Pens

If you aren’t familiar with Posca Pens, they are just really amazing paint markers.
They can be very pricey for an art room but a few boxes can really make the difference with finishing work with projects.
We used them to add all of the small details that went into our flowers: outlining the shapes, adding dots or emphasis lines and even drawing stems. In my opinion, they made the difference from messy to magnificent!
Have you tried painting pumpkins? I’d love to see your comments below!
Pumpkin Paintin’

Create amazing pumpkin decor without the mess! Painting pumpkins instead of carving them has several perks. Painted pumpkins last longer than carved ones. You don’t have to worry about your little ones and sharp objects. Plus, you can be as creative as you want to be with glitter, stickers, or whatever else your inner artist desires!
Pick a Pumpkin
The perfect painting pumpkin has a smooth, even surface. Be sure to choose one without bruises, scratches, and lumps. Unless lumpy is the look you’re going for, of course. Great painting pumpkin varieties include large Jack O’ Lantern pumpkins and, for the littles who like little pumpkins, Munchkins.
Clean Your Pumpkin
You can use a damp cloth or paper towel to gently remove the dirt and grime from your pumpkin. Avoid using items like rough scrubbing pads as this can damage your pumpkin’s skin and potentially bruise it. Use a soft cloth to thoroughly dry your pumpkin and be sure to keep the stem area dry. A wet stem or blossom (the bottom of your pumpkin) can cause your pumpkin to rot.
Get Artsy
When it comes to pumpkin painting, the design options are endless! Stencils and stickers are easy options for younger kids while older painters might like to take on more intricate designs.
Pumpkin Painting Tools
Acrylic paint is a great option for painting pumpkins as it dries quickly and allows you to paint over the first layer in a short time period. Go-to painting tools include cheap paint brushes, cotton swabs, sponges, and cotton balls. A damp cloth works great for wiping away any mistakes.
Decorate!
Make your pumpkin shine with fun embellishments like glitter, sequins, pom poms, or rhinestones. Add googly eyes to create faces! Incorporate glow-in-the-dark paint to make your pumpkin stand out at night!
Visit us on Pinterest for fun design ideas!


