Easy 4-Step Halloween Craft for Kids!
Create Your Masterpiece! Nine Creative Pumpkin Painting Ideas for Halloween
Once the kids return to school, it’s time to prepare for one of the next big events on the fall calendar—Halloween! Carving jack-o’-lanterns is a time-honored tradition come this time of year, but it’s one that may have you wondering whether your kids are too young to participate safely. Here’s a solution: Round up some craft paint and brushes and let them get creative by adding spooky seasonal designs to those gourds. Pumpkins are an excellent canvas on which to unleash your kids’ unique artistic talents, and there are many pumpkin painting ideas to take inspiration from. Painting pumpkins is also a safe activity that requires minimal cleanup. Your kids’ jack-o’-lanterns can be part of your fall décor until Thanksgiving if you like, and because they don’t require carving, painted pumpkins will last for weeks instead of a couple of days. So why not do something different with the family this Halloween and give pumpkin painting a try? The big question here is not how to paint a pumpkin but what to paint on your pumpkin. Let’s get started!
- Choose the right pumpkins: When you head to the market or farm with your kids to pick out your gourds, look for ones with smooth, even surfaces without any apparent cuts, soft spots, or insect damage. Pumpkins that don’t have deep grooves are easier to paint. Also, ensure that their shape is balanced and the pumpkins will stand upright on their own.

Remember to think about the presentation. For variety, you can select different sizes or add butternut squash or a white pumpkin to the mix. If you’d like something more permanent, buy paintable faux pumpkins from your local craft store that your young artists can reuse and repurpose. Then they can save ones with their favorite designs and take them out every year. If they’re ready for something new, they can paint over the reusable pumpkin with a fresh design.
Gorgeous Gourds in Five Easy Steps
Before bringing out the paints, help your kids pick out a design to use as inspiration, whether online or from a picture book. With the prep done, let the artistry begin!
1. Set the Backdrop
A pumpkin’s bright orange color is a beautiful background for any art, but you don’t have to stick with it. Feel free to switch it up by applying a background color to your design. You’ll probably only need one coat if you use a dark color like navy blue or black, but if you want to paint in pastels, you’ll need two or three coats to get a solid color and keep the orange from peeking through. An acrylic spray paint will do the job in a flash, but an adult should take care of this step to ensure it’s done safely.
2. Work with an Outline
Using a permanent marker, help your kids outline their spooky designs on the pumpkins. You can draw freehand or use a stencil or printable template taped onto the pumpkin. Don’t worry about making the drawing perfect—kids will be painting over the lines later.
3. Start Painting
Once the designs are outlined on the pumpkins, it’s time for young artists to start painting. Encourage them not to limit themselves to paintbrushes only. Let them experiment with dabbing on paint with sponges, cotton balls, swabs, or even old rags. Acrylic paint is water-based, so if anyone makes a mistake, just wipe it off with a damp cloth and begin again.
4. Set Your Design
Once everyone is happy with their pumpkins and the paint has dried, take the creations outside and, if you’d like, preserve your kids’ pumpkin art by adding another layer of sealant. This step will keep the colors from running and help their pumpkins last longer. As before, an adult should handle this step.
5. Add Fun Details
Be as elaborate as you want. Show your kids how to add an extra dimension by attaching crafty flair to their pumpkins using glue. They can enhance their pumpkins with glitter, buttons, googly eyes, rhinestones, pom-poms, raffia or yarn made to look like hair, and more. If you’d rather not use glue, opt for stickers, self-adhesive sequins, or washi tape instead.
Easy Pumpkin Painting Ideas
Now that you’re familiar with the prep and painting process and how to involve your young Picassos in their pumpkin projects, let’s look at some creative designs. Some of these designs are great for Halloween night itself, while others will look good on a porch or in a window all autumn long.
Disco Pumpkin
Glam out your gourds with this fun retro design that will give them a mirrorball effect worthy of the ultimate dance party. Start by applying an even coat of black paint. Once it is dry, create a grid pattern using painter’s tape or draw the squares freehand using a permanent marker. Cover the spaces with silver metallic paint. Once it’s dry, peel off the tape and place your masterpiece where it can catch and reflect light.
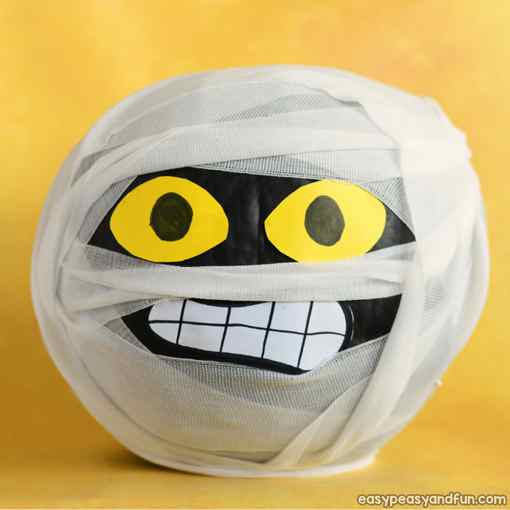
Painted Mummy Pumpkin
Coat your pumpkins in a layer of white paint. Once it’s dry, use a black paint pen or a fine-tipped paint brush to draw lines that look like a mummy’s bandages. Paint on two large glaring eyes, or glue on googly eyes for a sillier take.
Classic Jack-O’-Lantern Painted Pumpkins
Just because your pumpkins aren’t carved doesn’t mean you can’t draw inspiration from a jack-o’-lantern. Decorate your pumpkins with eyes and nose in the shape of a triangle, then add a large, toothy grin, all in black paint, for a classic look.
Seasonal Painted Pumpkin
This idea works well for artistically minded kids, or for an adult who wants to make a fall decoration while their kids work on the spooky stuff. Make a falling leaf pumpkin using a foliage-shaped stencil to outline the shapes of leaves. Paint them in fall colors of red, orange, brown, and yellow. You could also use a flower template to incorporate fall blooms like chrysanthemums, dahlias, or sunflowers.

Constellation Pumpkin
Does one of your kids love space? Look up at the night sky for some inspiration for this craft. Give your pumpkin a matte background using either navy or black chalk paint. Then, lightly splatter the surface with white or yellow to add a subtle starfield effect. Add a few adhesive glow-in-the-dark stars to create constellation shapes before joining the stars with thin lines of white paint.
Rainbow Pumpkin
Sponging on stripes of different paint colors can create a beautiful rainbow ombre effect. You could stick with the classic palette of red, orange, yellow, green, blue, and purple, or choose more seasonal colors. Start at the top and dab on your first color using a natural sponge. Once you’re happy with the coverage, switch colors and begin dabbing the next stripe. Make sure your new layer overlaps the first slightly to give a blended effect. Repeat the process with each new color until your pumpkin is completely covered.
Metallic Pumpkin
This decoration will shine on the table or the front step. Select pumpkins of different shapes and sizes and paint them with metallic colors like gold, silver, copper, and bronze. If you can’t decide on things to paint on a pumpkin, go for a minimalistic look and paint your gourd in a solid color. You can also consider geometric color-blocking or use classic patterns like stripes and polka dots.
Halloween Greeting Pumpkin
Get the message out that you and your kids love Halloween by using chalkboard paint to create a pumpkin message board for Halloween greetings that you can customize throughout the season. You’ll need a large gourd for this craft. Paint one side of the pumpkin with chalkboard paint, and add spooky details like spider webs, ghosts, and cauldrons along the border of the writing surface. Once the paint is dry, use chalk on the writing surface to draw a “countdown to Halloween” or leave a message for trick-or-treaters. To change the message, simply wipe off the chalk with a wet paper towel.
Glow-in-the-Dark Pumpkin
This one is great for kids who are not interested in fine details. Place their mini pumpkins on a cooling rack over a tray or cookie sheet lined with wax or parchment paper. Then, let your kids pour glow-in-the-dark paint over the pumpkin to look like dripping slime. To get even more creative, use multiple colors of glowing paint poured over the gourds to create a swirling effect. Your young ones will love checking out the pumpkins in the dark once they’re dry. Be sure to have wipes handy.
5 Glow-in-the-Dark Painted Pumpkin Ideas

Get creative in glow-in-the-dark 3D! Features and Benefits: 6 popular glow-in-the-dark colors that activate with UV light Nontoxic Permanent and machine washable Won’t crack or peel Tip is designed for optimal paint flow for each finish Easy-squeeze bottle
$12.99
$12.99 $12.99
Unit price / per
If you’re already thinking about decorating for Halloween, you are not alone! We’re totally getting into a spooky state of mind around here, and one of our favorite ways to prep for Fright Night festivities is making glow-in-the-dark pumpkins. They’re easy (and fun!) for all ages to create, they last longer than real pumpkins (and hey, are less messy too) and they’re perfect for adding a ghoulish glow to Halloween parties, your front porch or where ever you place them! Here’s a roundup of our favorite glow-in-the-dark painted pumpkin ideas for this year:
What you need:
– Real or faux pumpkins (we like faux so they last)

How cool are these glow pumpkins from Sam at Color Made Happy ?! Get creative like Sam and make sugar skull designs, animals and other patterns; they will all look amazing!

Pumpkins don’t always have to be scary; these beautiful boho pumpkins from Alisa Burke are still some of our absolute favorites. Simple repeating patterns make for a stunning motif that stands out in the dark.

Jaderbomb is no stranger to glow-in-the-dark pumpkins! If you’ve been following our blog for a while, you’ve certainly seen her get super creative with some glow paint and a set of pumpkins.

More sugar skulls please! With a side of kitschy humor. We love these Sugar Skull Pumpkin Pails that are great for your trick-or-treat haul, or for setting on display while not in use.

You don’t always have to create creepy faces or intricate designs . Pumpkins with Halloween themed words are also fun, and super easy to make! You can even use them for clever signs at your Halloween party.
Tip: how to paint a pumpkin – what kind of paint to use on pumpkins?
If you need to cover the whole pumpkin with paint – spray paint will do the job, as well as craft paints.
Smaller areas are best painted with acrylic craft paints. This type of color won’t wash out in the rain if you plan to showcase your painted pumpkins outside.
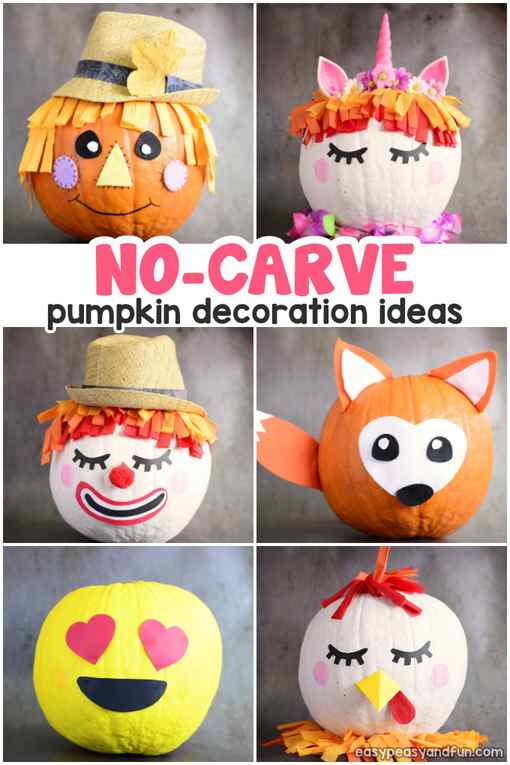
Pumpkin Painting Ideas
Scarecrow Pumpkin
As fall is the time of scarecrows, this one seems like a natural fit. You don’t need to paint the whole pumpkin.
The hair can be made of felt or tissue paper (napkins :)), paint the face, or use felt. Last but not least, find an old straw hat, decorate it with a leaf or a sunflower and the pumpkin is ready for display.
T- rex Dinosaur Pumpkin Decorating Idea
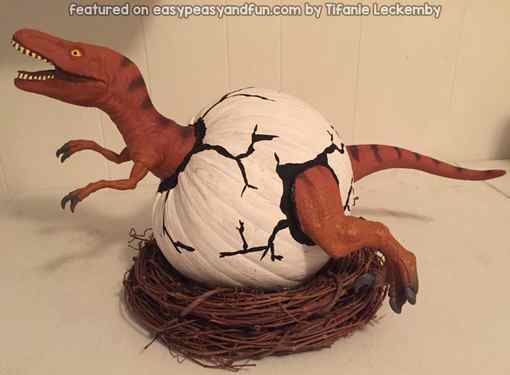
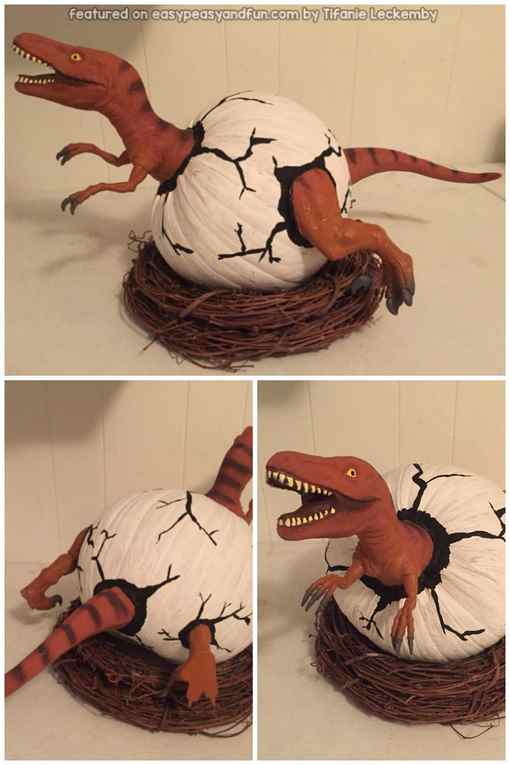
This hatching tyrannosaur dino egg pumpkin is one clever idea! If you’ve got an old dinosaur toy lying around and no idea what to do with it – this is the thing to make. Made by Tifanie Leckemby
DIY Unicorn Pumpkin
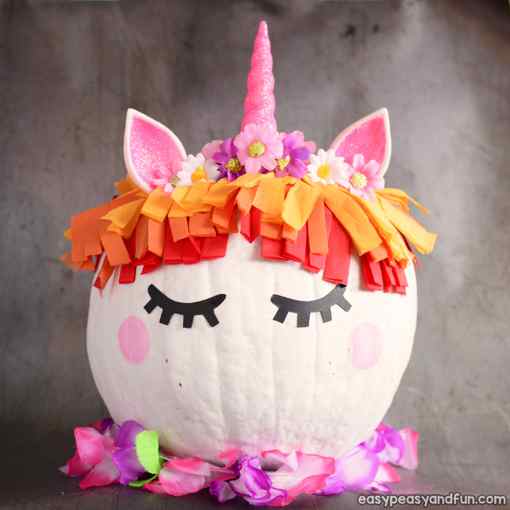
Unicorns have been extremely popular lately and this goes to pumpkin decorating as well. There are many ways you can go about decorating them – we painted the pumpkin white, added pink cheeks, and closed eyes (with eyelashes naturally).
The mane is made with tissue paper and the horn and ears from and old Halloween unicorn costume hair hoop. Add floral details to make things even more magical.
Rainbow Fish Pumpkin Decorating Idea
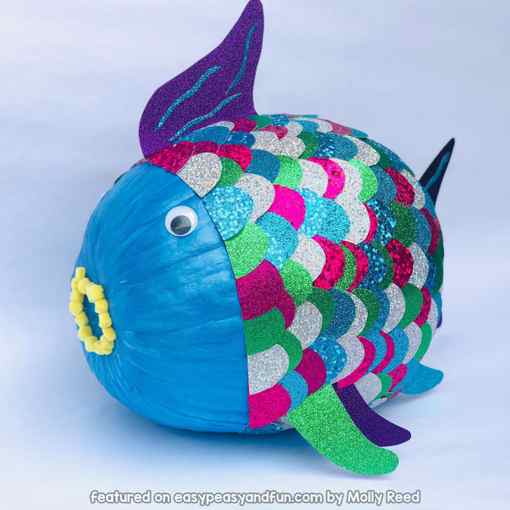
From the first time I have read The Rainbow Fish and till this day, this has been my favoite childhood book. Like the book, this decorated pumpkin looks magical. The shiny and sparky scales are mesmerizing aren’t they. Made by Molly Reed.
Witch Pumpkin Decorating Idea

Make a fun looking wicked witch! To make this witch, we painted the pumpkin green and let the paint dry completely. The hair is made out of tissue paper (napkins), felt would be great too. If you’ll be displaying the pumpkin inside, you can make the hat out of paper, if not, we recommend a store bought hat (or a hat made out of fabric). We used a green pom pom for the nose, which, if you ask us,makes all the difference with this pumpkin painting idea.
Cactus Pumpkin
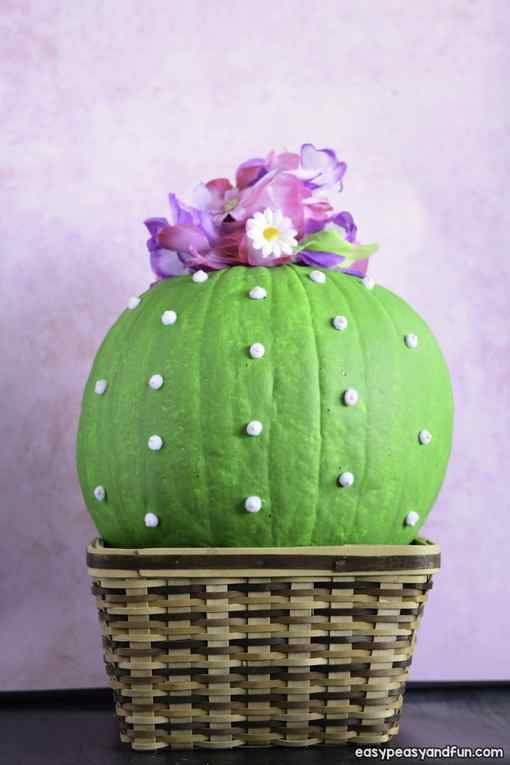
This one is a simple and fun one that requires a quick shop to a dollar-like store, grab a cheap basket if you don’t have one at home, green paint, fake flowers (we used a lei/flower necklace) and white pom poms.
Paint the pumpkin with green acrylic paint. Let the paint dry. Glue on white pom poms to serve as spikes. Attach the flowers on top and place your cactus pumpkin in the basket.
Bat Pumpkin
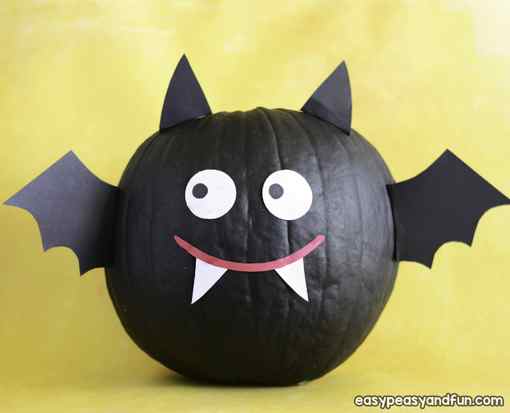
Paint the pumpkin bat and add details. If this one will be displayed at inside, you can make the wings and ears from paper. For outside display, it’s best to use black craft foam.
Pastel Stripes

If you want something simple that looks oh so gorgeous, make pastel-painted pumpkins. You will need two (or three) paints per pumpkin.
Go with one stronger color and a more pastel shade of the same color family. Follow the ribs on the pumpkin as a guide or freehand the stripes.
Pikachu Pumpkin
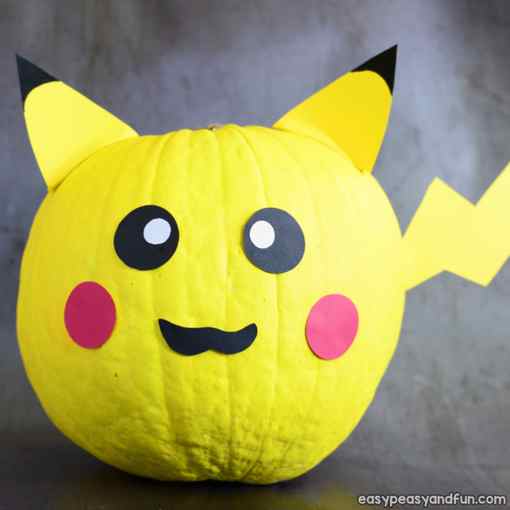
If you have a Pokemon lover at home, why not make a few this Halloween? You won’t be able to catch them all (or will you?) but making a few will certainly be fun. For Pikachu, paint the pumpkin with yellow acrylic paint or spray paint it yellow. For an indoor pumpkin you can use construction paper to add the details (and hot glue gun to attach them).
Black and White Painted No Carve Pumpkin

If you want to add a dash of elegance to your porch or home this Halloween you can go with a black and white painted one.
You will need a good-quality white paint for this one (it shouldn’t be translucent and not watery) in order for it to look nice on top of white paint. If your white paint isn’t the best, you will need to apply more than one layer (you can also switch the paints, having the white base and adding black details). If you will have your pumpkin indoors, you can also paint it with black paint and use a white chalk marker.
Lion Decorating Idea
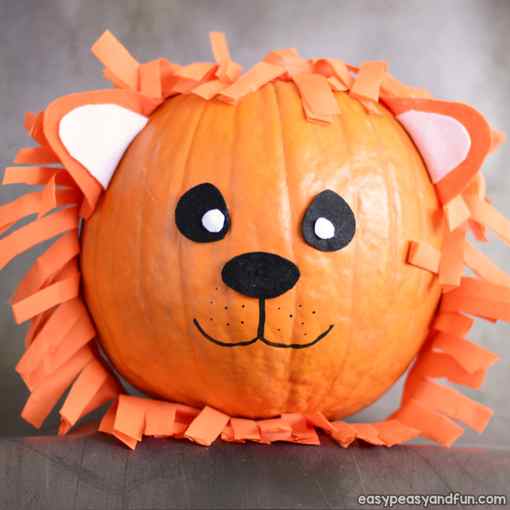
Lion is another easy idea, you can either go with the natural color or paint the pumpkin yellow. The mane is made with tissue paper or felt and the ears are made with felt too.
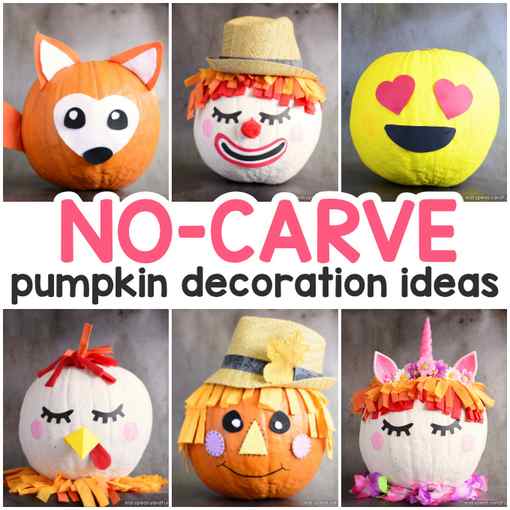
The friendly clown pumpkin painting idea
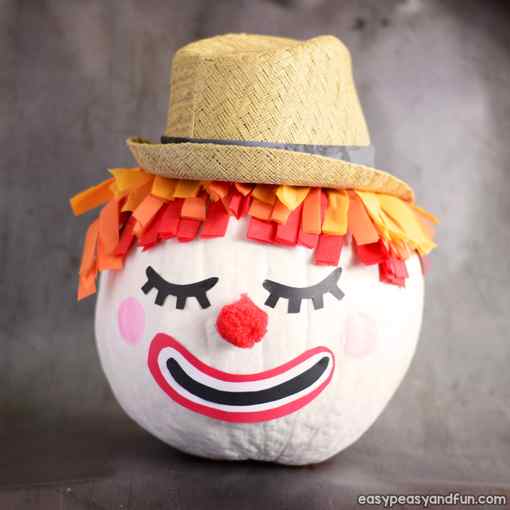
Clowns are peculiar characters – you can make a very cute one or a thing of nightmares. And it’s pretty easy to make it a thing of nightmares. We think sleepy closed eyes with eyelashes are the safest bet when it comes to making your clown cute and friendly.
Emoji Pumpkin Decoration
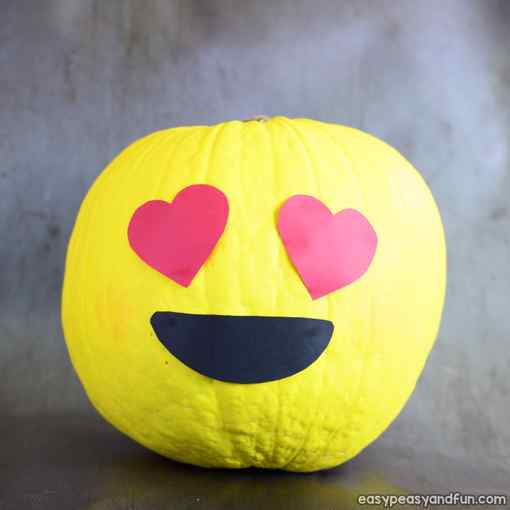
Everybody loves emoji! Why not make your favorite one as a Halloween pumpkin this year? We chose the heart eyes emoji, but any one of them would look insanely cute. Only paint is required to make this one so it’s one of the best pumpkin painting ideas.
Fox Pumpkin Decorating Idea
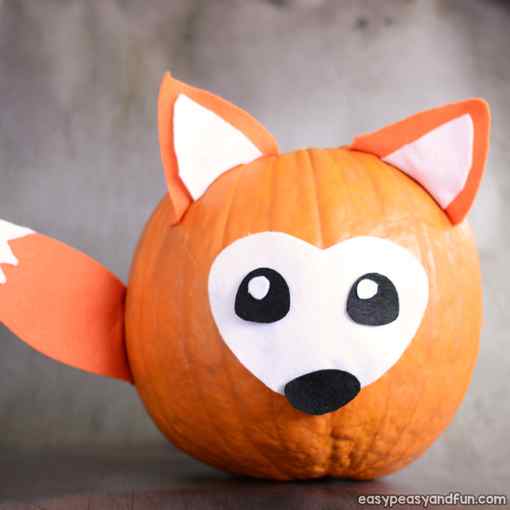
One of the most adorable no-carve pumpkin decorating ideas if you as us! Make the face, ears and the tail with felt to make it a bit fuzzy. Such a great non scary project for kids to make.
Donut Pumpkin

Paint the whole pumpkin pink or go more detailed and paint just the top half pink to achieve a true donut look. Paint on sprinkles in different colors.
Chicken Idea
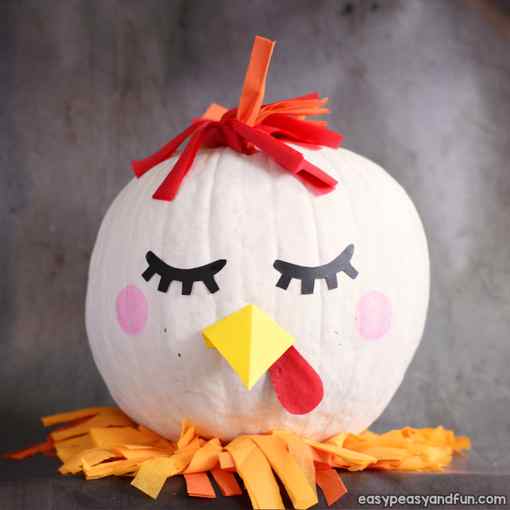
If you made a fox, why not also make the chicken?
Mummy
Have old bandages and are looking for a clever way to upcycle them? Make a mummy! This one is perfect for Halloween.
Polka Dots

Polka dots are another easy idea to for making an eye-catching no-carve pumpkin. You can leave the pumpkin as is (natural) or you can paint it with a coat of paint (or more colors). Paint dots in any color you like (the best tool to use is the round sponge brush you can find at kids’ crafts sections in craft stores).
Frankenstein’s Monster
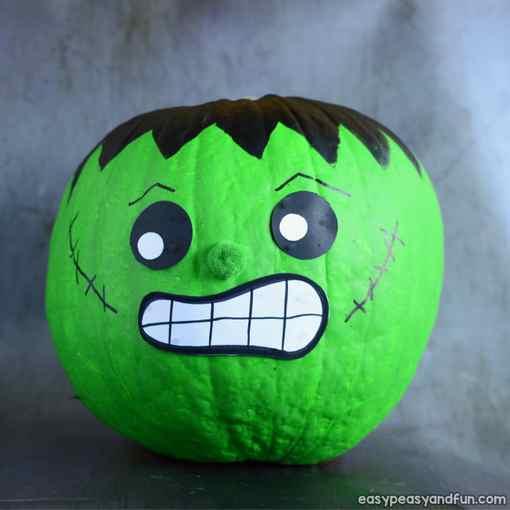
Another idea for a Halloween monster. Paint the pumpkin green and wait for the paint to dry. Once dry, continue with the black paint for the hair, eyes and other details for Frankenstein’s monster.
Ninja Turtle

Paint the pumpkin green. Paint the white for the eyes. Cut a strip of orange, purple, red or blue fabric and also cut holes for the eyes. Attach the fabric to the pumpkin. Paint the black for the eyes.
Fairy House
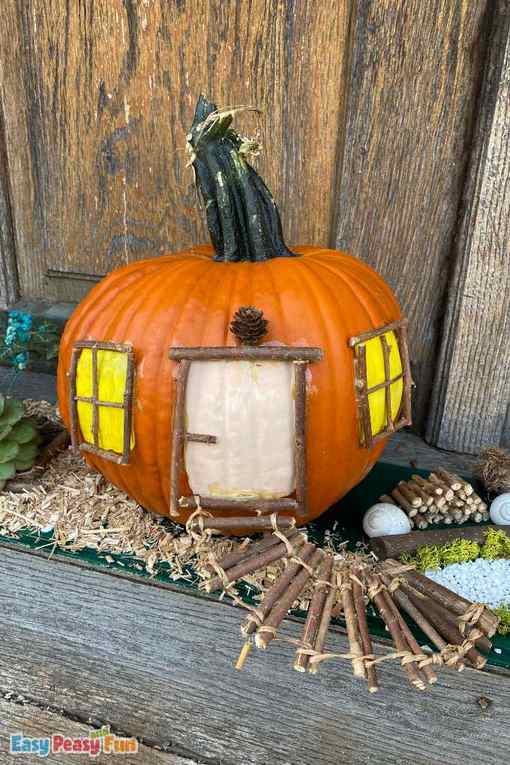
Have fun creating amazing pumpkin designs!
Want instant access to all of our printable crafts, activities, and resources?

With thousands of crafts, activities, worksheets, coloring pages, and drawing tutorials to print, you will always have just the resource you need at your disposal. Perfect for parents and teachers alike!


