*DecoArt provided the paint for review, but all thoughts are my own. Thank you for supporting the brands that make PMQ for two possible.
Tutorial: Easy Pumpkin Painting
Purchase the supply list and video tutorial replay f or the Easy pumpkin painting from the private Creative Haven membership. This easy pumpkin painting was painted in the private Creative Haven membership and Facebook group. You are purchasing ONLY the supply list and REPLAY of the previously live video of me making the Easy Pumpkin painting. The tutorial video is an UNEDITED video that was previously recorded LIVE in the private Creative Haven Facebook group in August 2022. What you will receive: An email with a PDF Download that includes – The finished photo
– A photo of the supplies
– A link to the unedited video tutorial REPLAY (NOT a Facebook link)
-The printable template tracer You will NOT receive written tutorial instructions.
You will NOT be shipped a product.
You will NOT be given access to the Creative Haven Facebook group.
You will NOT gain access to other Creative Haven projects. If you want access to ALL Creative Haven projects ($1100+ value) and all the printables ($130+ value), become a member at www.creativehavenvip.com for just $27 (billed monthly) or $270 (billed annually)! You do not have permission to share this tutorial with others or teach it yourself.
Shipping Information: We recieve a high volume of orders. We fill orders in which they are recieved. Shipping may take up to 4 weeks for your order to be pulled, packed and finally shipped. Please plan ahead. Tracking will be emailed when your order ships. See our shipping policy in the menu. The holidays may impact shipping times. View full details
Painting Detailed Patterns The Easy Way
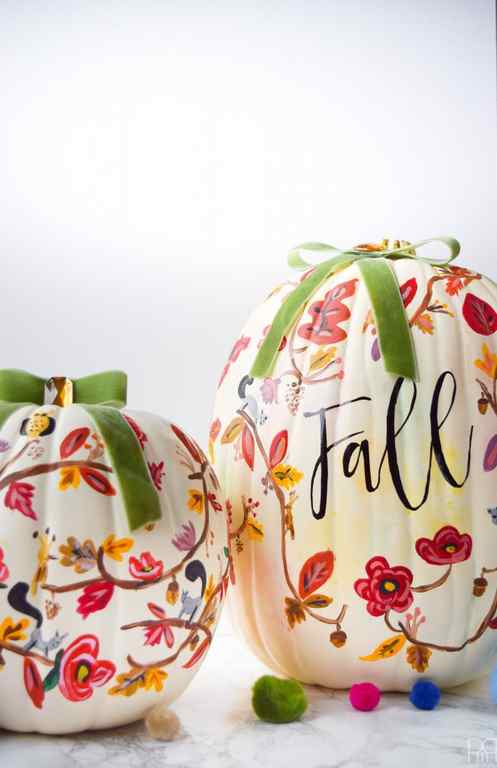
In the past I’ve done a few hand painted projects like my painted florals on glassware, and my astrological sign painted breakfast in bed tray but they all kind of hinge on you having talent… I accept this is a major flaw in my posts. So this time, I’m making it really simple! We’re just doing falling leaves, a flower or two, and maybe a squirrel. I’ll be spending more time showing the steps involved in creating these three elements, so that you can take it from there.
What I love about this style of painting, also know as the Rifle Paper Co. inspired school of painting, is that it’s less formal and more whimsical. You can have fun with colour and shapes and perspectives. So if you’re a sloppy painter free spirit with a paintbrush, this one is for you!
How to Paint a Rifle Paper Co. Fall Pattern
*The following product links are affiliate things. Thank you for supporting the brands that make PMQ for two possible.
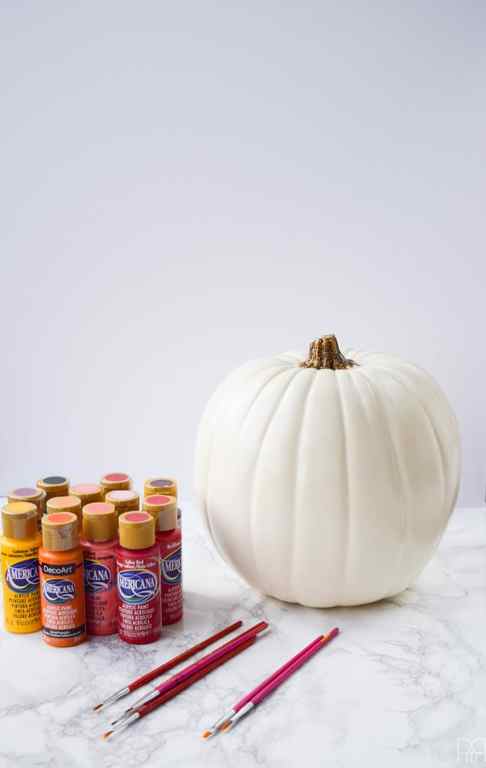
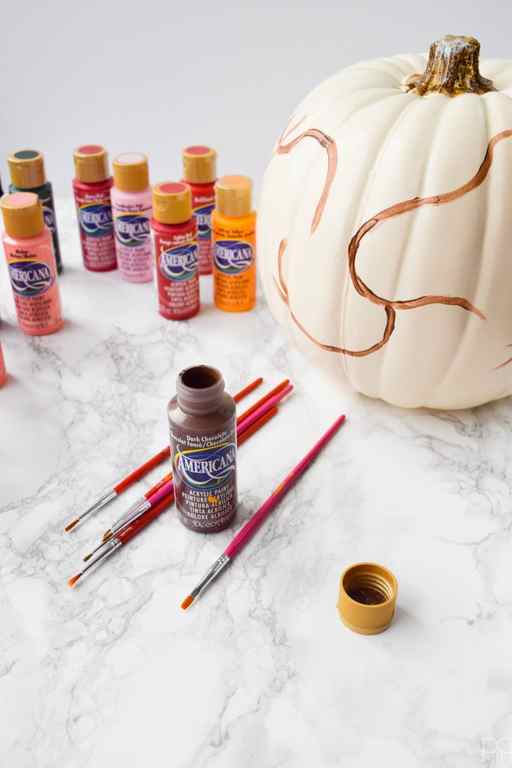
You’ll need all these paints and materials to recreate this exact pattern and palette. If you’ve got different shades, feel free to use them!
-
- Americana Paints – I used the following colours:
- DecoArt Americana Acrylic Paint, 2-Ounce, Poodle Skirt Pink
- DecoArt Americana Acrylic Paint, 2-Ounce, Melon
- DecoArt Americana Acrylic Paint, 2-Ounce, Coral Blush
- DecoArt Americana Acrylic Paint, 2-Ounce, Brilliant Red
- DecoArt Americana Acrylic Paint, 2-Ounce, Tuscan Red
- DecoArt Americana Acrylic Paint, 2-Ounce, Georgia Clay
- DecoArt Americana Acrylic Paint, 2-Ounce, Spiced Pumpkin
- DecoArt Americana Acrylic Paint, 2-Ounce, Saffron Yellow
- DecoArt Americana Acrylic Paint, 2-Ounce, Cadmium Yellow
- Americana Acrylic Paint 2oz-Frosted Plum
- DecoArt Americana Acrylic Paint, 2-Ounce, Dark Chocolate
- DecoArt Americana Acrylic Paint, 2-Ounce, Slate Grey
- DecoArt Americana Gloss Enamel Paint, 2-Ounce, Black
A note on colour choice: I chose beautiful warm shades of red and yellow for the season, but you could easily do something in blues or purples and have it be perfectly seasonal. You can also buy all of these paints at Michaels or online through amazon.

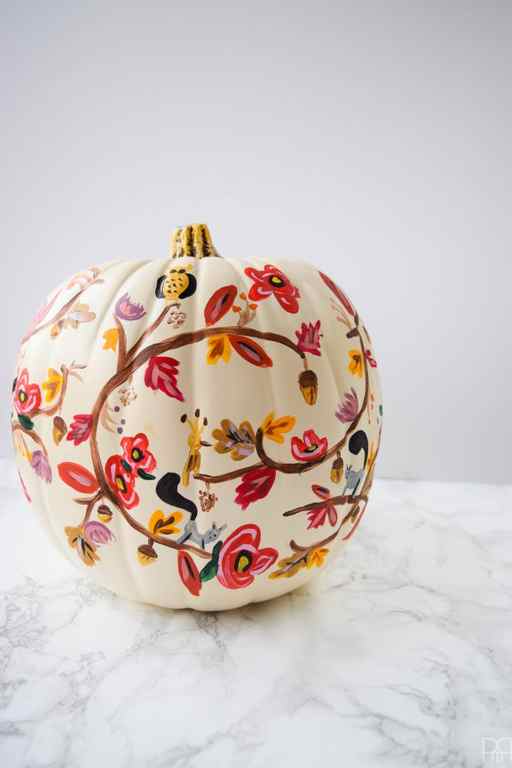
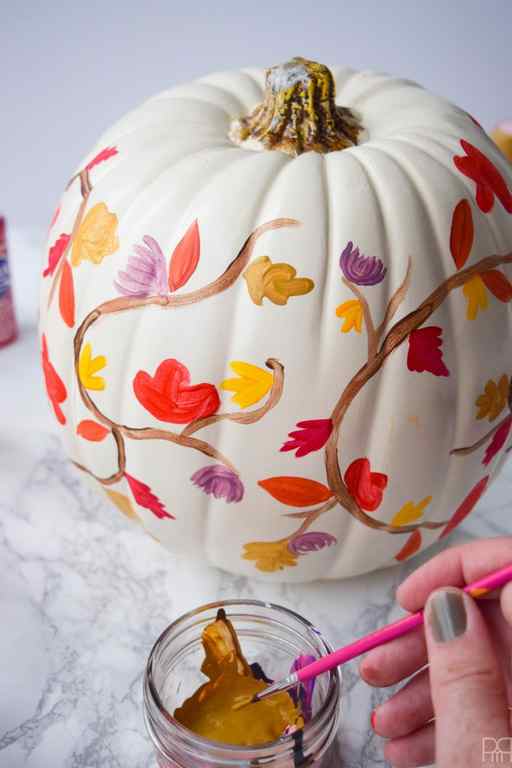
Using Dark Chocolate, paint a series of branches in overlapping arabesques. Add extra branches and offshoots to fill the space. Keep in mind that you will be adding leaves all around the branches, so don’t space them too closely.
Painting Fall Foliage
Paint your first leaf using Georgia Clay
Paint your flower bud using Frosted Plum.
Using Tuscan Red, paint your second leaf. This one is more like a sloppy maple leaf.
Using Saffron Yellow, paint your third leaf on the branches. I wish I knew the name of the tree off which I am basing this leaf, either way, it’s simple and small.
Using Brilliant Red, paint large anemones around the branches and to help fill spaces. These are like big red flowers. The real beauty of these ones comes with the finishing and contrasting details.
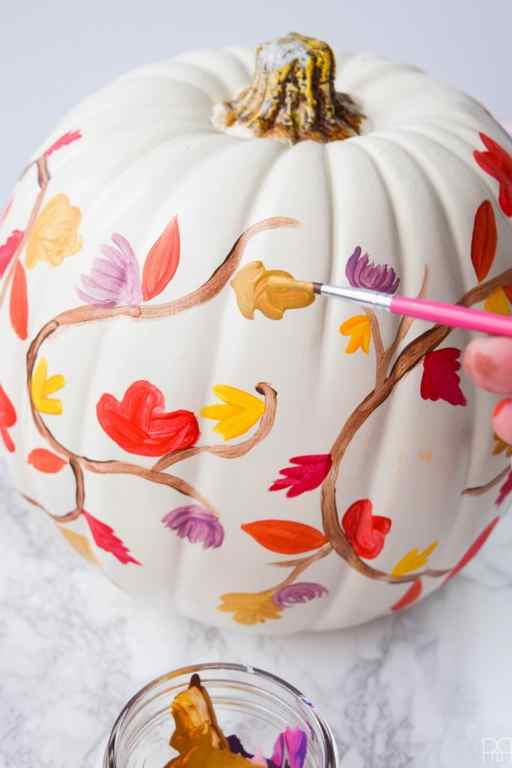
At this point your pumpkin should look like this! This is where you take stock, add blooms or leaves, and figure out where you’re going to put your finishing touches.
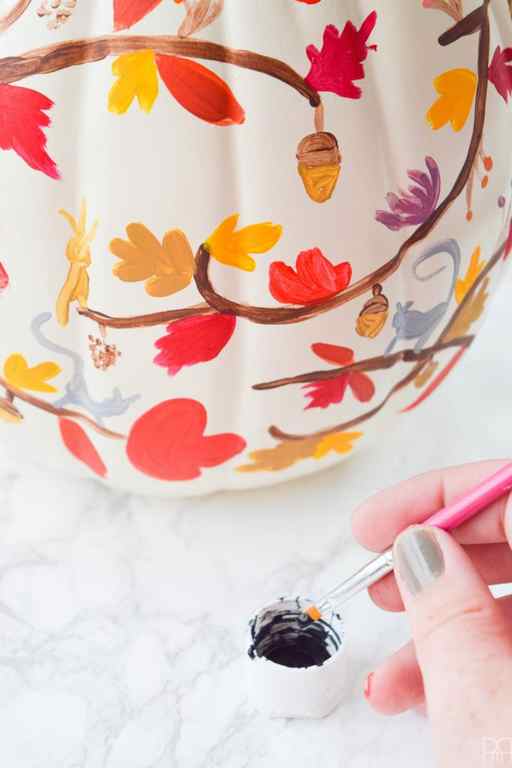
Using a mix of Dark Chocolate and Saffron Yellow to create a light brown for a final leaf motif on the branches. This one looks like an oak leaf. Make sure you make enough for two coats, and for some wildlife critters!
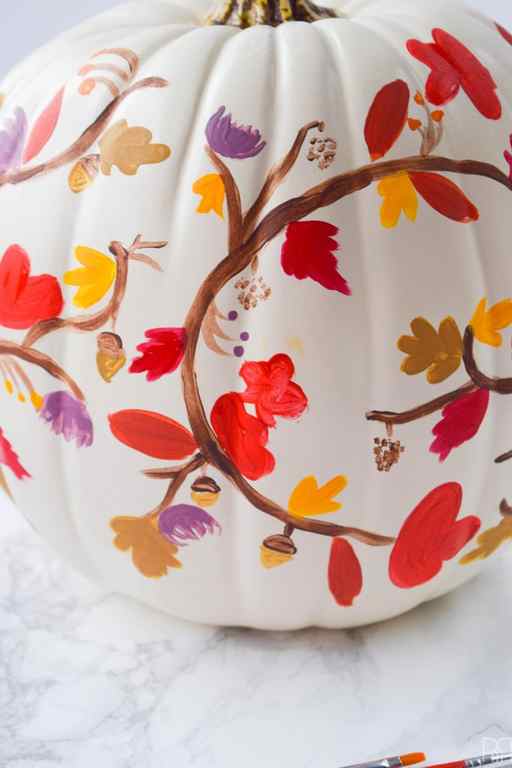
Using Dark Chocolate add three little twigs closely together. Sprinkle them throughout the leaves and buds on the branches. You’ll add different coloured berries to complement the leaves. You can make them as long or as short as you’d like. I use them to help fill space and add another colour. You’ll also add pinecones and acorns. They’re simple enough and don’t really need a gif.
Materials:
- Cadmium orange hue paint
- Burnt umber paint
- Titanium white paint
- Mars black paint
- Aqua green paint
- Light green permanent paint, optional
- Plastic cutlery fork
- 1″ flat wash brush, for the background)
- ½” flat brush, for the pumpkin and highlights
- ¼” flat brush, for the pumpkin stem
- Size 0 round brush or any small round brush, for the spider and foliage
- A few of your favorite small brushes, for the foliage
Step 1
First, sketch the pumpkins on your canvas, then start filling in the background with burnt umber paint making sure to avoid the pumpkin, and leave it to dry. Paint over the background with a thick layer of titanium white over the background as well as the sides, then while the paint is still wet, drag a plastic fork over the canvas to add texture, and let it dry completely. Using your fingers, paint the edges of the canvas with burnt umber, then draw lines on the pumpkins to create the ridges, and paint it orange with a double loading technique (load a ½” flat wash brush with orange paint covering the bristles up to the metal ferrule and dip one corner of the brush into burnt umber).
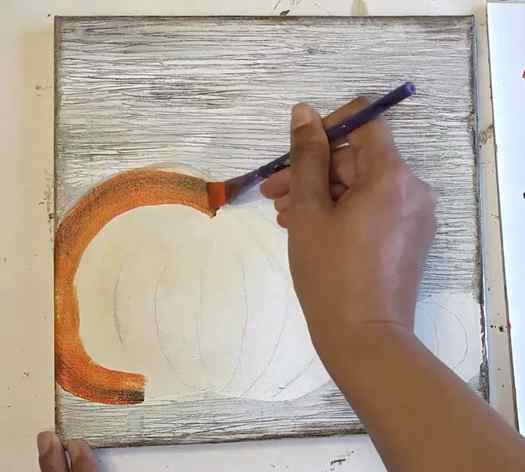
Step 2
Paint a “C” stroke with the wide edge of the flat brush and repeat for all pumpkin ridges, then paint the smaller pumpkin with aqua green and burnt umber using the same technique and stroke. Paint highlights on the pumpkins by mixing white with orange and white with aqua green. Paint a bold stem on the top center of each pumpkin using burnt umber, then draw some curly branches with a size 0 round brush, and paint a cute spider at the top of the canvas. Use assorted green colors and white to paint the leaves at the bottom and finish the details of the paint.
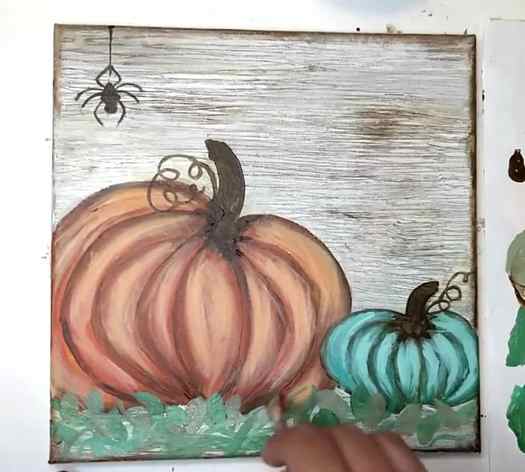
*All these images are credited to Jasmine – Feeling Nifty Painting Tutorials via YouTube. Give her channel a visit and subscribe for more!
- Americana Paints – I used the following colours:


