Paint drips or splatters on window glass are fairly easy to remove: Allow the paint to dry completely, and then scrape off the offending spots with a razor blade scraper (the Hyde contour scraper mentioned above will do the trick, too). Set the blade at an angle to the glass and gently scrape away the dried paint. If the razor blade starts to gum up with paint, wipe it off with a damp rag to remove the excess, and keep scraping!
30+ Easy Ways to Paint with Kids
Are you looking for fun, simple, and inexpensive ways to paint with your child? You’re in the right place. Here you will find over 30 easy ways to paint with kids!
For kids, painting is all about the process. This means children are focussed on the act of painting (the brush strokes, the mixing of colours, and the way the paint feels in their fingers) and not on the final product. Children learn best when they are free to explore and fully immerse themselves into the materials in front of them.
On this page, you can find ways to paint with…
Painting with Nature
Painting with Nature’s Loose Parts
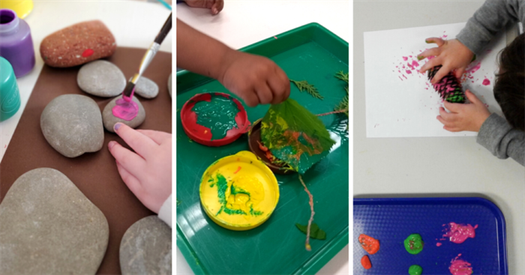
Nature is filled with lots loose parts that are great for painting. Try painting stones, pinecones, sticks and leaves or using them as the paintbrush. Your child can explore the textures and prints made from these loose parts!
Painting Snow
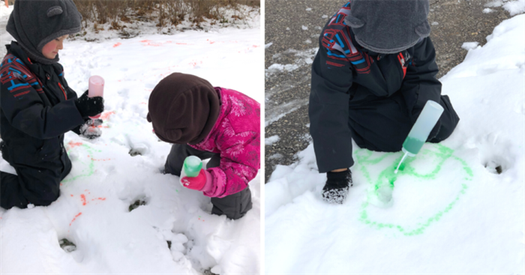
Use spray bottles, condiment bottles, or water bottles (with a squirt lid) filled with water and food colour to paint in the snow. Create shapes, lines, scribbles and images while watching the snow melt away under the water.
Tree Easel
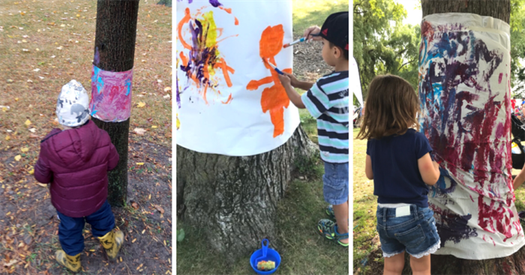
Place some paper on a tree to use as an easel. Does the texture of the tree come through on the paper?
Painting with Household Materials
Painting with Tin Foil
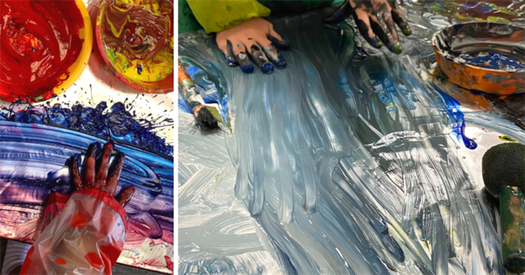
Tin foil is an interesting surface to paint on as it has a different texture, appearance, and sound than paper. Since paint doesn’t stick very well to tin foil it becomes slippery and easy to move and spread in different ways.
Bubble Painting
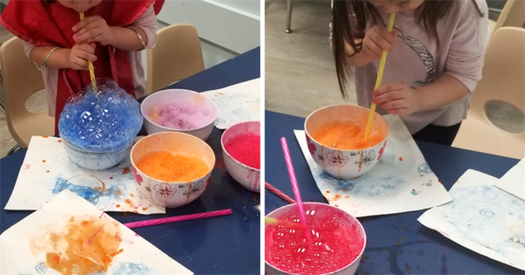
Bubbles are always a good idea! Mix tempera paint, water, and dish soap and use straws or bubble wands to blow the bubbles. Try blowing the bubbles onto paper to see how the bubbles colour the page or let the bubbles overflow from bowl right onto the paper.
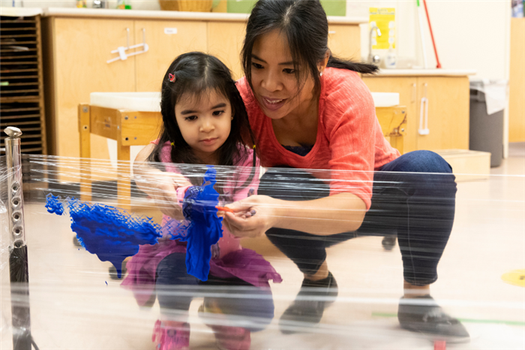
Painting with Plastic Wrap
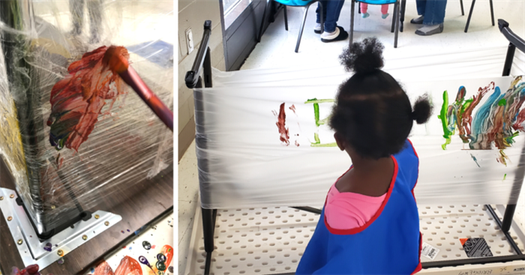
Wrap plastic wrap around the legs of a small table or chair for your child to paint. Since the plastic wrap is clear, it provides a new experience and perspective than other surfaces.
Salad Spinner Painting
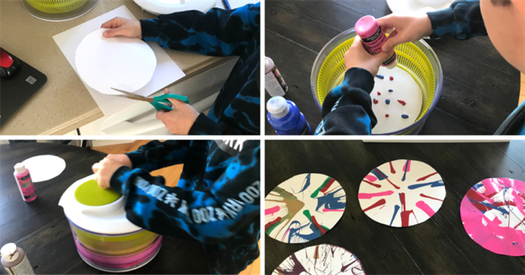
Grab a salad spinner, cut a piece of paper to fit inside, add a few globs of paint to the paper, and spin! Try adding new colours and spinning it at different speeds to see how the colours and patterns change.
Painting with Straws
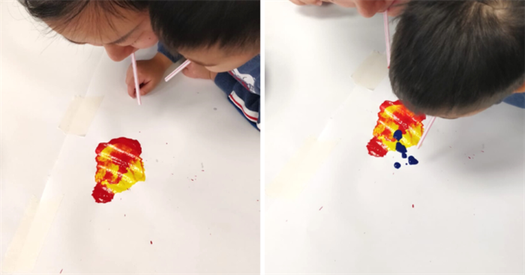
Add large drops of paint to a piece of paper (or another surface, like tin foil or a tray) and blow through the straws onto the paint. Watch as the paint moves around the page and the colours mix together.
Paint in a Bag
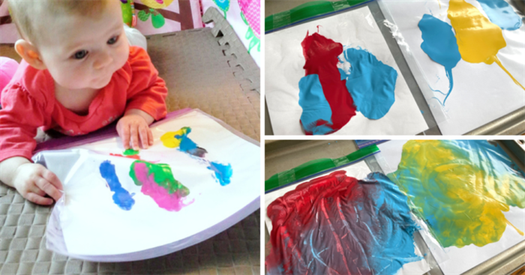
Using a clear and sealable bag, enclose a sheet of paper and some drops of paint for your child to explore. They can move and mix the paint with their fingers without ever touching the paint! Tape the edges or tape the bags to a tray/table for extra security.
Equipment needed for photographing bubbles
You don’t need much for these techniques. You’ll need a camera body, macro lens and tripod. I love using my Z 7II or Z 9 with the NIKKOR Z MC 105mm f/2.8 S lens but any macro lens will do. I use my articulating LCD screen a lot during macro photography, which makes it easier to focus. You will also need a flash or continuous light source for the first technique, and an inexpensive EL Wire light kit (EL or electroluminescent wire is a thin, flexible, self-illuminating wire that glows along its length and is meant to be used as a decorative light source.) for the second technique.
Blowing a bubble from a mixture of water and soap, and illuminating it against a black backdrop gives you a rainbow of colors to photograph.

Blowing a bubble from a mixture of water and soap, and illuminating it against a black backdrop gives you a rainbow of colors to photograph.
Sometimes the colors within the water and soap mixture will fill the entire bubble, other times, like in this example, part of the bubble will show off an array of colors, while smaller bubbles will form around the bottom of the larger bubble. Each one is unique.

Sometimes the colors within the water and soap mixture will fill the entire bubble, other times, like in this example, part of the bubble will show off an array of colors, while smaller bubbles will form around the bottom of the larger bubble. Each one is unique.
For this technique—photographing a blown bubble straight on to the camera. The small container of liquid is sitting on top of a mug, and faces the camera. The overhead softbox in this situation lights the bubble.

For this technique—photographing a blown bubble straight on to the camera. The small container of liquid is sitting on top of a mug, and faces the camera. The overhead softbox in this situation lights the bubble.
Bubble photography technique #1
The first set up is easy and can be done using simple household items.
First, find a table that allows you to shoot comfortably while sitting down.
Place black material underneath and behind your subject. Black poster board or fabric will work.
Next, create your bubble mixture. Mix three parts of water with one part dish soap. Add a little glycerin to this mixture. Stir up the mixture well.
Now find a receptacle for your bubble mixture. I like to use a lens cap. I place the lens cap on top of a mug to elevate it off the table for easy eye-level shooting.
Finally, you’ll need an overhead light placed about a foot above the bubble mixture. The larger the light source, the better results you’ll get. I use a small softbox with a continuous video light as my source of illumination. I position this using a light stand with a boom arm to put the light directly above the bubble. You can also use a Speedlight that’s placed so it shoots through a small softbox or other diffusion material to light your bubbles.
Here’s where the fun starts. Add your dish soap mixture to the cap filling it to the top. Next, take a straw and slowly blow air into the bubble mixture. Watch as a colorful bubble expands from the solution. Once the bubble is created, focus and shoot on the colorful soap residue. Larger light sources will illuminate more of the soap sheen. The glycerin should help hold the bubble together and prevent it from popping. I like to shoot at f/22 or higher to get as much depth of field as I can. If you don’t get a colorful soap sheen on the bubble, try a different brand of dish soap. Once you have a good bubble, keep shooting. You’ll be amazed at how different colors form and swirl on the bubble for quite some time.
For this technique—photographing bubbles in a container of water with colored lighting below, the camera is positioned straight over a container of water that has had a mixture of oil and glycerin added to it. The colorful lights beneath the container show through as diffused colors.

For this technique—photographing bubbles in a container of water with colored lighting below, the camera is positioned straight over a container of water that has had a mixture of oil and glycerin added to it. The colorful lights beneath the container show through as diffused colors.
Bubble photography technique #2
This time you’ll want to use cooking oil instead of dish soap to create the bubbles.
First, find a small clear glass container. I use a small glass food storage container. Ideally the container shouldn’t have any labels on the underside, otherwise it might show up in the final image.
You’ll need a way to suspend the container above the ground. I tape a few tomato stakes on the sides which allows me to place the container above the ground.
Next fill the container a quarter of the way full with water. Add a generous amount of cooking oil. If you like, add a little glycerin to help retain the bubble shapes.
Now you need to add a light source under the bubble mixture. I really like to use EL Wire colored cables (they can easily be found at online retailers). By mixing the color combinations I can create a variety of hues to illuminate the oil bubbles. You can also place an iPad underneath with a colorful screen to create similar effects.
Stir up the bubble mixture to create the bubbles. If you don’t see many bubbles add more oil to the water. Glycerin will help keep the bubbles from popping. Once the bubbles are created, give the mixture a moment to stop moving. I like to shoot at f/11 around ISO 3200 for this type of image. Be careful about photographing moving bubbles and using too slow of a shutter speed. Ideally you can shoot around 1/15 or faster, just wait for the bubbles to stop moving. If your bubbles are large, try shooting at f/22 for better depth of field.
Make sure to position your camera on a tripod pointing straight down into the oil/water mixture to get the most depth of field. If the front of the lens is parallel to the bubbles, you’ll be able to maximize the depth of field. Experiment with different color combinations to create a variety of abstract images.
Photographed from overhead, with colorful lights below, the oil and water mixture lets you create an array of unique images.

Photographed from overhead, with colorful lights below, the oil and water mixture lets you create an array of unique images.
Change the color of the lights below the container of water and oil mixture or focusing on a different area of bubbles you to create yet more abstract imagery.

Change the color of the lights below the container of water and oil mixture or focusing on a different area of bubbles you to create yet more abstract imagery.
Macro bubble photography is simple to do, and the results might surprise you. The next time you’re home on a rainy day, grab your camera, macro lens, tripod and head to the kitchen. Whip up some dish soap and water, and the let the macro photography begin!
Featuring Tom Bol
Tom Bol is an adventurous and inventive photographer with over 25 years experience shooting editorial, commercial, lifestyle and advertising assignments. He is the author of Adventure Sports Photography: Creating Dramatic Images in Wild Places. Examples of his work and information about his workshops can be found at tombolphoto.com.
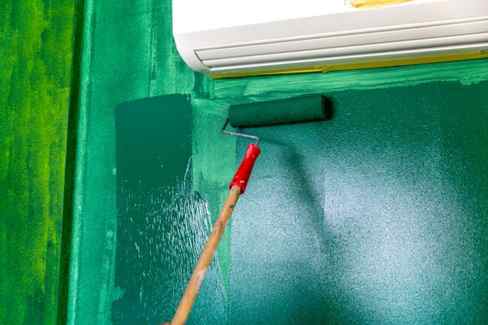
Eliminate Cissing

No matter the type of brush used, some paint won’t stick to a wall. The reason? Water-based paints can’t stick to oily surfaces, which is why you have to prepare the wall to receive the water-based paint. Here’s how to go about it: Wash the wall with soapy water, rinse, and let it dry. Lightly sand the surface and use a bonding primer, like Zinsser’s Peel Stop Triple Thick High Build Binding Primer before applying the desired paint color.
Remove the Wrinkling
A perfect paint finish isn’t usually achieved with just one coat, and forcing a thicker coat could lead to issues like wrinkling. Thicker paint coats, and paint that dries in extremely hot temperatures, can wrinkle. Fixing this issue involves sanding the wrinkles, cleaning the area, and then repainting when temperatures are mild using less paint per coat. Choosing high-quality paint from the best paint brands can also help ensure a top-notch finish.
Wipe the Lid
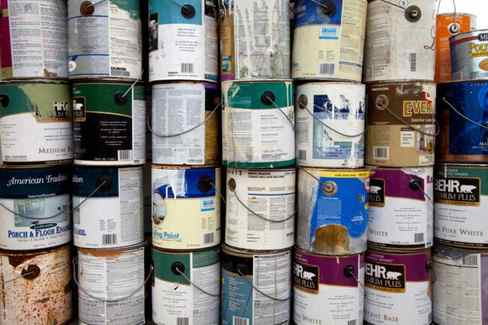
If you complete your project and have some leftover paint, you can save it for another fun DIY. When storing paint, make sure the lid is tightly sealed without wet paint in the rim; leaving paint on the rim may paint the can closed. The Paint Can Lid from Shur-Line keeps the paint safely stored and includes a pour spout to make the next paint job easier.


