If you like this Reverse Canvas Heart Wall Art, but you don’t feel like making it yourself, that’s fine. You can purchase heart wall art, like the 3D heart canvas above, at the following stores:
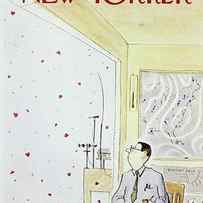
Reverse Canvas Heart Wall Art Tutorial

This Reverse Canvas Heart Wall Art is a super simple craft to make at home and display for Valentine’s Day.
To make sure this is the best holiday ever, check out our other Valentine’s Day posts for more inspiration.

I love Valentine’s Day because it’s all hearts and love and happiness. And we all could use some more of that in our life every day.
You can add a little of it to your décor with this Reverse Canvas Heart Wall Art.
It’s really easy to make. And you probably have all the supplies for it at home, except maybe for the reverse canvas. But if that’s your only expense, that makes this a really cute and affordable craft.

This Valentine’s Day Wall Art is just one of our Valentine’s Day crafts on Drugstore Divas. For more, check out our Easy To Make Valentine’s Day Crafts & Treats post.
Reverse Canvas Heart Wall Art Tutorial
Affiliate links are included in this post and Drugstore Divas may make a small commission if you use them.

Reverse Canvas Heart Wall Art Supplies:
- Stretched canvas
- Scissors
- 1 sheet of printer paper
- Pencil
- Black acrylic paint
- Baby wipe
- Red acrylic paint
- Paint brush
- Glue
How To Make Reverse Canvas Heart Wall Art:

Carefully pull the canvas off of the wooden frame.
You may need to use the scissors to help you remove the canvas from the frame. Don’t worry about removing the staples. But, if they come out, that’s okay.

Measure the inside of the frame onto the sheet of printer paper. Cut out that shape from the paper.
Fold one-quarter of that page over.
Cut a heart from the paper, using the center fold as the center of the heart. Don’t go all the way to any of the edges. You want to leave room around the edges.

Lay the frame on top of the canvas. Use that to position the heart cutout in an appropriate space.
Use the pencil to lightly trace the heart shape onto the white side of the canvas.
Paint the heart shape with red acrylic paint. Let it dry.
Trim the edges of the canvas down to the size that will fit behind the frame.
Put a little of the black paint onto a baby wipe (or a napkin).
Use the wipe to “paint” the frame. This will make it look like a wood stain rather than acrylic paint.
Set it aside to dry.
Glue the frame to the canvas. Make sure to pull the canvas tight so it doesn’t bubble.
Let it dry and display wherever you like.
Reverse Canvas Heart Wall Art: Frequently Asked Questions
What is a reverse canvas project?
A reverse canvas project is when you take a store bought stretched canvas (also known as a back stapled canvas) and turn it into wall art.
This technique is really popular with at home crafters because you have the canvas and the frame in one piece. You don’t have to worry about buying both a canvas and a frame that fits or buying a canvas and using power tools to make a wooden frame.
Which side of canvas do you use for reverse canvas?
When you’re making a reverse canvas project, you want to be mindful of two things: the side of the canvas you paint on and the side of the frame you paint.
You want to paint on the white side of the reverse canvas. The tan side was always meant to be the backside and the white was always meant to be the frontside. So be conscious of that when you’re painting.
For the frame, you want to paint the side without the staples. The side with the staples will be glued against the canvas and you won’t see them. That’s why you don’t need to worry about pulling out the staples when you’re removing the canvas from the frame. You won’t see them anyway.
What type of canvas do you need to make a reverse canvas?
You need to purchase a stretched canvas to make a reverse canvas. The stretched canvas wraps around the frame. A standard canvas board doesn’t do that. So, if you try to take one of those apart, you won’t have the extra canvas to glue onto the back of the frame once you take it apart.
Do you have to use a baby wipe to paint onto the frame?
Using a baby wipe is a really cool painting hack. You’re able to make acrylic paint look like a wood stain — for a fraction of the price. Wood stain is expensive and it’s not worth it to purchase it just for a simple project.
The baby wipe applies a thin layer of paint with extra liquid, so you’re able to spread the paint out in a way that you can’t when you’re using a paint brush and acrylic paint.
If you don’t have any wet wipes in your home, you can wet a napkin or paper towel and then use it to apply the paint. That will work, but a napkin or paper towel is less durable than a wet wipe, so you run the risk of it falling apart and leaving debris behind on your frame. Just be conscious of that and wipe it away before it dries.

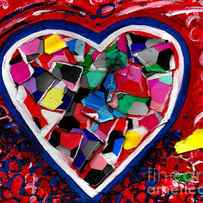
Heart Shape Paintings


Filters
- Men’s T-Shirts
- Men’s Tank Tops
- Women’s T-Shirts
- Women’s Tank Tops
- Long Sleeve T-Shirts
- Sweatshirts
- Kid’s T-Shirts
- Baby Onesies
- Face Masks
- iPhone Cases
- Galaxy Cases
- Portable Battery Chargers
- Yoga Mats
- Tote Bags
- Weekender Tote Bags
- Carry-All Pouches
- Coffee Mugs
- Jigsaw Puzzles
- Beach Towels
- Round Beach Towels
- Weekender Tote Bags
- Carry-All Pouches
- Portable Battery Chargers
- Tote Bags
- Weekender Tote Bags
- Carry-All Pouches
- Original Artwork for Sale
- Gift Certificates
- Sample Kits
- Create Your Own Products


Baby Onesies Favorites

Baby Onesies Favorites

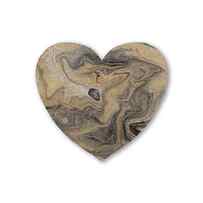
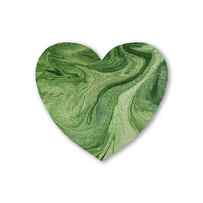
Hearts in Every Form


Wild Apple Graphics


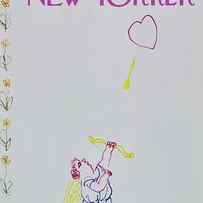


Audrey Jeanne Roberts


Holy Rock Design


More from This Artist Similar Designs
Nyan Cat Valentine Heart Painting
Heart Painting with Cardboard Tubes
Valentine’s Day is already next week! I have an easy activity for you today to help celebrate. Heart Painting with Cardboard Tubes is super easy and a lot of fun. Plus it is a great art project for kids of all ages.
We have done two similar art projects using just circles but this one is so much prettier! I hope you will love this simple Valentine’s Day painting activity as much as we did.
This post does include affiliate links. That means I could earn a tiny portion of any sale that is made through clicking on any of these products with no additional cost to you. All support is greatly appreciated!
Heart Painting Supplies
The supplies for this heart printing project are super simple! You probably have everything you need already.

Here is a list of supplies we used including the colors for paint. Feel free to change it up and use your own choice of colors.
- Cardboard Tubes
- Paint – pinks, purples, teals and reds
- Paper or Canvas
- Paper Plate to hold paint colors
How to Make Heart Prints with Cardboard Tubes
To begin this art project, shape a recycled cardboard tube into a simple heart. Do this by folding a crease in the top and bottom of the cardboard tube. Invert the top crease to form a heart shape.

The tubes can be tricky to hold their shape. I tried using a rubber band but the size didn’t really work. So I wrapped a toddler size hair band around the tube to help make the heart stamping easier.
Just dip the heart shaped portion of the tube into the paint and stamp onto paper or canvas. Repeat this process until you think you have enough hearts using a variety of colors.

We used several different tubes so that each tube had its own color. This may not be necessary though.
This project was done on a large piece of white paper from a roll of craft paper. You could easily use this as handmade gift wrap. Another option is to stamp the hearts on a blank card to create your own Valentine cards.

This Heart Art turned out so pretty and was so simple to make. We ended up using this to decorate a shoebox for her Classroom Valentine Mailbox.
Looking for more Valentine’s Day Ideas? Be sure to take a look at our Sweetheart Strawberry Smoothie Recipe or Glitter Heart Crayons.

Share this:
- Click to print (Opens in new window)
- Click to share on Pinterest (Opens in new window)
- Click to share on Facebook (Opens in new window)
- Click to share on Twitter (Opens in new window)


