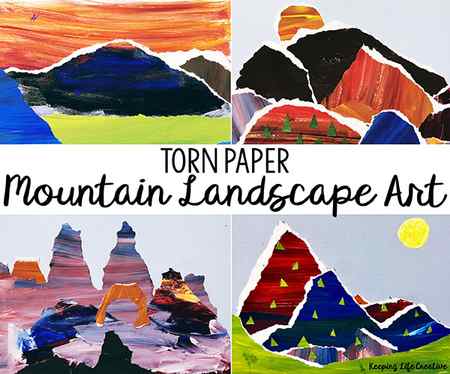
Torn Paper Mountain Landscape Art Tutorial
Whether you’re teaching about faith to “move a mountain,” or geology and mountain land forms — this Torn Paper Mountain Landscape Art Tutorial will help you create unique and memorable visuals to help kids better remember and apply the lesson.
Our family is pretty “normal” — sibling rivalry, messy bedrooms, exhausted parents, way too much sugar and screentime. But we know our flaws and do our best to forgive, learn and grow. One of the ways we try to end the day with peace in our home is by reading the scriptures and praying together before bedtime every night (or almost every night!). And then at least once a week we try to go deeper with a family night lesson or activity.
It’s a constant juggling act, and even with our best intentions, the lessons and discussions don’t always go well. But sometimes they do. And sometimes they’re worth sharing!
Family Lesson on Having the Faith to Move a Mountain
We’ve been studying the New Testament and were talking about Matthew 17:20 and having the faith to move mountains.
- We read this quote: “I have never witnessed the removal of an actual mountain. But because of faith, I have seen a mountain of doubt and despair removed and replaced with hope and optimism. Because of faith, I have personally witnessed a mountain of sin replaces with repentance and forgiveness. And because of faith, I have personally witnessed a mountain of pain replaced with peace, hope. and gratitude. Yes, I have seen mountains removed.” (Richard C. Edgley)
- And then talked, “What are some mountains in our lives (or family) that need to be moved?” (contention, anger, sugar addiction, doing chores with a bad attitude, etc.)
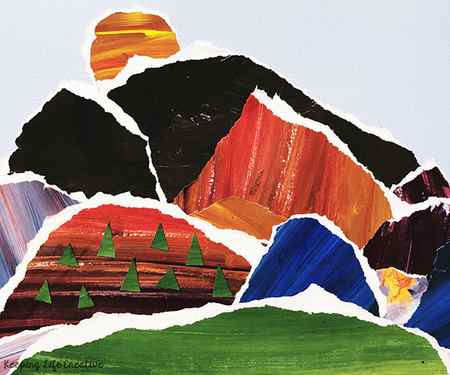
Next we created a visual reminder of our personal “mountains” with torn painted paper. I LOVE how these torn paper mountain landscapes turned out. And I LOVE the discussion we were able to have around the table while hands were busy! Here’s how we made them:
Torn Paper Mountain Landscape Art Tutorial
- white card stock
- tempera paint
- paint brushes
- gray or light blue card stock
- glue sticks
- pencil or marker
1. Begin by painting several sheets of card stock with various colors of paint. This is a good activity to do ahead of time since the papers will take a while to dry. Sometimes we keep a stash of painted papers for projects, but this time I had my kids paint the papers while I made dinner.
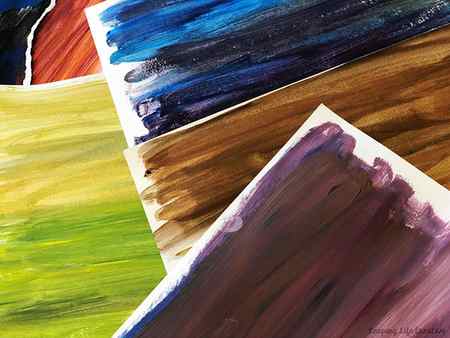
SEE ALSO: HOW TO MAKE PAINTED PAPER
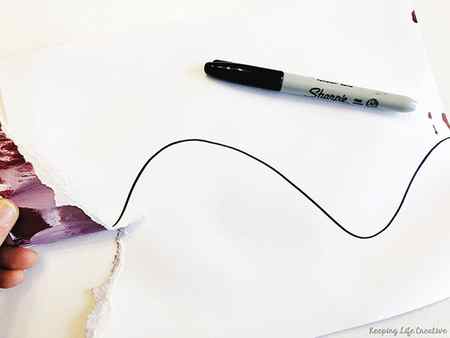
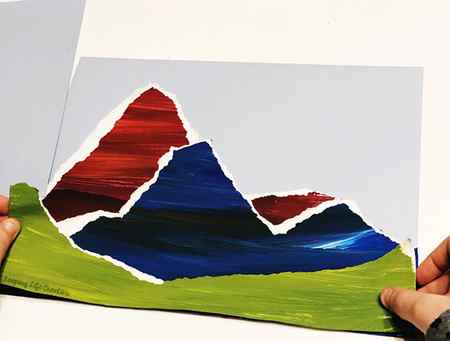
2. When painted paper is dry, turn the paper to the unpainted side and draw a large “mountain” shape with the pencil or marker (this step is optional, but easier for younger ones). Then tear along the sketched line to create a mountain shape. We’re not going with perfection here, we’re just using that line as a guide.
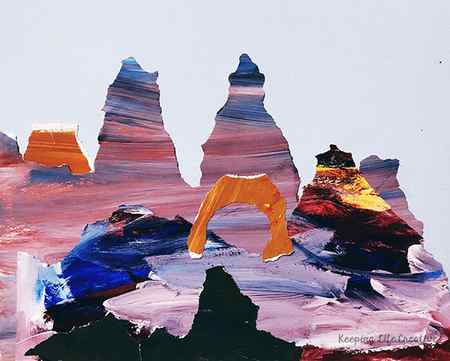
3. Repeat until you have several “mountain” layers. Arrange the torn paper layers on the gray/blue background paper to create a mountain landscape scene.
ADD THE FINISHING TOUCHES TO YOUR TORN PAPER MOUNTAIN LANDSCAPE ART
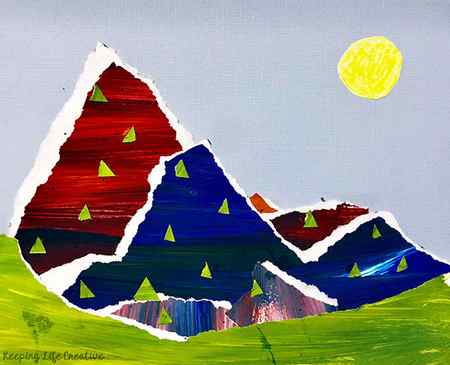
4. To finish the mountain landscape project, glue the layers in the order you’d like. Cut mini triangle trees or add other details — like a sun, if desired.
HERE ARE SOME BOOKS YOU MAY WANT TO READ ALONG WITH THIS PROJECT:
- On the Mountain
- Colorful World: Mountain
- Above and Below
- What’s Above?

Looking for more simple (and creative) projects and books for kids? Be sure you’re hanging out in our Facebook community: Keeping Life Creative with Books.
Share this:
- Click to share on Twitter (Opens in new window)
- Click to share on Facebook (Opens in new window)
- Click to share on Pinterest (Opens in new window)
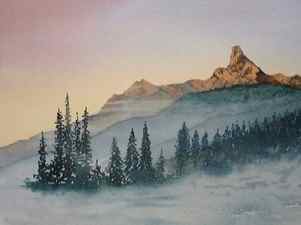
Painting a Mountain Landscape
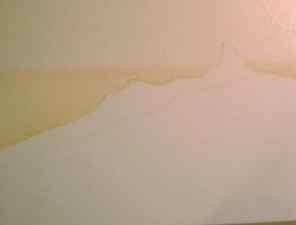
We only need a few guidelines in order to mark the mountain range and the foreground hills.
Three lines are drawn, make your own choice of mountain peaks.
Next, mix up three washes:
1. Raw sienna.
2. Ultramarine with a touch of light red.
3. Alizarin crimson with a touch of Ultramarine

Turn your board upside down with it tilted about 15 degrees being high at the back.
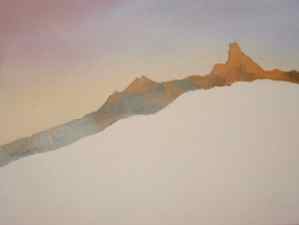
Wet the sky area with only clear water.
While damp, apply the wash of raw sienna along the mountain top line, allowing it to run down as you apply. As the board is upside down, it will run away from the mountain line towards the top of the sky.
You will need to work fairly quickly as you need to finish the sky area before it dries.

Turn your board around so it is positioned the correct way with the back still raised about 15 degrees.
Apply the ultramarine wash along the top and allow it to merge with the sienna wash.
Now while still wet, apply the alizarin to the top left corner only, allowing it to merge with the previous washes. If necessary tilt the board more or less as needed to get the merging you wish.
Now lay the board flat and allow to dry completely.
Mix up some burnt umber and raw sienna. Keep your ultramarine mix handy as well.
Starting at the right side paint in the mountains starting with your burnt umber, as you work, alternate between the two colours and eventually, as you get to the lower mountain (left area), use only ultramarine.
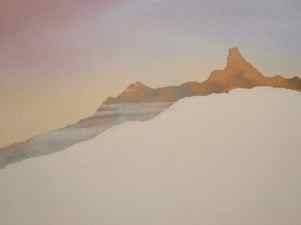
We need to make the left side look as though it is in mist. Using a crumpled up piece of tissue, kitchen towel, or toilet paper, dab the wet paint to lift some leaving it patchy and lighter.
Now allow it to dry.
We also need to lift out some lines of paint. Using a damp chisel brush, run the brush across with light horizontal strokes and then dab the wetted lines. This will lift thin bands of paint.
As the paper had dried before we started, it was more controllable.
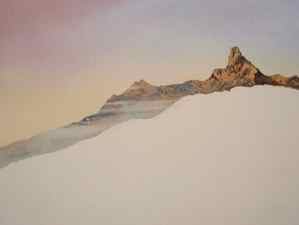
Add some ultramarine to your burnt umber mix to darken.
Paint in the shadow areas along the mountain tops. Make the shapes varied.
Use a strong mix on the top sun lit peaks. As you work along to the misty area weaken the mix as you go.
Shadows will not be as strong here.

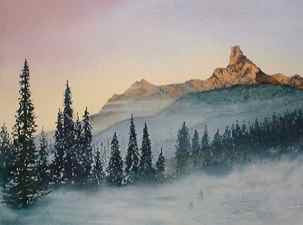
First I wet the area below the mountain line with clear water, using a mix of ultramarine and a touch of yellow to give a blue/green.
I ran a few quick strokes of colour across the damp paper and allowed it to disperse slightly.
Leave this to dry, then using the same mix, paint in the shapes to indicate the distant pine forest.
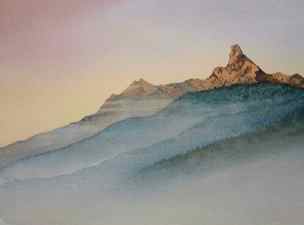
Separate some of the blue/green mix and add water to weaken. The next line of distant forest-covered hills needs a hard line at the top, but a soft disappearing line at the bottom.
To achieve this effect, use a damp mop brush to wet the paper from one side to the other. Work about one inch below the tree hill line you are going to paint.
Paint along the line, and as you progress lower, you will meet up with the damp paper and your paint will disperse, giving a soft dissappearing edge.
You will paint from a dry area of paper into a damp area.
Allow the paper to dry and then repeat the process for the next line of tree tops. This time, use a stronger mix as the trees are closer.
Once again allow the paper to dry. This can be speeded up with the use of a hairdryer.
The bottom of the foreground trees disappear into mist.
Decide where the bottom of the trees will be and wet this area across the paper with a damp mop brush.
Wet only the bottom area, as the tops of the pines will be hard edged, so the paper will need to be dry here.
Using the stronger blue/green mix paint in the line of pine tress. Vary the height and width of the trees.
As you get to the bottom of the trees your paint will be into the damp area and will disperse. As you get into this area, manipulate the paint if necessary to improve the misty look. Some of it may need to be lifted using a tissue.
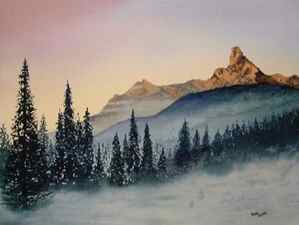
I allowed the back line of trees to dry completely, then I wet the bottom foreground again.
I painted the foreground trees once again starting at the top onto dry paper and working down into the damp area.
While the foreground paper was still damp I dropped in the odd streak here and there to indicate ground showing through the mist.
I also went back and darkened the top of the distant hills to give more contrast against the sun lit peaks.
Happy Painting!
Rod.


