Now that you have a folder ready for the new material you will be creating, you will want to open a new project in Clip Studio Paint.
How to Create Custom Brushes
PaintShop Pro comes with a wide selection of brush tools that you can use to add some unique and creative elements to your photos. In this tutorial you’ll learn how to save your preferred brush settings like shape, density, thickness, size, rotation and more. You’ll also learn how to make a custom brush using a selected shape or image.
Want to learn more about the brush tools? Check out our tutorial on Using Brushes in PaintShop Pro.
See what’s new in PaintShop Pro 2023!
Download your FREE 30-day trial and make every shot your best shot with PaintShop Pro 2023, your all-in-one photo editing and design software.
What’s New in PaintShop Pro
- What’s New in PaintShop Pro 2023
- How to use Focus Stacking
- Introduction to AfterShot Lab
- How to use the Frame tool
- Instant background replacement
- New AI Portrait Mode
- Enhanced AI Style Transfer
- Enlarging Photos with AI Upsampling
- Removing Noise from Photos with AI Denoise
- Removing JPEG Artifacts from Photos
- Exploring PaintShop Pro’s Sea-to-Sky workspace
- How to Use the Picture Tube Tool
- Create a Filmstrip with your Favorite Photos
- Create Scrapbook Pages
- How to Make a Polaroid Photo Border
- Creating a 3-layer Collage
- Creating a Multi-layered Artistic Poster
- Creating a Photo Collage
- Make a Facebook Cover Collage
- How to Create Custom Brushes
- Turn your Photos into Playing Cards
- Create a Filigrane Element
- Creating Ribbon Loops
- Write a Message in the Sand
- How to Create Confetti
- How to Use the Folded Edge Script
- Create a Folded Edge
- Using the Wooden Window Script
- Webinar: Working with Picture Tubes in PaintShop Pro
- Webinar: Creating a Digital Scrapbook
Artistic Tools and Projects
- Enhanced AI Style Transfer
- Adding picture frames to your photos
- How to Use the Picture Tube Tool
- How to use the Shape tools
- How to Use the Pen Tool in PaintShop Pro
- Turn your photos into paintings
- Create a Dreamy Effect on a Portrait
- Turn a Photo into Pop Art
- Outlining with the Pen Tool
- Create a Cartoon Portrait
- Painting with the Art Media Tools
- Using the Brush Tools
- Create a Silhouette Image
- Webinar: Working with Picture Tubes in PaintShop Pro
- Webinar: Turning Snapshots into Artistic Portraits
- Webinar: Adding Glamour with Brushes
- Double Exposure Photo Effect
Tools You Need
Create something incredible with the pro-level editing and design tools plus a bonus pack of premium software in PaintShop Pro 2023 Ultimate.
Sometimes less is more! With these 5 scripts for PaintShop Pro you can give your photos a clean, minimal style that’s suitable for all kinds of images.
Make every shot your best shot with PaintShop Pro 2023, the pro-level photo editing and design software made simple and affordable.
If you love scripts, and you love a good deal, the Ultimate Script Bundle Vol. 2 is for you. Includes 70 premium PaintShop Pro scripts.
Saving or deleting document brushes
Click Manage brushes in the Properties panel. Use the Manage brushes option to save the new brushes for future usage or delete unused brushes from the document.
In the Manage Document Brushes screen, select a single brush or select multiple brushes.
Click Save to save the brushes or Delete to delete the brushes from the Brush library. You can view the saved brushes within My Brushes family in the Brush Library.
In the Brush Library, the Brush family name is same as the document name within which it is created. Brushes from two different documents with the same file name are saved within the same family in the Brush Library.
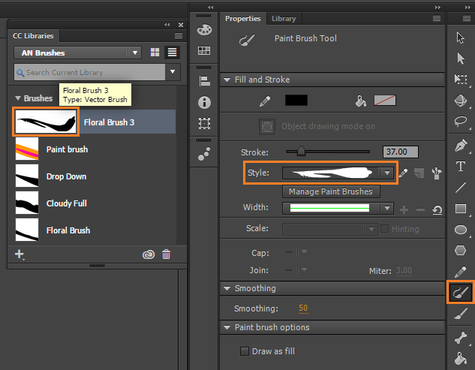
Using Brushes from the Brush library
In the Brush Library panel, select one or more brushes or click on a brush family.
Click on the Use in document button at the bottom left-hand corner of the panel to add the selected brushes to the document. The brush is displayed in the Stroke drop-down list in the Properties panel.

You can also double-click on a brush to add it to the document.
To delete unwanted brushes from My Brushes family, click the Delete button at the bottom of the panel.
Pressure and Tilt in Paint Brush
Animate provides Pressure and Tilt support for strokes drawn using the Paint brush tool. You can draw art and pattern strokes with variable width, dependent on the applied pressure or tilt on the stylus. For further refinement, use the Width tool to adjust the width points.

Pressure and tilt icons in the tool bar are displayed only if you have connected a Wacom pressure-sensitive tablet to your computer.
Save your material
To save your brush, click Edit → Register Material → Image…

Once you click on Image… a settings window will appear with some options we will need to change.

- Change the name of your brush Material to something recognizable.
- Underneath the preview window for your brush, select the option that says Use for Brush Tip Shape
- Select the folder you created at the beginning in Materials as the location to save your brush shape to.
Create your brush
Now that you have your material saved, it is time to assign it to a brush. For this, you will need to create a copy of an existing brush. To do so, right-click on a brush. It does not matter what brush you select for this since you will be replacing it. For my convenience, I used the Astropad Studio magic gesture to right-click. Next, click Duplicate Sub Tool on the menu that appears.

Next, a small settings window will appear for your duplicated brush tool. Be sure to name your duplicated brush something recognizable as this is what we will be applying that material we created to. Once your brush is named, you can click OK.
Once your custom brush tool is created:

- Select it and click on the Tool Property tab.
- Click on the wrench icon at the bottom of the Tool Property tab. This will open a new window.
- Click on Brush tip then on Material. This will open a material selection window.
- For ease of access, click on the Created material tab and select your brush material from the list.
- Click OK to assign this material to your brush.
Be sure to make any adjustments you’d like in the brush settings window and then click Save all settings as default.

Now you are ready to use your brush in your next project! We recommend trying out your new Clip Studio Paint brush with Astropad Studio. Not only can you customize your brush use even further through adjustable pressure curves, but you can also use touch gestures to streamline your workflow!
Get started today with Clip Studio Paint on your iPad
Get the most out of CSP with your iPad! Try out Astropad Studio with our free 14-day trial. No commitments, cancel any time.

- Mirror any desktop app on your iPad
- Compatible with Mac and PC
- Build your own shortcut panel, custom gestures, and custom quick keys
- Utilize pressure-sensitive and precise sculpting and painting
- Connects over WiFi or USB cable


