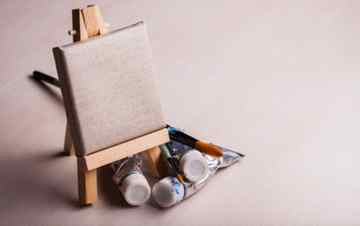
Impasto art is usually made with one of two kinds of paint, oil or acrylic – but what is impasto paint exactly? Oil paint is naturally thick enough for impasto techniques, but has a very slow drying time. Acrylic paint must be mixed with an appropriate medium for impasto painting, but it will dry faster than oil paint. Whichever paint you use will depend on your budget and experience, although if you are a beginner we recommend using acrylic paint with some mediums, as it isn’t as expensive as oil paint and it is odourless and water-based, making clean up easier as well.
10 Easy DIY Techniques for Creating Textured Canvas Art

Are you seeking a fun and creative way to spruce your living space? Textured canvas art is a great way to add a unique and personalised touch to any room. Creating textured canvas art is a fun, fulfilling activity and an affordable way to decorate your home.
In this post, we will explore ten easy DIY techniques for creating textured art canvas that will allow you to unleash your creativity and produce stunning works of art. Whether you are a seasoned artist or a beginner, these techniques are easy to follow and will help you to create beautifully textured canvas art pieces that you can proudly display in your home. Let’s start and see how we can turn a blank canvas into a work of art with simple and creative techniques.
Overview of Textured Canvas Art
Textured canvas art is a great way to add a unique and personalised touch to any room. It can range from abstract designs to landscape paintings, allowing you to express yourself in whatever way you choose. With texturing, you can use various materials such as sand, fabric, or even dried paint to give your artwork additional depth and interest.
10 DIY Techniques for Creating Textured Canvas Art
Technique #1 – Painting with a Palette Knife
Painting with a palette knife is a simple and effective way to create textured canvas art. Here’s how you can do it:
- First, choose your paint colours and a sturdy palette knife.
- Next, apply a thick layer of paint to the canvas boards.
- Next, use the palette knife to create texture by scraping and dragging the colour in different directions.
- Experiment with different strokes and angles to create a variety of surfaces.
Technique #2 – Stenciling
Stenciling is a quick and easy way to add texture to your canvas. Here’s how to do it:
- Choose a stencil that you like.
- Place the stencil on the canvas and hold it in place.
- Use a brush or sponge to apply paint over the stencil.
- Carefully remove the stencil to reveal the textured design.
Technique #3 – Adding Sand
Adding sand to your paint can create a textured surface on your canvas. Here’s how to do it:
- First, mix a small amount of sand into your paint.
- Then, apply the paint to the canvas using a brush.
- Next, use a palette knife or spatula to create additional texture by scraping and dragging the paint in different directions.
Technique #4 – Creating a Collage
Creating a collage on your canvas is a fun and easy way to add texture. Here’s how to do it:
- Collect various materials like fabric, paper, and natural materials like leaves and twigs.
- Cut or tear the materials into small pieces.
- Apply a layer of glue to the canvas.
- Place the materials onto the glue, overlapping them to create texture.
- Allow the glue to dry.
Technique #5 – Using a Textured Roller
Using a textured roller can create a unique pattern on your canvas. Here’s how to do it:
- First, choose a textured roller that you like.
- Next, apply a layer of paint to the roller.
- Finally, roll the paint onto the canvas.
- Repeat the process, overlapping the previous layer of paint to create a textured surface.
Technique #6 – Adding Crumpled Paper
Adding crumpled paper to your canvas can create a 3D effect. Here’s how to do it:
- Crumple a sheet of paper.
- Apply a layer of glue to the canvas.
- Place the crumpled paper onto the glue.
- Flatten the paper onto the canvas.
- Allow the glue to dry.
Technique #7 – Using a Toothbrush
Using a toothbrush can create a fine, spattered texture on your canvas. Here’s how to do it:
- Dip a toothbrush into your paint.
- Hold the toothbrush close to the canvas.
- Use your finger to flick the bristles, splattering the paint onto the canvas.
- Repeat the process to create a textured surface.
Technique #8 – Using a Sponge
Using a sponge can create a soft, mottled texture on your canvas. Here’s how to do it:
- Dip a sponge into your paint.
- Dab the sponge onto the canvas, overlapping each dab to create a textured surface.
- Experiment with different sponge shapes and sizes to create different textures.
Technique #9 – Adding Tissue Paper
Adding tissue paper to your canvas can create a delicate, textured surface. Here’s how to do it:
- First, cut or tear small pieces of tissue paper.
- Next, apply a layer of glue to the canvas.
- Place the tissue paper onto the glue, overlapping the pieces to create texture.
- Allow the glue to dry.
Technique #10 – Creating a Drip Effect
A drip effect can create a textured, abstract surface on your canvas. Here’s how to do it:
- First, tilt your canvas at an angle.
- Drip paint onto the top of the canvas.
- Allow the paint to drip down the canvas, creating streaks of colour.
- Experiment with different colours and thicknesses of colour to create other effects.
Introduction: 5 WAYS to Make TEXTURES on Your Art Canvas | Painted Wall Art DIY

By FernMakes Visit my Channel! Follow
More by the author:

About: Multi-crafter, jewellery maker, card designer and frequent procrastinator. More About FernMakes »
I always like to learn new ways to add texture to my arts ‘n’ crafts, because that’s where you can add dimension and therefore make something much more interesting. This tutorial goes through 5 ways of adding texture with easy-to-find items, from eggshells to toilet paper 🙂
I hope you like it!
Add Tip Ask Question Comment Download
Supplies
Add Tip Ask Question Comment Download
You can really paint the canvas any colour but I had black to hand already so that’s what I used 🙂 Simply paint the entire canvas including the edges.
Add Tip Ask Question Comment Download
Step 2: Toilet Paper Texture
This one is my favourite texture! Feel free to build up more layers of the paper for a more 3D effect, and obviously feel free to get creative with the pattern you make – you don’t have to do the same as I’ve done.
First, dilute (wood) glue slightly in a plastic cup to make it runnier. This is so it will more easily absorb into the paper.
Paint a band of the glue mixture across the centre of the canvas, then lay one layer of toilet paper on top.
Add more glue on top and stipple it into the paper with your paintbrush. Coat all of the paper. You don’t want to drag the brush across as this will rip the paper.
Repeat this twice more so you have 3 layers of paper in total, with the glue mix on top.
Use your brush in an up-and-down motion to carefully push the wet paper into ‘hills’ in whatever pattern you like. I started from the centre and pushed the paper out into a ripple pattern.
Remove the excess paper.
I wanted 2 smooth bands above and below so I just added stripes of (undiluted) PVA glue as well.
Add Tip Ask Question Comment Download
Impasto painting techniques, tips and tricks
Here are some extra handy hints to make your textured painting journey a little smoother and a whole lot more fun!
- Loaded your painting knife with too much paint and now there’s way too much colour on your canvas? Don’t worry – scrape it back off with a clean painting knife while it’s still wet. Has your paint dried and you don’t like the look of it anymore? Carefully scrape it away with your palette knife until the offending colour is gone. And who knows, scrape away too much and you may reveal a surprisingly well-fitting colour underneath!
- Paint thick over thin to avoid cracks forming in your painting. Because thin layers dry faster than thick layers, ensure your thickest layers (your peaks) are on top. If you apply a thin layer over these peaks, the thin layer will dry before your peaks and then will crack as the peaks themselves dry.
- Angle your brush and apply only gentle force when adding colours and painting sections. Too much force will disrupt your lower layers of paint and will either displace them or muddy them together.
Palette knife painting ideas
- Painting flowers with a palette knife – the shape of a palette knife is perfect for painting the petals of flowers, as you can see in our images. You can create incredibly detailed and beautiful flower art by simply pressing a loaded palette knife onto your canvas to create a petal shape, and repeating to make large, textured flowers.
- Painting the ocean with a palette knife – recreate the wavy surface of the ocean using your palette knife! Creating peaks and waves – literally – is a wonderful way to illustrate the ocean, and you can use multiple shades of blue to represent the different depths of the ocean itself.
Because of the wonderful textures of a finished impasto painting, any sealants or varnishes will need to be applied via spray. A varnish will protect your painting from dirt and moisture, and in the case of textured artwork, it will stop dust from settling in the crevices of your painting.
When your painting is completely dry, carefully wipe it over with a dry cloth to get rid of any existing dust. Make sure you are in a well-ventilated area and place your painting upright. Shake the can well and apply evenly over the surface of the painting – check the can for specifics on how far back to stand, how many coats to apply etc.
Once you are done applying your varnish, cover your painting with some sort of protective tent so the varnish can dry without the worry of having any dust or insects sticking to it.
Try not to display your painting in direct sunlight, as this can damage the paints and cause your painting to fade.

Find everything you need for impasto art at Spotlight
Have we inspired you to begin impasto painting? If so, you can find an excellent range of paints, canvases and other painting accessories right here at Spotlight! Browse our range of art supplies online, where you can choose from a great range of payment options, as well as click and collect or home delivery for your order. You can also pay your local Spotlight store a visit and our lovely team will help you find all the impasto painting supplies you need!
For more great painting ideas and inspiration, have a read of our create blog, or check out our handy painting projects page.


