6. One of the most fun art projects I’ve found is putting a fun shaped paper inside a plastic baggie with a few squirts of paint. Seal it up and squish it around to create cool colors. From Toddler Approved
10 Simple Painting Projects To Keep Your Little One Happy & Occupied!

There are plenty of lovely painting projects that you can do with your little one at home, using commonly available items. Plastic bottles, bubble wrap, rolling pins, sponges, and even paper plates can be used in these art projects! Doesn’t that sound like fun? Let’s have a look at 10 such creative activities!
Age group: 2 – 3 years, 3 – 4 years

What you need:
- Sponge
- Paints
- Paintbrushes and containers/palette
- Big sheet of plain paper/newspaper
Instructions:
- First, take out a few different colours in different containers. If you want to make a rainbow, then take out those colours.
- Next, help your child (or do it yourself) apply the paints to the sponge with the help of a big, thick paintbrush. To make a rainbow, apply the colours in the order they appear in a rainbow!
- Then, all that’s left to do is give your child the painted sponge, and let him run it all over the plain paper/newspaper, in whatever pattern he wants!
2. Bubble Wrap Painting
Age group: 2 – 3 years, 3 – 4 years

What you need:
- Bubble wrap pieces
- Paints
- Paintbrushes and containers
- Plain paper
- Scissors
Instructions:
- Start by cutting up the bubble wrap into small pieces. If you like, you can cut it up into different shapes like circles, squares, triangles, stars, etc.
- Next, take out different coloured paints in separate containers.
- Then, let your child pick out a piece of bubble wrap, and help him apply paint to the bubble-y side of it with a paintbrush.
- Help him press the painted side onto the plain paper (not too firmly, as the bubbles might pop!)
- Repeat this with other shapes and colours, till the paper is filled!
3. Splatter Painting
Age group: 2 – 3 years, 3 – 4 years, 4 – 6 years
What you need:
- Paints
- Water
- Containers
- Paintbrush/spoon
- Large canvas (chart paper/newspaper/cardboard/old bedsheets or clothes)
Instructions:
- First, lay out the painting zone. You can do it outside in your garden or balcony, or indoors. Make sure to lay down old newspapers or cloths to catch the splatters of paint that don’t make it onto the canvas.
- Using old bedsheets or t-shirts as the canvas are great recycling ideas, not to mention very exciting for your child to be able to paint on cloth!
- Next, take out different paints in separate containers, and water them down to make them more fluid and thus easier to splatter.
- Then, simply hand your child a paintbrush or a spoon, show him how to flick his wrist and ‘throw’ the paint at the canvas, and sit back and watch him go at it!
4. Spin Art
Age group: 3 – 4 years, 4 – 6 years

What you need:
- Paints
- Paper plates
- Plain paper
- Paintbrushes
- Containers/palette
Instructions:
- First, help your child take out different paints in separate containers.
- Then, using a paintbrush, let him apply dollops of paint to the outer surface of a paper plate. You can use multiple paper plates and multiple colour combinations!
- Lastly, on a sheet of paper, turn over the plate with the paint side down. Let your child spin and slide and twirl the plate around the paper to make colourful patterns and designs!
5. Rolling Pin Art
Age group: 3 – 4 years
What you need:
- Paints
- Plain paper/newspaper
- Rolling pin
Instructions:
- For this super simple activity, join some sheets of paper or newspaper together to make a large canvas for your child.
- Then, drop or squirt different paints all over the canvas.
- And then, give your child a rolling pin, and let him roll it over the paints on the canvas, having plenty of colourful and creative fun!
6. Shaving Foam Marble Painting
Age group: 3 – 4 years, 4 – 6 years
What you need:
- Paints
- Shaving foam
- Water
- Wide and shallow container
- Plain paper
- Cardboard
- Paintbrush/wooden stick
- Dropper (optional)
Instructions:
- Begin by spreading a layer of shaving foam on the bottom of the wide and shallow container.
- Take some paints out in separate containers, and add a little water to them to make them more fluid.
- Then, with the help of a dropper or a paintbrush, let your child drop dots of the different paints all over the shaving foam layer.
- With a wooden stick or the bottom of a paintbrush, he can swirl around the paints in the shaving foam to get a ‘marbled’ look (think of what marble cake looks like!).
- Press a piece of plain paper into the shaving foam-paint mixture, then lift it up and turn it over. With a piece of cardboard, swipe away the shaving foam and put it back in the dish.
- You’ll be left with paper that is beautifully marbled and colourful! Let dry. Repeat with different colours!
7. Bag Painting
Age group: 2 – 3 years, 3 – 4 years

What you need:
- Paints
- Plain paper/newspaper
- Pencil and scissors
- Plastic zip-locked baggy
Instructions:
- First, draw and cut out the shape of a heart, circle, star, or any other object from plain paper or newspaper.
- Then, take a big plastic bag with a ziplock, and have your child put the cutout inside. Help him drop or squirt some paints in there, too.
- Now, it’s a fun time for your child! Zip up and secure the bag well, and then let him squish, squeeze, crumple, shake, and roll the bag however he wants.
- When he’s done, open the bag carefully, and make sure that the cutout is completely coated with paint. Take it out carefully, and leave it to dry.
8. Ice Cube Painting
Age group: 2 – 3 years, 3 – 4 years

What you need:
- Paints
- Water
- Ice trays
- Wooden sticks
- Plain paper
Instructions:
- First, let’s make the paint ice cubes. In an ice tray, add different paints in separate compartments. You can add other colours on top if you like. Top them all off with a little water, and freeze for 20 minutes. Then, add a wooden stick to each compartment, and then freeze for 4 to 6 hours. Take more time if needed!
- Once the paint cubes are ready, all there is to do is hand your child a painted cube on a stick, and let him run it as he wants over a sheet of paper!
- This activity is great for hot summer days, but keep an eye on your child, in case he decides he wants to lick the paint ice cube!
9. Plastic Bottle Painting
Age group: 2 – 3 years, 3 – 4 years

What you need:
- Paints
- Plastic soda/water bottle
- Plain paper
- Containers
Instructions:
- Lay out some paints in separate containers.
- On a sheet of paper, help your child draw/paint some flower stems and leaves. Let dry.
- Then, help him dip the bottom of a plastic soda/water bottle into some paint, and press it onto the top of the flower stems to make the petals. Let dry.
- As the last step, your child can dip his finger or thumb in some paint, to make the middle portion of the flower head (between the petals!).
10. Q-Tip Painting
Age group: 3 – 4 years, 4 – 6 years
What you need:
- Paints
- Q- tips or earbuds
- Plain paper
- Containers
- Pencil
- Scissors (optional)
- First, help your child draw some butterflies or dragonflies on a sheet of plain paper. You can either cut them out or let them be on the paper.
- Next, take out some paints in separate containers.
- Paint the bodies of the butterflies/dragonflies, but let the wings remain plain. Let dry.
- Then, take some earbuds, and help your child to dip one tip into one colour and press it several times onto a wing (see image for reference).
- Repeat this with other colours, and encourage your child to make patterns if he can!
Hours of painting fun sorted!
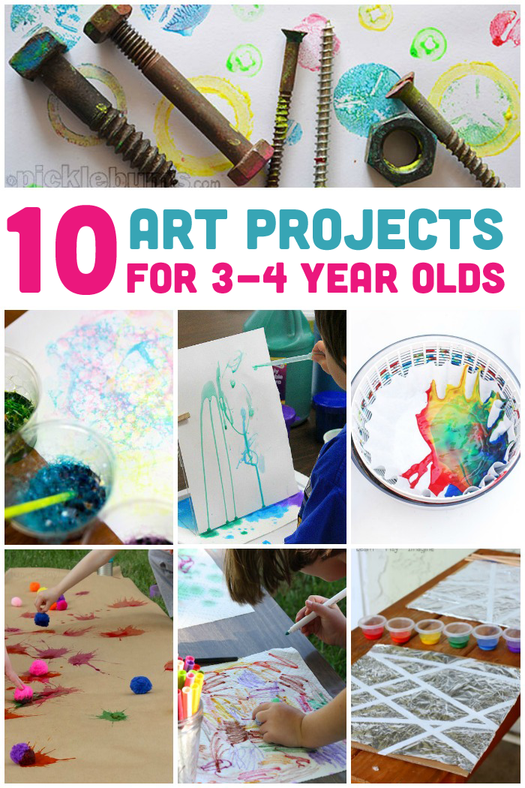
10 Awesome Art Projects for 3-4 Year Olds
If you have a preschool aged kiddo that loves art projects, you are going to love this list! These are the absolute best, most fun art projects you’re going to find. They’re easy, beautiful, and perfectly selected for 3-4 year olds.
1. Use this free fish printable and let your kids dip a celery stick into paint to make a fun effect! Add a googley eye and you’re all done! From Crafty Morning
2. Hang paper vertically and let your kids paint using small pipettes, letting the paint run down the paper. Mix different colors and create a really fun work of art. From Teaching 2 and 3 Year Olds
3. This fun project incorporates a little science with art. Have kids stand on a step ladder and drop paint dipped pom poms onto their paper. They’ll be able to see the splat patterns change depending on how far away they are! From Fun A Day
4. Create a fun watercolor effect by drawing on a paper towels with different color markers and then “painting” it with water. From Happy Hooligans
5. Another fun food to create art with is a potato. My kids adore Monsters Inc. and now they can make their own painted Sully and Mikey. From I Heart Arts N Crafts
6. One of the most fun art projects I’ve found is putting a fun shaped paper inside a plastic baggie with a few squirts of paint. Seal it up and squish it around to create cool colors. From Toddler Approved
7. You can even use bubbles to create art! Use this bubble solution recipe and blow bubbles onto paint for a fun project. From Kids Activities Blog
8. Grab a salad spinner, a coffee filter and a a few dabs of paint and make this spinning art. So cool! From Babble Dabble Do
9. Try making this fun tape resist art on aluminum foil! This creates a really fun look. From Learn Play Imagine
10. I love thinking outside of the box and finding new ways to create art. This fun idea uses nuts and bolts dipped in paint to make some really cool art! From Picklebums
Liz is a just a mom trying to keep it real about how little she sleeps, how often she gets puked on and how much she loves them. You can find her here every day writing about real-mom moments.
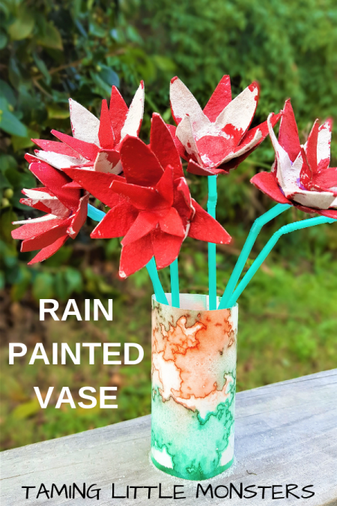
10 Rain Painting Process Art Activities for Kids
Painting with rain is a fun and easy way to create art using the power of mother nature. Toddlers and preschoolers are going to love these 10 Rain Painting ideas. They definitely make the best rainy day activity.

Disclosure: Some of the links provided in this blog are affiliate links. I will be paid a commission if you use this link to make a purchase.
Weather Art for Kids
Learning about the weather is so much fun for kids. After all, it impacts how and where they play that day. The next time you’re teaching your class about the weather, try a few of these fun weather art projects.
- Pasta Sun Art for Kids
- Rainbow Lightning
- Rain Stick Craft
- Thunderstorm Art Project
- Umbrella Paper Plate Craft
- …
Painting with Rain
1. Rainbow Lightning

I’ll be honest, I came across this idea by accident and I am so happy that I did. When I was exploring different ideas that involved painting with rain, I came up with this beautiful art project.
If you don’t want to wait for the next rainy day to watch as the rainbow fractures into lightning pattern, then grab a spray bottle and help it along.
2. Drip Painting

Save this process art idea for some rainy weather. But be prepared, because it takes a long time. As the rain drips through the coffee filters it’ll leave colorful raindrops on the watercolor paper.
Learn how to do drip painting the next time the weather turns wet.
3. Leaking Rainbow Sand
If you are looking for easy ways to entertain the kids the next time the weather report says it’s going to rain, then this kids art idea is for you.
Homemade rainbow sand leaks its color when it gets wet. Which is wonderful if you want to try some process art with your toddlers and preschoolers.
Spread the rainbow sand on the page and then leave it out in the rain. As the sand gets wet the colors will seep out and run all over the page. Just make sure to put pebbles at the top and bottom of the page, to make sure it doesn’t blow away in the wind.
For more ideas, check out these 3 ways to create art using rainbow sand.
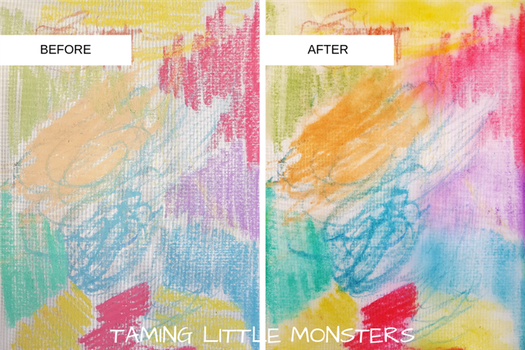
4. Rain Painting with Washable Markers.

Washable markers are a great way to create art using the rain. Draw any picture you like using the bright colors and leave it in the rain to see what happens.
If you don’t want to wait for the actual rain to start, you can always use a spray bottle instead.
Photo: Rhythms of Play
5. Chalk Rain Painting.
There are so many different ways to make rain painting for kids. Sometimes all you need is some regular chalk to make a rainy day piece of art.
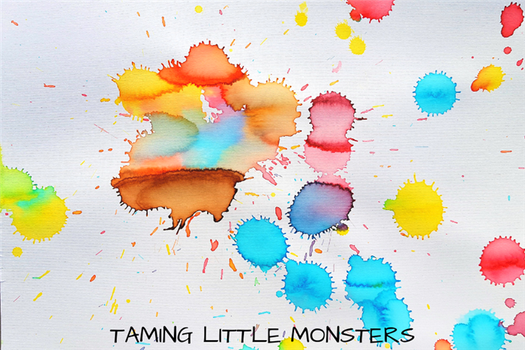
6. Exploring with Watercolors

Leaving watercolor paints in heavy rain creates some wonderfully interesting effects. For the best results, take your picture outside while it’s still wet. Then see what happens when the drops of rain fall on the picture.
Photo: Nurture Store
7. Watercolor Pencils

The next time you look through some open windows and see rain clouds gathering overhead, grab your watercolor pencils. This is such a fun and easy art project for toddlers and preschoolers. They will get so excited seeing how the rain changes their watercolor pencil drawings.
You also don’t necessarily need to do these on a flat surface either. Try using masking tape to attach them to an exterior wall. What will happen? Will the colors drip down with gravity?
Photo: What Do We Do All Day
8. Rain Paint

Using rain to make paint is one of the best homemade paint recipes that I’ve come across. After all, you don’t always need to let the rain change the picture, sometimes you just want it to create the paint for you. This fun rain activity is a wonderful idea if you’re interested in process art for kids.
Photo: Learn Play Imagine
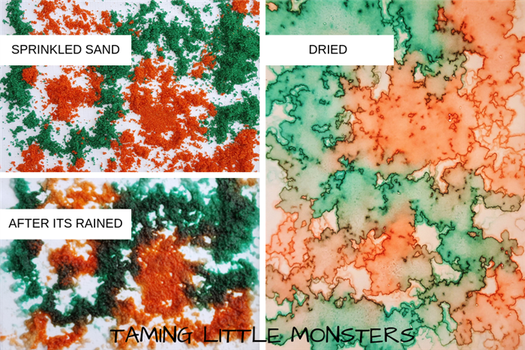
9. Rain Painting with Powdered Tempera Paint.

Using tempera paint has a similar effect to rainbow sand when painting with rain. Sprinkle some powdered tempera onto the page and let it sit in the rain. The color will spread and create some lovely patterns.
Photo: Housing a Forest
10. Mud Painting

This is a fun idea to try the next time you’re hit with pouring rains. Gather up the mud and use it to paint your sidewalk.
If you’re a fan of going out in all weather then you don’t even need to wait for the rain to stop to try this idea. If you’ve got some light rain, you can always wear your rain jackets, grab the paint brushes, and head outside anyway.
Photo: Rain or Shine Mamma
Are you going to try any of these Rain Painting ideas with your kids?
Don’t forget to pin the idea for later.


