In some cases, you may be able to avoid the need to prime the piece of furniture prior to painting black.
Easy Beginner’s Guide: How to Paint Your Furniture Black
Give your old furniture new life with black paint. Black furniture is timeless and can last through changing trends. But, if you are new to painting furniture, it can still feel intimidating.
Follow this easy step-by-step guide to getting a great black paint finish on your furniture in no time.

To paint furniture black you will need to sand the surface slightly, apply primer if the piece has a heavy varnish, then use 2-3 coats of black paint. After allowing sufficient dry time, apply topcoat to seal as needed.
- Remove all Hardware and Knobs
- Remove Drawers
- Do You Have to Sand Before Painting?
- Remove Dust and Clean Piece
- Do You Need Primer for Black Paint on Wood?
- How Do You Paint Over Varnished Wood?
- What Primer to Use
- Best Black Paints
- What Paint Brushes Should You Use?
- How to paint furniture black distressed?
- How do you stain a table black?
- How to Paint Furniture Black
- How to Paint Furniture Black: Easy Steps and Tips
Remove all Hardware and Knobs
Take the time to remove all hardware from the drawers prior to beginning your paint project.
If the hardware varies from drawer to drawer, be sure to label them so you will know where to put them later.
You may even wish to paint the old hardware to really give your furniture a new look!
Remove Drawers
I find it is easiest to remove any drawers or doors if possible prior to painting. This makes the entire process go more smoothly.
Drawers are of course easier to remove than doors. If your piece has several drawers, be sure and mark where they belong so you have no question when putting things back together.
In all honesty, I rarely, if ever take doors off of furniture prior to painting. It’s just a lot of extra work to take them off and ensure they go back on correctly in the end. I just paint over the hinges and call it a day.
Perhaps that is just me. Do what works for you.
About this Painting Technique
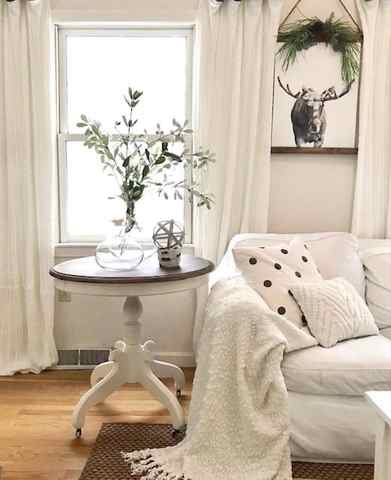
I first learned of this technique a couple of years ago and originally tried it on an old vintage end table that I picked up from the Facebook Marketplace. It was such a simple technique and 4 years later, the table still looks like the day I finished it. This little table sits on the end of our sofa and fits perfectly in this space. There are no scratches or stains and it has held up really well. The best part is that you would never know the top is a faux wood grain painting technique.
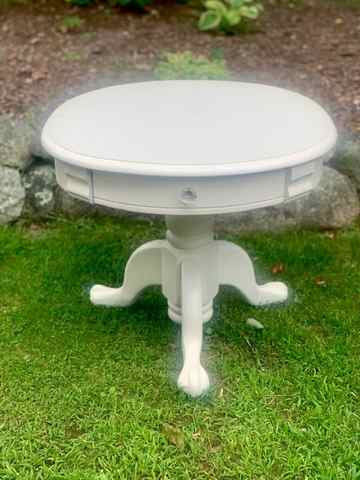
Recently I picked up two end tables to refinish for my vintage booth. The tops were laminate with a few marks on them so I knew this method would be the perfect solution to cover these imperfections.
Using these end tables, I will take you through the 3 steps to achieve the perfect faux wood finish!
Why You Will Love This Project
- Ease: No sanding, no priming (unless you want to) for this simple painting technique. Chalk paint is a breeze to work with however Valspar Antiquing Wax is the hero here! This antiquing wax goes on so smoothly and gives you plenty of time to get your finished look just right before drying and stay right in place! Doesn’t get better than that!
- Cost: Grab an inexpensive piece of furniture at your local thrift shop or on Facebook Marketplace and give it a completely new look for a fraction of the cost of new furniture using this technique.
- Look: Let’s face it, wood grain is timeless! One of the things I love about this technique is its faux wood grain with an artsy twist. From afar you wouldn’t know that the furniture isn’t real stained wood but up close you can see that it’s a hand-painted piece of art and a one-of-a-kind piece.
*This post includes affiliate links, for more info on affiliate links visit here
- Piece of furniture of your choice
- Can of white chalk paint (enough to cover the furniture piece)
- Can of Valspar Antiquing Wax
- Minwax Polycrylic clear satin polyurethane
- Chip Paint brushes
- Chalk paint brush
- Frog tape -painters tape
Step 1 – Chalk Paint
The beauty of using chalk paint is that it requires very little prep. Make sure the furniture piece is clean but other than that you can go right in with your first coat without sanding or priming UNLESS it’s a darker older piece that may bleed through the chalk paint. The old cherry and dark mahogany pieces often do. For these types of furniture, I use 2 coats of B-I-N Shellac Primer first, let dry completely, lightly sand then go in with my first coat of chalk paint. Often chalk paint requires 2 – 3 coats but luckily it dries fast.
I did not prime these tables whereas they came to me with a white finish. I also have a lot of faith in chalk paint as I use it all the time! It has a sticking quality to it and I knew with two coats of chalk paint, followed by two coats of antiquing wax and to finish polycrylic – I thought – ya, we’re good!
Applying wallpaper to the cabinet
I chose to cover the back of the cabinet with wallpaper. This is called Japandi and is from B&M.
The pink and white leaves have gold edges that subtly complement the metallic handles.

To cover the back, I needed four pieces of wallpaper and lined them up so the pattern matched both horizontally and vertically.
I attached the pieces with wallpaper paste and used a wallpapering brush to smooth the paper flat.
Transfers are another great way of adding a nature theme. Such as on this magazine rack.
The finished wood cabinet
I like that the texture of the wood grain is still visible, particularly on the doors. The best thing is that it adds to the character and you can tell that it’s not just MDF. You can see the texture even better in the photo with the new handle, above.
I’m also really happy with the handles. As they’re smaller, they’re a bit more delicate and allow for the focus to be elsewhere on the cabinet.

The old furniture could hold books or even bottles and glasses. The modern look makes it more of a statement piece.

I couldn’t resist including this photo. My dog, Puzzle, was missing out on fuss when taking photos, so came to claim a spot on the rug.
I couldn’t have found a more beautiful accessory to the cabinet!

Have you tried to paint wood furniture black? Did it work well? Please share your experiences in the comments.
If you liked this post, you might also enjoy this one using pink paint…
FAQs
Do you need a coat of primer under black paint?
Black is one of the most forgiving colours when it comes to not needing to use a primer. You may still get bleed-through depending on your furniture pieces, however, it should be hidden underneath the dark paint.
If you are using primer for another reason other than bleed-through? For example to even out the surface texture after using wood filler, then priming is a good step to take.
How do you not get streaks in your top coat?
Black paint is notorious for being hard to top coat without streaks. Hemp Seed Oil is the best option to avoid streaks when painting an entire piece of furniture black. Another good choice is to tint your top coat with black paint to reduce streaks.
How do you get a smooth finish when painting with black?
Sanding between each coat of paint with help you achieve a smooth finish. Also, using a good quality brush will avoid brush strokes. Or alternatively, you can use a paint sprayer.


