When sun is casting light behind the clouds, it will fully lit the thinner cloud and add a rim light around the thicker clouds.
Pastel Tutorial | How to Paint Clouds

✓ Showcase your talent and win big in Artists Network prestigious art competitions! Discover competitions in a variety of media and enter for your chance to win cash prizes, publication in leading art magazines, global exposure, and rewards for your hard work. Plus, gain valuable feedback from renowned jurors. Let your passion shine through – enter an art competition today!
Follow along with Marc Hanson as he shares his techniques for how to paint clouds with pastels, paying special attention to warm and cool color values and plays of light and shadow.
Step 1: Set Up the Paper
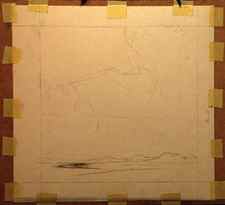
This photo shows how I lay out and adhere the paper to a backing board. I like to use ¾-inch Gatorboard for this. It’s not as hard a surface as hardboard, and is also very smooth—no bumps under the paper. I use a 2H lead in a lead holder to draw both the perimeter dimensional lines and a basic layout of my composition. The tape holds some tension on the paper so that if I use a wash on it the paper remains flat. If need be, I can lift the little pieces of tape and gently stretch the paper taught.
Step 2: Lay in Color
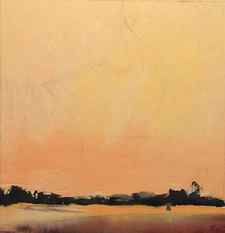
At this stage I lay in gouache. I use gouache because I get a more intensely colored stain than I would using regular watercolor. The gouache isn’t thick; it’s actually as thin as a watercolor wash would be. This simply allows me to “pre-color” large masses before using the pastel to fill in the areas. In this case, I want to have a warm sienna-like wash under the cooler blue gray clouds to act as a complement to the clouds. This takes about one minute to apply.
Custom Brush of Default Brush?
Different types of clouds can be paint with custom brush and default brush in Photoshop. But it will be more better in long term without depending too much on custom brush. So, this tutorial will be focusing on using default brush.
Some default brushes which I find useful for painting clouds are “Chalk”, “Charcoal” and “Oil Pastel” brush. Some settings you migh want to play with are:
- Size Jitter – Randomise brush tip size. Control with Pen Pressure.
- Minimum Diameter – Minimum brush tip size.
- Angle Jitter – Randomise brush tip rotation.
- Roundness Jitter – Randomise brush tip shape roundness. This will squeeze the tip shape vertically.
- Minimum Roundness – Minimum brush tip shape roundness.
- Scatter – Randomise brush tip location. Enable Both Axes so it scatter on X and Y axis.
- Count – Number of brush tip scatter. Default 1 is good enough
More info on brush settings for painting anime cloud and creating custom Photoshop cloud brush.
Types of Clouds
Before moving further, lets look at different type of clouds.

The naming for clouds can be confusing. So, here is a list of useful info on how naming is done.
- Cirro = High altitude clouds
- Alto = Mid altitude clouds
- Nimbo / Nimbus = Clouds that bring rain
- Cumulo = Piles of clouds
- Stratus = Wide flat layer of clouds
Although we are not learning meteorology here, but it is always good to remember there are different type of clouds in the sky. For example, we want to avoid painting high altitude clouds infront of low altitude cloud.
Painting Basic Cumulus Clouds

This is the basic clouds which we will be painting a lot of times in different artworks. Mastering this clouds will help alot when come to painting landscape art.

- Use “Chalk”, “Charcoal” or “Oil Pastel” brush to draw cloud shape.
- Lock layer transparency and shade the cloud. A lot of time, we can use 50% opacity of the sky colour for shading.
- Use smudge tool to blend the colours.
- Unlock layer transparency and smudge the edge of cloud. This step is optional but will add some wispy look near the edge.
The basic cloud look easy to paint, but there are two important factors to remember, which I will discuss further below.
- Avoid painting cloud symmetricaly.
- More randomness in cloud placement and cloud shape.


