2. Right click and make a duplicate of the group.
Making Repeating Patterns in Clip Studio Paint
Hi! My name is Maddie, and I am a long time digital illustrator and lover of patterns. In the following tutorial, I’ll be showing you how to make repeating or tiling patterns in Clip Studio Paint. You can watch the video to see the steps in real time, or skip to the text tutorial below.
At the end, I’ll also show you some more of my own patterns and what kinds of things you can use them for. Let’s get started!
Video Tutorial
This video goes through steps 1- 5 of the Text Tutorial below (with a brief portion on how to correct a common mistake). For additional ideas and patterns, see the “How to Use Your New Pattern” section after the text tutorial.
Go to File > New and create a new canvas to draw your pattern on. I usually work with a square canvas, but you can work with other shapes if you prefer.
- Remember to look up what size and resolution your final pattern should be if you’re making it for something specific, like a game texture or a fabric print. The section “How to Use Your New Pattern” has some standard US sizes if you need somewhere to start.
Step 2 – Drawing the Pattern
This is where most of your pattern will be designed. Patterns come in many different shapes, sizes, and colors. Do some research if you’re trying to recreate a particular pattern type, or draw whatever you want if you’re making something just for you!
Patterns are a great way to play around with shapes and techniques that you don’t use very often, so one of the things I like to do is make symmetrical patterns. To do this, look for the ruler tool in your tool bar or press U to open the rulers menu.
Once you have the menu open, make sure “Line symmetry” is checked, and select the number of lines of symmetry you want to use. 2 Lines will give you a mirror symmetry, this is what I used here. (The number is two because both lines are overlapping, making them look like a single line).
- If you want to play around with more lines, you can get some snowflake or mandala like effects!
- Depending on what type of pattern you’re making, the base of the pattern may consist of interconnecting lines, surface textures, or a collection of shapes. See “How to Use Your New Pattern” for some other ideas.
Don’t worry about the edges of your pattern just yet, we’ll fill in and fix up the seams in the next few steps.
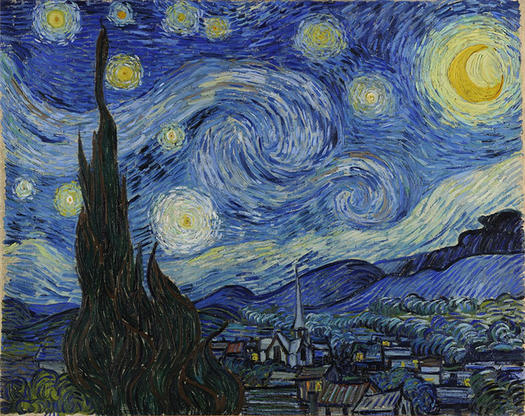
Arts & Culture: Turbulence in The Starry Night
Researchers analyzing Vincent van Gogh’s The Starry Night show that its swirling structures have turbulent properties matching those observed in the molecular clouds that give birth to stars.

×
With its bold swirls of blue and yellow, Vincent van Gogh’s The Starry Night entrances many a viewer. James Beattie is no exception. A student at the Australian National University, Canberra, Beattie studies the structure and dynamics of molecular clouds—the birthplaces of stars—whose churning eddies often make him think of the Dutch painting. He recently put that resemblance to the test with help from Neco Kriel, a student at Queensland University of Technology in Australia. Using techniques developed to analyze the patterns of simulated molecular clouds, the duo compared art and reality, finding that both display the same turbulent features. While it may only be a happy coincidence that Van Gogh’s sky contains star-related patterns, the presence of turbulent motifs is common in paintings, likely due to the abundance of turbulent phenomena in our everyday lives.
Beattie and Kriel are not the first to spot The Starry Night’s link with the heavens or to probe its patterns for turbulent structures. In 2004, the Hubble telescope captured an image of an expanding halo of light around the star V838 Monocerotis, which a NASA press release described as the Universe’s version of Van Gogh’s painting. Then in 2008, Jose Luis Aragón, from the National Autonomous University of Mexico, and colleagues found hints of turbulence in The Starry Night as well as other paintings by the same artist, including Road with Cypress and Star and Wheatfield with Crows, with its ominous stormy backdrop.
Aragón and his colleagues analyzed the changes in the brightness from point to point across the sky of The Starry Night. They found that the statistics of these brightness fluctuations appear to follow the predictions of Andrei Kolmogorov for subsonic turbulent flow, which drives convection currents in stars and atmosphere motion on Earth. But for over a decade, the exact form of turbulence in the painting remained unconfirmed. “Our approach was an approximation,” Aragón says, adding that “a detailed power spectrum is essential to establish if The Starry Night is indeed turbulent,” something he and his colleagues didn’t calculate. The new study addresses this shortcoming.
Focusing their attention on The Starry Night’s central whirls, Beattie and Kriel used techniques developed to analyze images of turbulence-containing simulations. They first selected a square section of the sky in a digital image of the painting and created 2D maps in three different color “channels.” They then used Fourier analysis methods to calculate the painting’s 2D power spectrum—a statistical decomposition of the image that provides the dominant length scales of the structures. In contrast to Aragón, the team found that the structures have the same scaling behaviors as those found for supersonic turbulence, which is the type of turbulence observed inside molecular gas clouds. This quantitative match “is really exciting,” says Beattie, as it provides an explanation for why the large eddies that seem to “feed” or “drive” smaller eddies in The Starry Night qualitatively resemble those found in turbulent clouds.

×
Van Gogh is one of numerous artists who have rendered turbulent-appearing structures on paper. Austrian painter Gustav Klimt, for example, often included swirling features in his works, such as The Tree of Life. The Canadian artist Stacey Spiegel has also captured vortex patterns in his abstract paintings of fluid behavior. What inspires artists to include such motifs? Gerald Cupchik, a psychologist at the University of Toronto, and his colleagues have performed brain activity experiments to try to understand the human response to art. These studies have shown that emotional regions in the brain light up when subjects are asked to focus on colors, shapes, and other compositional features of a certain painting. It might be that swirling patterns appeal to some innate aesthetic sense. “But Van Gogh likely wasn’t thinking about how the brain would respond when he painted The Starry Night,” Cupchik says.
Rather, Cupchik thinks that turbulent whirls frequently show up in paintings for another reason: the patterns exist in abundance in the natural world. “There are certain kinds of physical phenomena that we all experience and that draw our attention; turbulence is one them,” Cupchik says. He cites the spiraling of water down a drain and the crashing of waves on a stormy ocean as two examples. “Van Gogh was clearly sensitive to certain kinds of features in the world and he embodies these features in his work.” Cupchik adds that he is unsurprised that Van Gogh’s swirls match those observed by physicists. “The elements of the artwork have to fit together and be coherent or it’s a failure,” he says. If the turbulent swirls in The Starry Night didn’t resemble the swirls in nature, then the viewer would likely notice something was off.

×
“Art inspires science and science inspires art, so it’s no surprise that artists have observed the complexities of nature and tried to capture some of the key features in their works,” Beattie says. He acknowledges that it’s unlikely Van Gogh was making predictions about the turbulent eddies found in real stars when he painted The Starry Night. “That has just been an amazing coincidence,” he says.
Katherine Wright is a Senior Editor for Physics.
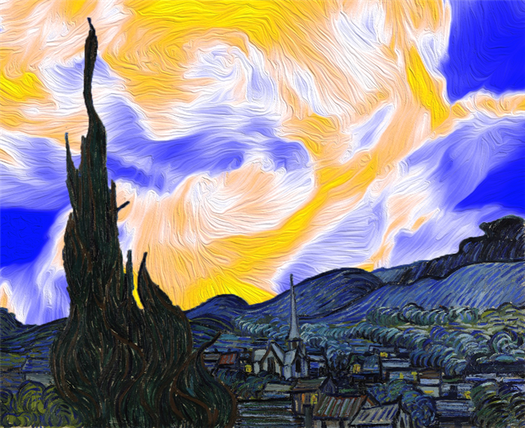
Starry Night With Watercolor. Step By Step Painting Tutorial
Today, I try my liquid watercolor. I only have three colors, but this is enough for the imagination. Sometimes we attach too much importance to the lack of many choices and forget about what we already have. So it was with me. I purchased these paints a few years ago, but for some reason, I didn’t consider using them.
Last time I painted the starry sky with watercolors in cuvettes using the wet on wet technique.
My choice was the starry night sky, so deep and gentle, full of nebulae and constellations. And the majestic Queen Moon. They are always in our memory. Distant and desirable stars and an equally close but distant moon planet.
The result stunned me. The painting is vibrant and saturated. Liquid watercolor has a rich pigment. After finishing it, I felt genuine delight and pleasure from working with liquid paints. Now I already dream of all the colors and my discoveries and possibilities. But this will only happen sometime later.
Enjoy the brightness and splendor with me and my tutorial. May an excellent mood full of positive emotions didn’t leave you today!
Let’s practice now!
Materials you’ll need:
1. Watercolor paper 300 gsm (140lb)
2. This work requires liquid watercolor. You’ll need these colors for a painting: magenta, ultramarine violet, and black. You can use any shades of these colors.
3. You also need white gouache for the stars and the moon (you can use white watercolor or even acrylic).
4. Professional brushes. Here you need a size 24 flat, and 6 round.
7. Washable tape
You may use other materials, but the result may be different.
Here’s a step-by-step tutorial.
1. Fix the paper with tape and wet it with clean water.
2. Grab magenta, ultramarine violet, and black. Move the board up and down to blend colors smoothly.
3. Dry your painting.
4. Paint with gouache (or white watercolor) a semicircle of the moon. Tap the brush to add some white stars with gouache.
5. Dry your painting and remove the tape.
That’s all. Happy painting!
You can also check my other tutorials.


