EAT ICE CREAM
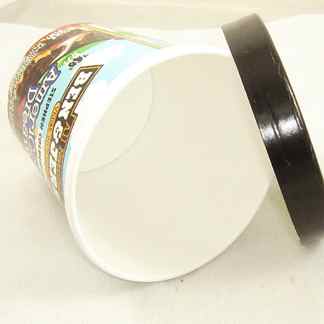
If you are like me you always have a carton of ice cream in the freezer. When the carton is empty rinse it out, dry it off and set it aside for revamping.
Pumpkin adorned with a painted ice cream cone
Today is an ice cream double whammy. First up you can pop over to Craft Magazine and read my post about how to make homemade pumpkin pie ice cream. My husband and I make this frozen treat every fall and it is always a big hit. So much of a hit we sometimes give it as a gift which brought about today’s I Love to Create post. How do you customize and gift wrap ice cream? Well luckily it starts with eating ice cream.
SUPPLIES
Empty Ice Cream Carton
Crafty Chica Little Chica Paint Packs
Sponge Brush
Fabric Scraps
Ice Cream Cone Applique from Sew Darn Cute
Scissors
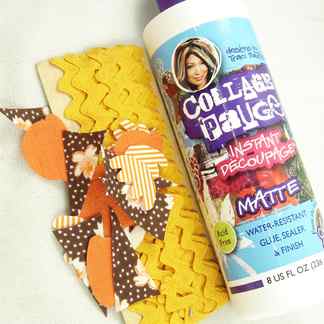
Collage Pauge
Rick Rack
Aleene’s Tacky Glue
EAT ICE CREAM
If you are like me you always have a carton of ice cream in the freezer. When the carton is empty rinse it out, dry it off and set it aside for revamping.

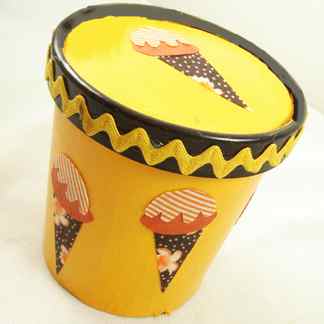
PAINT
Using a Crafty Chica Paint and sponge brush paint your empty ice cream carton. This may take several coats. I went with a warm fall color palette since my carton was going to hold pumpkin pie ice cream. Allow to dry completely.
DECORATE
I used the applique pattern of an ice cream cone from Jenny Ryan’s book Sew Darn Cute to adorn my carton, but feel free to create your own. I traced the image onto 3 different types of fabric in fall pumpkiny colors and cut out. Using Collage Pauge I adhered my ice cream cones to the carton
For extra spice using Aleene’s Tacky Glue I also applied gold colored rick-rack to the rim of the carton lid.
VARIATION
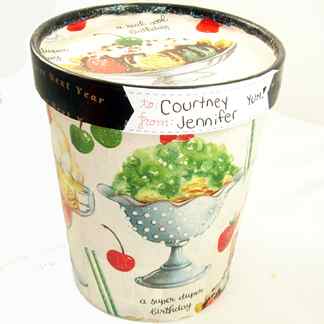
I just so happened to have some vintage ice cream themed wrapping paper laying about that begged to be used. I cut the paper to the size I needed and using Collage Pauge Sparkle I applied it to another empty ice cream carton.
Now all that is left to do is make some homemade loquat or pumpkin pie ice cream to fill my cartons with!

Looking for more ice cream goodness? Check out a round up of my Top 10 Favorite Ice Cream Related Blog Posts!
DIY Ice Cream Cone Pumpkins

You didn’t think we were going to get through Halloween/Fall without showing you guys something ice cream related, did you?! I waited all Summer for the chance to be able to make these ICE CREAM CONE PUMPKINS, and now that they’ve finally come to life, I think they might be my favorite project of all time! (I know, I know, I say that about a lot of projects). BUT when you get to make a pumpkin look like your favorite ice cream flavor (it’s mint chocolate chip by the way), it’s really hard to not freak out over how awesome this is! Plus, I got to eat all of that real ice cream afterwards too, and we all know any photoshoot where you get to eat the props is a real winner!


Four medium sized pumpkins
Fake ice cream cone (here) or a real ice cream cone
Spray paint in white, mint, pink, and brown
Vinyl adhesive in pink, yellow, orange, green, blue, lilac, and brown
Hot glue gun
Scissors


1. Spray paint each of your pumpkins with one of the colors; mint, pink, white, and brown.
2. Take your brown vinyl and cut out irregular circles in all different sizes for the chocolate chips on your “mint chip” pumpkin. When the spray paint is dry, peel off the backing on the vinyl and stick the brown chocolate chips all over your mint colored pumpkin.
3. For the strawberry pumpkin, take the pink vinyl and cut out small squares and diamonds. Stick these strawberry pieces on your pink pumpkin, spacing them out further than you did with the mint chocolate chip.
4. With the pink, green, yellow, orange, and lilac vinyl, cut out small rectangles for sprinkles and decorate your white pumpkin with them.
5. Stack the pumpkins on top of each other using hot glue to secure them together and keep them from falling over.
6. Put your scoops on top of a plastic cone (like I did here) or a real cone!


