But, enough of that! Let’s dive in with acrylic halloween paintings!
Quick and easy halloween painting for beginners
Who said that Halloween is just about scary stuff? How about those little (and big) ones who still want to celebrate but dislike gore?
Don’t worry! We’ve got a solution for you!
Our certified School instructor Annabel Hoogeveen prepared a super cute themed face painting tutorial for you!
Another great news is that our Halloween pumpkin face painting is very fast and very easy to reproduce, so even if you’re a beginner you can surprise your clients with this stunning design!
To be honest, for me Halloween is not my favorite time of the year. I get scared easily and I really don’t like painting all the scary and gruesome designs.
So, being a face painter and not being able to just skip Halloween, I have to come up with on-the-job designs I do like to paint. And this is one of them: a quick, one-stroke Pumpkin Mask for little Pumpkin hero’s.
When the idea of a pumpkin mask popped up in my head, I started searching the internet to see if it had already been painted before. But I didn’t find anything that resembled my first sketch, and that seemed odd to me then. After the first attempt on my son I knew why ;-).
My original plan was to recreate the characteristic 3D pumpkin look using a one-stroke, in a ‘superhero’ color, blue. I choose blue because I wanted it to look ‘cool’, I wanted to make my own “Pumpkin Power Hero” :-).
It looked great on my sketch, but it certainly did not look good on the face :-(. Making it look like a convex pumpkin mask, turned out to be very difficult with the concave nose and the cut out eyes.
So my plans had to change: less 3D, and more original color, but still using one-stroke.

Annabel Hoogeveen
Are you a beginner? Check out our Free Guide for Beginner Face Painter and learn where to start, what tools to buy and how to face paint many amazing popular designs!

Materials used:
- Global ‘Hero Power’ palet by Onalee Rivera
- Global funstroke ‘Mexico’
- PartyXplosion aquapaint Black
- PartyXplosion aquapaint White
- Short-bristled angle brush ⅝# (Facepaintstuff.com)
- Angle brush #¼ (American Painter)
- Round brush #3 (Marcela Bustamante)
- Stencil (Wiser Oner)
- Halloween Stencil with bats (Studio Joli)

Step 1: Sketching the Outline of Easy Pumpkin Face Paint
Because I wanted it to look like a pumpkin as much as possible, the outer shape of the mask was very important.
That’s why I started with sketching the outlines of my design and the placement of the eyes, using a round brush #3 and a watery yellow paint. Once you painted this design more often, you don’t need to do this anymore.

Step 2: Halloween Pumpkin Face Paint One-Stroke Base
To continue making easy pumpkin face paint, use a yellow-orange-red-dark red split cake and a ⅝# angle brush paint the base. Start with the yellow lines next to the eyes.
Then flip your brush and keep the light color on the outside while painting ‘bands’.
For the central ‘band’ flip your brush again, so the lightest part is in the middle suggesting a convex shape.
Because I don’t want the bands to be separated too much, I blend them together a bit more by going over the borders a few times.

3 Acrylic Halloween Painting Ideas

1. Halloween Treats
Materials Required
- Acrylic paint
- 11 x 14 canvas
- Chalk
- #8 and #4 art brushes
Colors
- Titanium white
- Mars black
- Cadmium yellow light hue
- Cadmium orange hue
- Yellow oxide
- Brilliant yellow green
- Dioxazine purple
- Deep green permanent
- Burnt umber
- Deep violet
How To Paint
This fall art is suitable especially for beginners and kids. To make it, start with painting the 11 x 14 Canvas entirely black. Then, take the chalk and draw the outlines of the key characters of the painting: Frankenstein popsicle, bat ice cream, and orange pumpkin ice cream.
Draw the outline for an ordinary popsicle, add two “Frankenstein” screws and bumpy lines on the top or anywhere you like. Then, take out your #8 brush and start painting your popsicle.
You can color them with anything you like, but we prefer the outline to be painted with brilliant yellow-green and a semi-thick layer of permanent green at the bottom. Use yellow oxide for the stick and a stash of titanium white on the side.
It’s time to take out your #4 brush to paint a dripping shape using deep violet color on the popsicle head. And, use titanium white for the screws.
It’s time to start drawing the middle bat ice cream. Use a #8 brush and yellow oxide color to paint the cone, and mix a tad bit of titanium white on the edges. Then, paint the ice cream brilliant purple with a mixture of titanium oxide. Use cadmium orange hue and titanium white to paint the next ice cream cone. Draw another layer of it once dry, and then use a mixture of colors like green, orange, or any other to the bottom.
Finish the art by drawing faces on the ice cream to make it Halloween-themed.
2. Sugar Skull Painting
Materials Required
- Acrylic paint
- 11 x 14 canvas
- Chalk
- #8 and #4 round paint brushes
Colors
- Titanium white
- Mars black
- Primary yellow
- Pyrrole red
- Medium magenta
- Turquoise blue
- Green hue permanent
How To Paint
Start with blackening the 11 x 14 canvas background, then outline a skull using chalk and fill it with titanium white. Use a #8 brush for black paint, and paint its teeth, eyes, nose, and jaws.
Now it’s time to start decorating the skull with designs, dots, flowers, and other decorations. Though it’s entirely up to you how you want to decorate the skull, we are sharing how we like it to be.
Start with making half circular shapes around the eyes using #4 brushes and medium magenta color. Then, draw a flower on the head using a primary yellow color, and primary blue for painting a mandala pattern on the cheekbones. You can keep on adding whimsical designs on it, like a rose on the head, a flowering branch on its jaws, and a small red heart on the nose.
3. Pumpkin Topiary
Materials Required
- Acrylics
- 11 x 14 canvas
- Chalk
- #4 and #8 art brush
- Water
Colors
- Red
- Orange
- Light blue
- Brown
- White
- Black
How To Paint
Start with drawing a squiggly line 2 inches apart from the edges using a #8 brush, black paint to make a frame, and fill it using green color. Add some big violet dots to give it a quirky look.
Once done, run a few splashes of blue, a tiny bit of black, and titanium white in the background. You can add any color of your choice. Then, draw three pumpkins on top of each using chalk, with the smallest at the top and the largest at the bottom. And, make bump lines on each of them.
Next, use reddish-orange paint to color the edges and orange to fill the inside. Now, draw different Jack O’lantern faces on each pumpkin using your chalk. Finally, draw the facial expressions using your brush and black color.
Acrylic Halloween Painting Frequently Asked Questions ?
What acrylic color brand should we go for?
Well, it depends entirely on your budget. First, go for basic ones to see if you can use them well and draw quality paintings. And, once you feel confident about it, spend extra money to get yourself some artist-quality paints.
Can we mix different paint brands?
Yes, you can mix paints of different brands, irrespective of their quality. But, remain cautious while mixing different types of paints, like oil paints and acrylic paints, for the same painting. You can add oil paints to a dried acrylic color but not vice versa.
Where should we paint?
You can paint acrylic color on card, paper, wood, or canvas without applying a primer layer first.

Acrylic Halloween Painting Final Words
That concludes our painting suggestions!
We hope your kid will be able to make beautiful Halloween-themed paintings using these ideas. And, if they enjoy themselves when drawing them, they might end up being an artist in the future. Keep these beautiful pieces hanging on your wall for everyone to admire.
Acrylic paints are the ones they should start with, but only if they are aged above three years. These artworks are intended for fun, so you don’t want to give your kids something harmful to them.
You can search on YouTube, Etsy, and other sites for more Halloween paintings like a haunted house, a cat and the moon, and so on. Visit these site links for simple and free art tutorials.
With that, we’ll wrap up the guide. See you soon and goodbye!
ghost in a Bottle 13 days of Halloween live stream painting Step by step Day 12 | TheArtSherpa
Category: Howto & Style
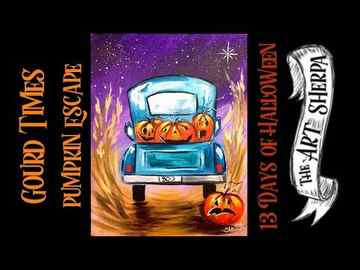
Vintage Truck and Jack O Lantern Easy Acrylic painting step by step #13 Days of Halloween
Category: Howto & Style

Van Ghosts Easy Acrylic painting step by step 13 days of Halloween
Category: Howto & Style
Learn to paint with Acrylics Step by Step with The Art Sherpa. There are 600+ free video art lessons for beginners. You CAN paint this. Begin YOUR art Journey today by finding the perfect acrylic painting on canvas to follow along with. With the #1 beginners acrylic painting channel on YouTube, there is something you will be excited to create, and can hang on your wall today. We have Big Art Quest lessons that will take you through every beginner step and lessons to get you painting your own masterpieces. Join our art family for Live streaming video lessons on YouTube and Facebook. Take your art to go with Mobile! Why are these art lessons free? So YOU can save for more art supplies and have fun!

©2023 The Art Sherpa | Privacy Policy | Terms Of Service | Contact Us | Acrylic April


