This tree art project is perfect for preschool all the way to grade school.
Simple Fall Tree Painting with Q-Tips
Hi Sweet friends! We are loving this new 31 days of Fun Fall Arts and Crafts for Kids Series. We had so much fun creating this simple fall tree painting today using Q-tips.
Did you create the Fall Tree Craft from yesterday? Well, if you did be sure to share it and use our hashtag #KFHFallFun! I would love to see it!

Yeah, I know we are doing another fall tree today, but there are seriously so many fun and creative ways to make a fall tree. Oh and by the way, I’m sure this won’t be the last. lol!
I could seriously make a different fall tree everyday and still not get tired of them! I have mad fall tree love! Anyone else?

Day #2 – Simple Fall Tree Painting with Q-Tips
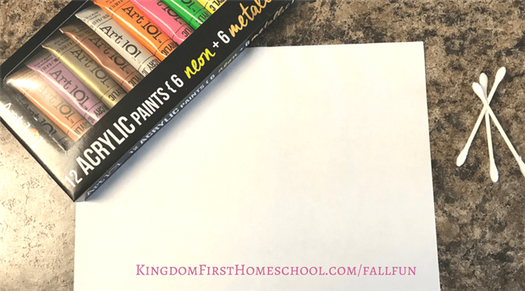
- White paper – Watercolor Paper, Construction Paper or even a Canvas.
- Q-Tips
- Acrylic Paints
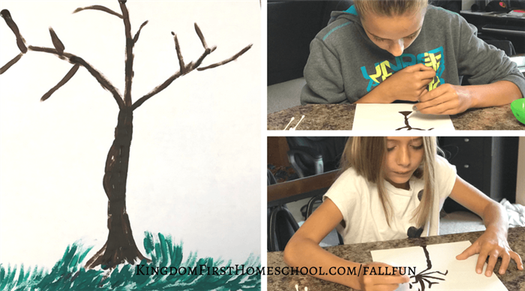
Step #1 – Paint the Fall tree trunk and then the grass using quick and easy strokes with the Q-tip or a paintbrush if you want.
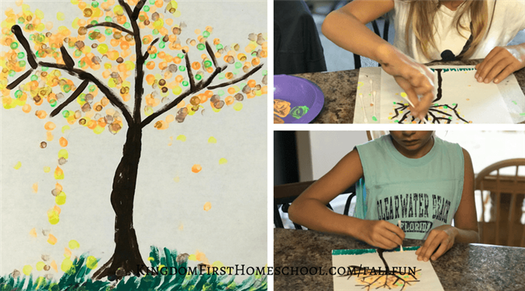
Step #2 – Paint the leaves with a Q-tip using pretty fall colors. Dip the Q-tip in the paint color of choice, I recommend starting with the lighter colors first. We used metallic acrylic paints for the leaves only. So pretty! Just dab the Q-tip don’t brush it on. Add some leaves blowing in the wind and on the ground if so desired.

Awesome! I hope you’ve enjoyed making this with your kids as much as I have! Here’s day 1 of the 31 Days of Fun Fall Crafts for Kids series if you missed it and here is the rest of the series!
For more homeschooling inspiration, tips and encouragement, make sure to follow KFH on Facebook, Pinterest, Instagram and Twitter, and subscribe to our Newsletter for some FREE GOODIES!
Forest Rose is a God Loving, Blessed Wife, & Mama to 3 girls. She’s passionate about lifting moms out of the trenches that are discouraged, overwhelmed, or feeling alone or isolated. Her hope is to point them to Christ and equip them to rise up with a newfound hope and joy within, that He alone can provide. Besides blogging, she also loves to create printables!
Pre-Activity Fall Reading about Leaves Changing Colour in Autumn
If you like, you can jump ahead and start the painting activity. However, I’m a teacher, so every activity comes with some learning objectives. This activity lends itself well to learning about colours, fall, trees and leaves. There are a bunch of wonderful books round these topics that you and your little one can read first to really learn while you play. I have a list of awesome fall books and activities with worksheets you can check out.
Here are a few great books for young learners that talk about autumn and trees and how the leaves change color and fall off.
- Fletcher and the Falling Leaves by Julia Rawlinson
- We’re Going on a Leaf Hunt by Miki Sakamoto
- Mouse’s First Fall by Lauren Thompson
- The Leaves on the Trees by Thom Wiley
What Materials Do You Need To Make An Autumn Tree Painting Craft For Kids?
I wanted to make something nice that we could do together and hang up as decor for autumn so I opted for a small paint canvas from the dollar store but feel free to use paper instead.
As I mentioned earlier, you can either use your fingers to paint or make this a sensory play opportunity and use different items around the house to paint with. I find our little learners love this best. We ended up using our fingers as well as whatever else was within reach.
- Paint Canvas or Paper
- Newspaper or plastic table cloth
- Non-toxic paint in fall colours (red, yellow, orange, brown)
- Pencil
- Marker & Sharpies
- fingers
- cotton balls
- Q-tips
- leaves
- pine cones
- sponges
- straws
- small potatoes or apples
- tree craft template (optional free printable at bottom)
What Are The Instructions For Creating Your Autumn Tree Art with Toddlers and Kids
1. The first thing I did was draw the tree stump and branches using a pencil and added squiggly lines to create a bark-like texture.
Depending on the age of your little one, you may be able to let them draw it out themselves.
My little guy is only 2 so I drew the bark for him.
Another way to create the bark if you don’t like to draw is to use construction paper and cut out a rectangle and glue it to your paper.
You would add branches in the same way with thinner rectangles.
2. Outline your tree bark and branches with a marker to make it really stand out.
3. Paint your tree bark and branches brown and let dry before continuing. If you rather not wait, colour in with markers or use construction paper.
If you aren’t keen on cleaning up a giant mess after this activity, lay down newspapers or a disposable plastic table cover that you can toss once you’re done.
Now for the fun part!
4. Have your little artist use their fingers and any other sensory items to dab the red, yellow, orange and brown paint to create colourful leaves on the trees.
You can also put blobs of paint and use a straw to blow the paint around creating beautiful designs.
5. Leave somewhere away from little hands so it can dry.
6. Once it’s dry you have two options. You can leave your painting as it is. Or you can add some more detail like leaves and outlines of the edges of the tree with a sharpie like we did.
Now, proudly hang your little Picasso’s masterpiece for all to see. Oohing and Aaahing is encouraged.


