Keep mixing until both colors are fully incorporated. You should obtain a light shade of pink – if it isn’t what you’re expecting, adjust it by adding a bit more red or white paint until you get the desired shade.
Easy Cherry Blossom Tree Cotton Bud Impression Painting Idea
Welcome the splendor of cherry blossom through this step-by-step tutorial. While you make a beautiful creation using cotton swabs. This easy and charming artwork is ideal for kids of all ages. This tutorial enables one to unleash your innovative ideas and creative talent. Start your artistic journey today with our captivating Cherry Blossom Tree Cotton Bud Impression Painting Idea!

Materials Required
- White Craft paper
- Scissors
- Brown, Pink, and Red paint
- Paintbrush
- Cotton swab
Step 1: Cut Out A Circle
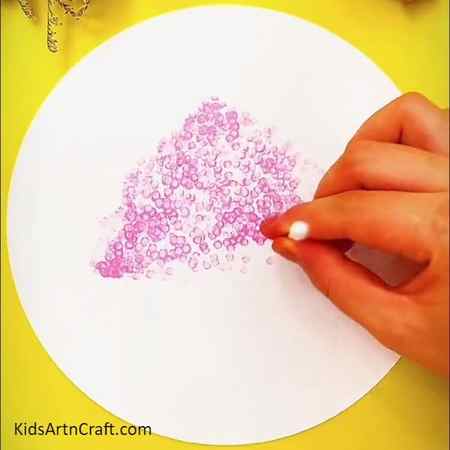
From a sheet of white craft paper, cut out a circle. After that, take a cotton bud and apply pink paint on its tip, dab it on the paper in a triangular format.
Step 2: Trunk Of The Tree
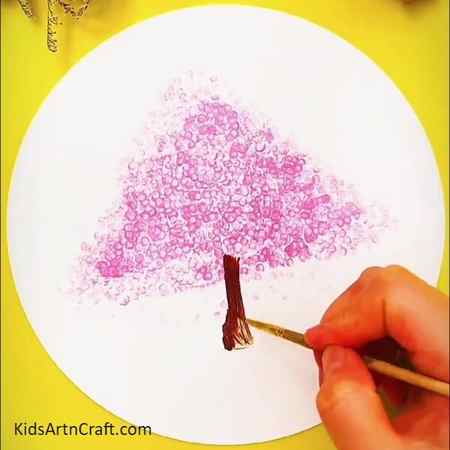
Using brown paint, paint the trunk of the tree.
Step 3: Make Branches
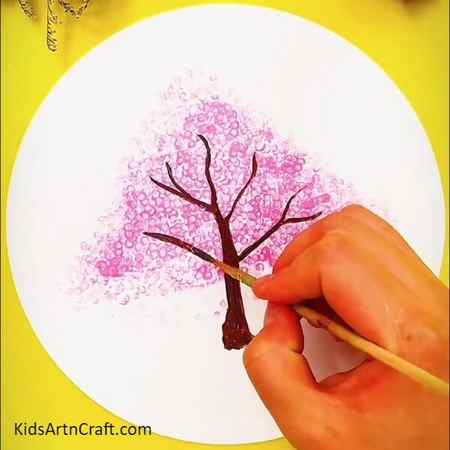
Complete your cherry blossom tree by drawing its branches.
Step 4: Complete The Tree
Finish off the tree by drawing its branches
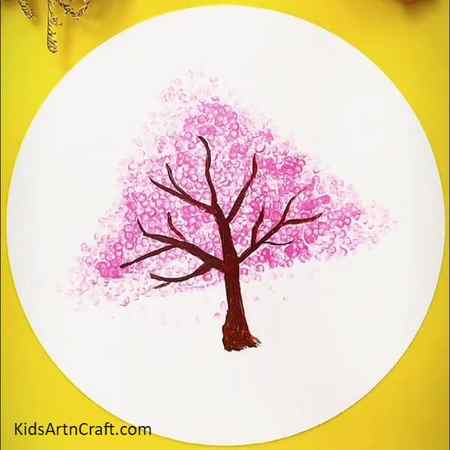
Step 5: Fallen Leaves
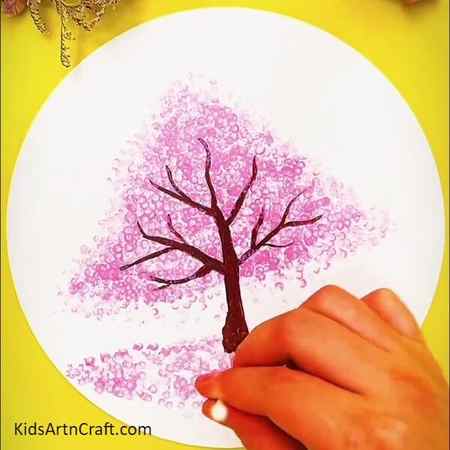
Apply pink paint on the cotton bud and dab it below and near the tree to show fallen leaves. Additionally, apply some red paint on your cotton swab and dab lightly over the leaves.
Now, You Are All Done!
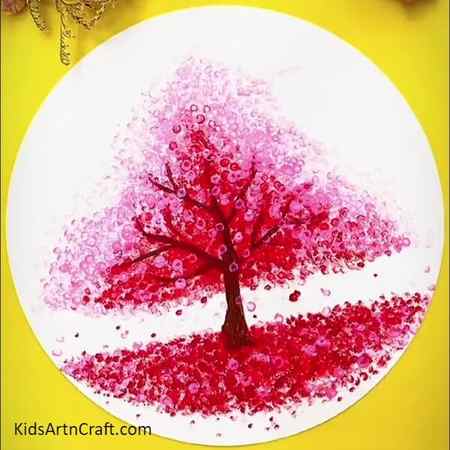
That takes us toward the end of our step-by-step tutorial. The Simple Cherry Blossom Tree Cotton Bud Impression Painting has proven to be a charming and involving art exploration appropriate for kids of any age. This enables individuals to discover their artistic abilities and produce amazing artwork. So, let the cherry blossoms bloom forever in the hearts of these budding artists.
Do try out this step-by-step tutorial on Cherry Blossom Tree Cotton Bud Impression Painting. Tell us your thoughts on this in our comment section below.
Thank you for reading!
Follow us on Youtube for art and craft tutorials and much more.
More Articles from Kids Art & Craft
- Realistic Tree Landscape Stamp Painting Using Fruit foam
- Pretty Tree Landscape Sketch pen Painting Art Idea For Kids
- DIY Handprint Carrots In a Basket Painting Tutorial
- Creative Owl Painting Idea For Kids Step-by-step Tutorial
- Pretty Poppy Flower Garden Painting Art For Kids
Related posts:
- Realistic Tree Landscape Stamp Painting Using Fruit foam
- Cute Birds Over Tree Painting Step by Step Tutorial
- Pretty Tree Landscape Sketchpen Painting Art Idea For Kids
- DIY Handprint Carrots In a Basket Painting Tutorial
- Creative Owl Painting Idea For Kids Step-by-step Tutorial
- Pretty Poppy Flower Garden Painting Art For Kids
- How to Make Apple Tree Craft Tutorial For Beginners
- Easy Fruit Foam Net Flower Pot Artwork For Kids
Step 1.
Gather the necessary supplies. Ideally, you should have red, white and black paint, a soft brush, a paper plate to mix colors, a small water recipient to clean the brush, and a 0,5-liter soda bottle, which will serve as the stamp for the cherry blossoms. Don’t forget white poster board or card board, which will be the perfect backdrop for this artwork.

Step 2.
Dip the brush in water and black color, then start to paint the first branch of your cherry tree.

Advertisement
Step 3.
Keep painting branches, and make sure that they aren’t too thick. Don’t worry if they aren’t straight, as curvier ones will look even better!


