Disclosure: Some of the links provided in this blog are affiliate links. I will be paid a commission if you use this link to make a purchase.
Easy Ocean Painting Tutorial
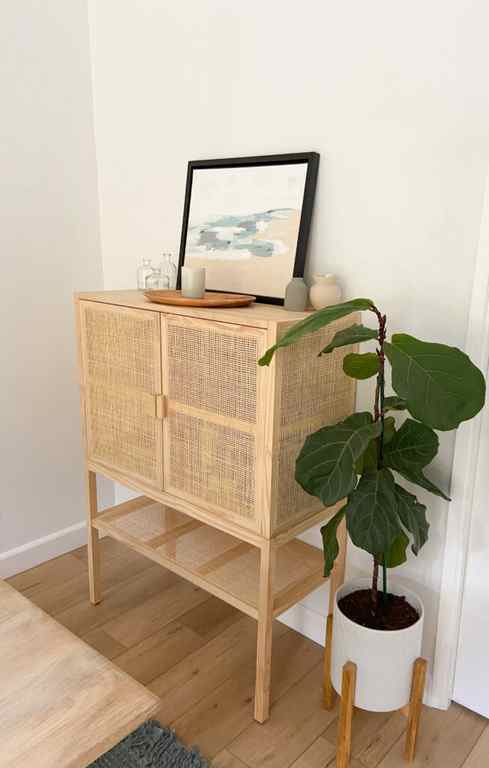
I’ve been eyeing a few pieces of artwork to add to my dining room lately, but to be honest haven’t wanted to spend the $ to get them! I finally found the one that I absolutely loved, but it was over $400 on West Elm. So I decided to try my hand at a DIY version- and it didn’t disappoint! Today I’m going to share with you how I made it, and guys, this DIY makes ocean painting easy! This project cost me less than $17 and it is a beginner ocean painting easy kind of a project! All you need is an afternoon and maybe a few snacks with a yummy drink!
Supplies
- Acrylic Paints in white, sand, blue (I also used this blue), and black
- Canvas (I used 16×20)
- Paint brush sponges
After studying my West Elm painting inspo piece, I decided to start with the base sand layer first. Because my inspiration painting was landscape oriented, I chose to do mine the same. I painted a triangle from the bottom right corner and filled it in. Tip: All of my brush strokes were in the same direction, horizontally. I think this helped with the cohesiveness of the painting as a whole.

After finishing the triangle, I painted the sandy layers up the right hand side, about ⅔ of the way up the canvas, and then filled in the entire bottom ⅓ of the canvas. The key to this part was brushing so that the right hand side started to look like a shoreline. In order to achieve this look I brushed farther in towards the middle of the painting on some strokes, and then closer to the edge on others.

To make the ocean painting easy for myself, I layered different colors of blues, grays, and whites, over and over. I started with a darker blue base layer, and then added lighter blues over the top of it, and then mixed some blues and layered even more. These “layers” looked like patches or rectangles across the ocean. This part took the most time, because it was a matter of layering the paints enough to give the ocean depth. I also filled in around the shoreline in different blues and whites, to look like sea foam!


I added a touch of black paint to different parts of the painting, because I could see in my inspiration photo that there was black running through it. I think I did a little too much here at first- but again, with all of the layering it was very easy to cover and blend. Rest assured, there’s beginner ocean painting easy fixes here!!

Tip: It is not supposed to look perfect! If I didn’t like how one section turned out, I layered a few colors on top of it!
The last section was the sky. I knew I needed to add a little bit of blue to the sky, so I mixed a few of my blues with white to make a light blue color. I painted a few random sections of blue in the sky, and let that dry.
The final step in this painting was going over everything with white paint. I painted the entire sky in white, which turned out really nice because the blue still showed through underneath, giving it dimension. I also painted a lot of white across the ocean layers, to make it look like waves crashing along the sea line, and just to lighten the blues across the entire painting.

That pretty much sums up all of my steps! I kept this ocean painting easy and simple because I am not a painter at all! So trust me, if I can do it, anyone can. lol!
Tips to make this ocean painting easy and simple
- Keep the brush strokes going in the same direction
- Layer layer layer! You can do no wrong in layering colors
- Letting the colors dry before the next layer is helpful to not over mix colors if thats an issue- but sometimes I did let them mix and loved the outcome! I think a balance of both is key
- Have fun and keep checking your inspiration if you get stuck!
I really enjoyed this project and I hope you do too. Making ocean painting easy should be a thing so we can all enjoy it, right?!
If you’re up for more DIY art projects, check out our DIY Spackle Art post!
More Ocean Art Projects for Kids
Make a variety of ocean animals and hang them on the wall. These fun summer play ideas are a wonderful way to get creative with your toddlers and preschoolers.
- Paper Plate Jellyfish Craft
- Paper Plate Turtle Craft
- Paper Plate Starfish Craft
- Paper Plate Fish Craft
- Under the Sea Paper Plate Craft
- Sea Animal Suncatchers
- …
Materials Needed
- The free Under the Sea Silhouette templates
- Printer and paper
- Laminating machine and laminating sheets
- Scissors
- Sticky tape
- Black paper
- Soft pastels

Step 1. Download and print the Under the Sea Silhouettes.
The first step of this art project is to get your copy of the digital download below. It contains a silhouette picture of a turtle, stingray, shark and a mermaid. Use these free printables for kids for this silhouette painting, or any number of other play ideas.

2. Laminate the templates, and cut them out.
This is optional. You don’t have to laminate each picture unless you want to.
I like to laminate the pictures because it makes them more sturdy, and also reusable. When the kids are finished making their picture you can easily wash the templates and store them to use again another day.

3. Attach the template to the paper.
Take your black paper and stick the main subjects to the center of the page using sticky tape. If you are making a large picture you can always use more than one of the templates on the same page.

4. Draw around the edges of the template
Use different shades of blue, green and a bit of white to draw around the edges of the template. Let the kids draw how they like, but encourage them to make sure the edges of the silhouettes are completely covered.
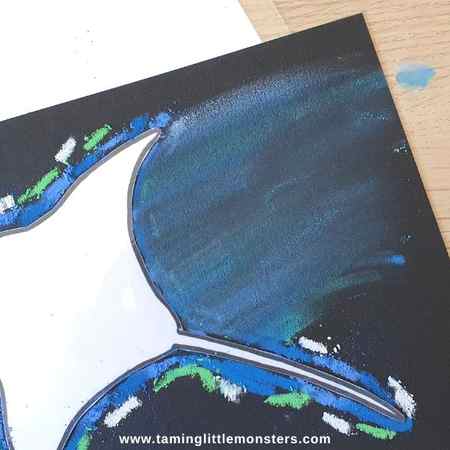
5. Use a finger to smudge the color outward
Now this is the fun part. To make the blue background, use your finger to smudge the colors outwards.
This will make it look like your sea animal is passing in front of the sun and the rays are shining outwards to the edges of the picture.

6. Repeat until you get the background you like.
Generally speaking, a little bit of soft pastels can go a long way. But you can go over the first layer with a different color to add more detail or a deeper color to your picture.
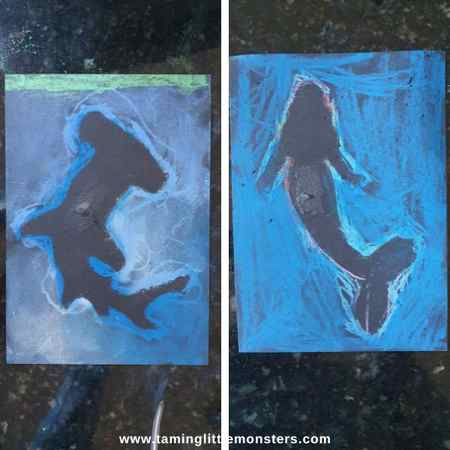
7. Remove the center template.
Very carefully remove the sticky tape, trying your best not to tear the black paper underneath. Blow or brush away any soft pastel residue that got underneath the template. You can also use a damp cloth if you’re very careful.

8. Use black paint to draw rocks, coral and seaweed around the edges
This is an optional detail that is better suited for older children. Use a black oil pastel or black paint to decorate the edges of the picture.
Again, this will aid with the illusion of looking up towards the sky from the bottom of the ocean floor.
Other options to try

While I used soft pastels to make this fun art project, you can use the same idea with regular acrylic paints or even watercolor paint. Use a bit of white paint to help add the streaks from the sun.
Try a different sea animal for your picture, such as a sea horse or a whale. Let your kids draw their own animal to make a custom template for their silhouette art project. This is a fun way for your kids to express their unique creativity.
Are you going to make this Under the Sea Silhouette Art with your kids?
Don’t forget to pin the idea or later


