Table of Contents
DIY Gold Christmas Tree Tutorial
This post may contain affiliate links. Please read our disclosure policy.
I have always wanted a DIY gold Christmas tree! So this year I decided this was the year I was excited to give my painting idea a try. It actually was easier than I thought! So easy in fact, a nine-year-old can do it.

The sparkle of gold will enhance your Christmas tree. Paired with a beautiful garland and all your special ornaments your DIY gold Christmas tree will be a hit during this festive season!
Spray paint makes many things possible! How easy it is to paint a tree whatever color will compliment your Christmas theme this year.
DIY Gold Christmas Tree Just a few Simple Steps
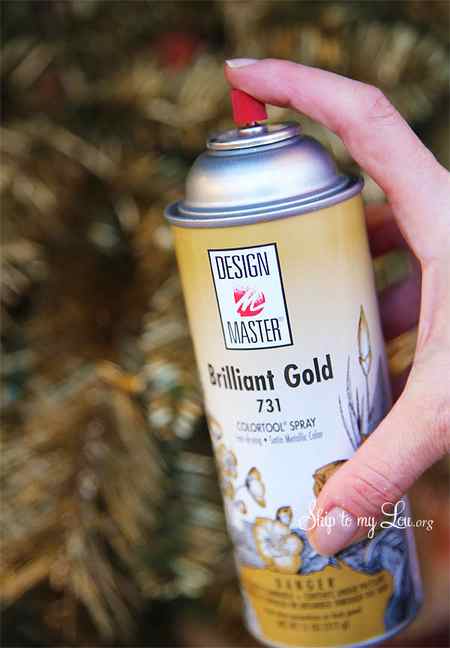
We used gold floral paint. We tried several different kinds of spray paint but this paint made especially for florals worked the best.
To keep from painting the lights we put drinking straws over the lights. Moving them as we painted.

Let your tree completely dry and decorate!

I decorated our tree with ornaments collected through the years from places we have traveled and things we like to do. I was thrilled to be able to add to my collection at Michaels. My candy-loving daughter loved this gumball machine.

My son, born in Texas, needed Santa in a car with longhorns.

More Christmas Decorating Ideas
- Button Christmas Tree Pendant can also double as an ornament to hang on your tree.
- Canvas Christmas Tree Banner this quick and easy project can be made in under an hour.
- Give your tree a handmade and homespun look with this Easy Crochet Garland For Your Christmas Tree.
- Reindeer DIY Christmas Wrapping Paper is a fun project for kids.
- Christmas Stocking Pattern is fully lined and super simple to sew!
- DIY Christmas Wreath Ideas are a fun way to celebrate and decorate for the holidays.
- Vintage Christmas Light Garland Tutorial this is a great gift idea kids can help make!
- Felt Christmas Gnome will make a friendly decoration under the tree, make it bigger to make a pillow.
- If you love decorating for the holidays, you’ll love these easy Simple and Stunning Holiday Decorations
- Crochet Santa Hat for cute photo props or even a handmade gift.
- If you’re looking for a fun and festive way to decorate your Christmas tree this year, why not try making some Santa Face Ornaments?
Did you paint your tree GOLD? If not, You can help spread some holiday cheer by sharing a photo of your dream tree or any trees that inspire you this year.
I would love to keep you fully stocked with creative ideas, yummy recipes, fun crafts, and loads of free printables. Subscribe to Skip to my Lou to get new ideas delivered to your inbox. Follow me on Facebook, Pinterest, Twitter, and Instagram for all my latest updates.
Like this post? Share it with friends!
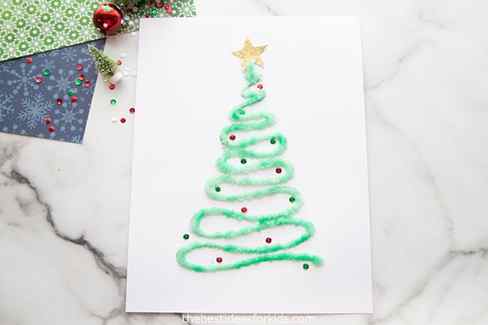
Salt Painted Christmas Tree Activity
If you’d rather not do salt painting, you can use this same printable template to make glitter painted Christmas trees.
Follow along with the same steps but instead of adding salt on top, add your favorite glitter.
We made this craft really simple by including a free template. You can get the template emailed to you as a free gift by signing up to our newsletter on the form with the preview of the Christmas tree template (close to the bottom of the post).
You can also do this activity drawing your own Christmas trees too!

Supplies Needed for Salt Painting
– Liquid watercolors – we like this brand
– Salt – regular table salt
– White glue – this bottle size is the best for tracing our template as the nozzle is smaller.
– Paintbrush
– A little bit of water
Watch the full tutorial video here before you get started!
TIPS FOR SALT PAINTING:
- Use a higher concentrated solution of liquid watercolors. Only add a small amount of water to your solution to keep the colors more vibrant.
- Dip your paintbrush gently into your liquid watercolors. Only get a little bit of watercolor at a time. If you have too much water when you’re painting the water may spill over the salted area. Don’t worry too much if you’re doing this for fun with the kids. But if you want to keep it as art to hang up we found using just a little bit of paint works best.
- You can paint after the glue dries or right away. We like to paint right away.
- Use some cardboard underneath your cardstock to avoid getting your counter or table wet as the liquid watercolor may seep through a bit.
- Use a thick white cardstock to avoid paint bleeding – this white cardstock is thicker than regular sizes but you can also check the thickness of the paper when ordering (we like 100 lbs).
Steps for Salt Painting
1. First print off the template or draw your own Christmas tree.

2. Begin by tracing the Christmas tree with your glue. We like to use this bottle of glue since the nozzle at the top is smaller and less glue will come out.
Don’t worry about some black showing through when you trace with the glue. Once you add the salt on top the black will not be noticeable.

3. Now for the fun part! Sprinkle on your salt. We like to keep a separate stash of salt for art activities. When you’re done, you can shake off the excess salt and store again for another salt craft.
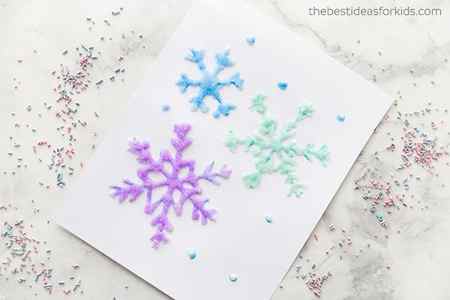
Or you can use it again to make these salt painted snowflakes.
Tip: Pour lots of salt over your Christmas tree to ensure you coat all of the glue. If you miss a spot then the color won’t run over that part.

4. Now you can begin to paint with your watercolors!
We like to use liquid watercolors as they are easy to use and more vibrant than food coloring or regular watercolors. However, food coloring or regular watercolors would also work. Whichever paint you decide to use, don’t dilute it with too much water to keep the colors vibrant.
If you’re looking for a low cost brand of liquid watercolors we like these ones.

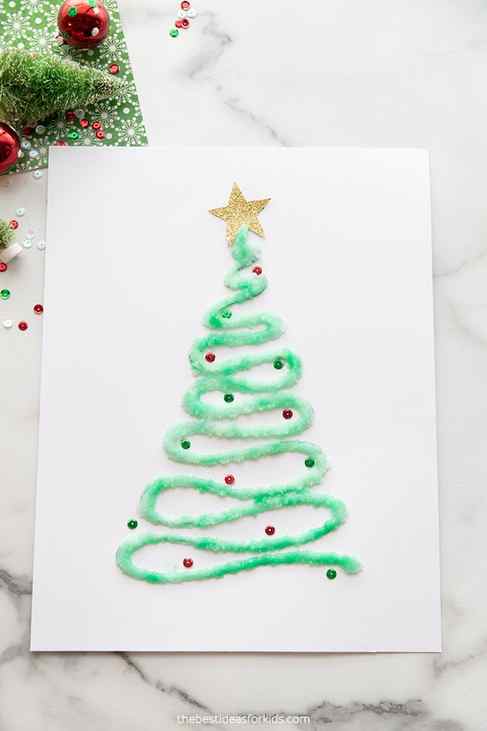
5. Once you’re done the salt painting, you can decorate your tree.
Add some confetti ornaments or sequins to the tree. We also added a gold glitter star to the top. You can also salt paint the star instead.
We love how this salt painted Christmas tree turned out! Your kids will love creating it too!

To make the glitter painted version, simply sprinkle glitter on top of your glue instead of salt and then decorate.
Sign up for our Newsletter and get this Salt Painted Christmas Tree Template as a thank you!
If you are having trouble getting the email confirmation, make sure you check all folders as it can sometimes land in the promotion and junk folders.
Step 8: Add more details
Look at the painting and see if there’s anything else we can add to the basic tree. In this case, I thought it will be nice to extend the branch a little bit more. So with some leftover paint on the brush let’s dab it some more to extend some branches.
At this point, our basic tree is done. We can now let it dry partially so that we can proceed to the next step which is adding our ornaments.
While waiting we can clean our brush by swishing it around into the jar of water. Gently wipe the tip of the brush with the rag making sure that the bristles of the brush is back into its normal shape.
Step 9: Add the ornaments and a star
We can use the same small brush to add ornaments. Dip the brush into the red paint and use it to make little circles in the Christmas tree, leaving a little white space in the middle of each circle.
With the same brush add few tiny red dots around the Christmas tree.
We can also use the same brush to add some red in our star. With some leftover red paint left, dip the brush into the water. Gently brush it on some of the sides of the yellow star and just let the watery red paint spread a bit.
Note: As you may noticed in photo before, the red paint is not on my palette. I just dipped the clean brush directly into the red paint container.

Here’s the finished painting!

Ideas for using:
- Christmas cards. It can be painted directly on a folded 7 x 10 in watercolor paper. Just make sure it is at least 300 gsm to avoid buckling.
- Mini painting. It can be painted on watercolor paper and displayed in a matted frame.
- Rock art. Make sure to prime the rock with white acrylic paint first.
Don’t want to waste the paint left in your palette? Click the pictures below to go to my other Christmas tree painting tutorials.


ABOUT
Hi, I’m Rei! I love painting easy designs on small surfaces like rocks, cards, and mini canvases. Grab your paint brushes, and let’s make some art!


