Go over the black fur around the eyes again with your fingers. Here it is important that the entire fur area is deep black. Immediately, you can begin again to draw in the individual hairs with a light-grey pastel chalk crayon. To blend transitions that are too light, you could either use the blending stump or, like me in this case – a black pastel crayon. This will give you a shadow of the hair and more depth at the same time.
How to Draw a Dog – Step by Step Dog Drawing Guide
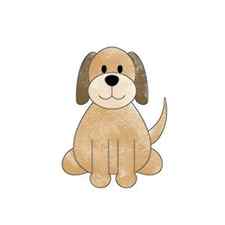
Drawing a dog is great fun and a challenge. This is because proportions, fur, eyes, nose, and many other details all need to be combined to create a realistic dog drawing. In this blog post, we will show you how to draw a dog by step. The simple dog drawing process will be presented alongside pictures to make things easier to follow. We have also included many useful tips and tricks to help you to learn how to draw a dog and to achieve the best results. So, if you want to learn how to draw a dog for kids or adults, then be sure to continue on to our detailed guide below.
Table of Contents
- 1 Dog Drawing Basics
- 2 Materials Need for Dog Drawing
- 3 How to Draw a Dog – The Basics
- 3.1 Choosing the Dog Picture
- 3.2 Think in Surfaces and Colors
- 3.3 The Workplace
- 4.1 1. From Photo to Drawing
- 4.2 2. The Forehead Area
- 4.3 3. Drawing Dog Eyes
- 4.4 4. Drawing the Mouth and Nose
- 4.5 5. The Chin
- 4.6 6. The Chest
Dog Drawing Basics
When drawing dogs with colored pencils, is there a big difference in drawing different dog breeds? Yes, absolutely! But for me, the difference is not if the dog is small or big, has short or long legs, is light or dark, but more in the structure of the coat. The easiest way to begin is to start with dogs with a shorter coat. Here you will draw with short brisk strokes. The direction of growth usually remains the same as well as the length. Soon you will be able to do this quickly and without thinking too much.
With dogs with a longer coat, like a Golden Retriever, it becomes more complicated. The individual hairs stick out in different directions, overlap, and vary in length. The hairs in the area of the head are relatively short, and at the ears, they start to get longer. The hairs can curl due to movement and become longer over the wider body. With dogs, you have to think a lot and draw in long strokes. Do not let yourself be driven crazy. Here too, proceed in small steps and draw parts individually. This will make it a little easier.
Make it easier for yourself at the beginning by sticking to portrait drawings and working at least on DIN A4 if possible. The smaller your drawing is, the more complicated it becomes. On larger sizes you can play around a bit more, you can see more when drawing and it is easier to get the details. In the end, this makes your drawing look very realistic.
Materials Need for Dog Drawing
You don’t need much for a colored pencil drawing, which is the style we will be doing in this tutorial. At that time of drawing, I only started with a sheet of paper, various pieces of pastel chalk, and colored pencils. This is a great medium for producing an easy dog drawing. Whether you are learning how to draw a dog, or want to draw anything else, here are some of the materials that I use and recommend:
- Natural white, acid-free, and age-resistant paper
- Colored pencils from KOH-I-NOOR
Important for me, as I can use it to prime large areas - Pastel chalk pieces from KOH-I-NOOR
Important for me, because with this I can draw in more layers and later create the coat structure - White artists pen marker
Important for me, because I can draw small accents like tactile hair and small reflections - Blending/drawing stump
Important for me, because I blend transitions, create coat structure, and soften areas - Kneading putty eraser
This is important for me because I can shape it in such a way that I can both erase large areas and set small accents. Note: Dark colors cannot be erased! - Pencil eraser
Important for me, because this eraser is much harder. I can use it to create very hard lines, make small repairs, or lighten small areas. Note: Dark colors cannot be erased here either!
How To Draw a Dog – Easy Step By Step Guide for Kids
Want to learn how to draw a dog? Well we’ve got a few easy step-by-step guides here for how to draw a few different types of dogs.
What you will need
- Pencil / Marker (If you’re game!) – Find Pencils
- Colours – Find Colours
- Eraser – Find Erasers
- A surface to draw on – Find Pads
- Start With The Mouth
To begin, you will need to draw an oval with flatter sides to make the mouth. Make sure not to make it too thin as we will need to fit the rest of the mouth inside this oval. - Put On The Nose
Next you need to draw in the nose, which will be a triangular shape with soft rounded edges. - Add The Head
Now you will want to draw an upside down U shape on top of the mouth you drew in step one. This will be the head of the dog, so make sure there’s space for the eyes. This could take up most of the width of the mouth but can be however you like!
Now that it’s finished, you can colour in the dog however you like! If you’re unsure where to start, you can make the body a mid-brown, the ears a dark brown and the mouth a beige.
Easy-peasy way to learn how to draw a dog!
Related Articles:


