Part Number: SAFCI443-W
How to Paint a Watercolor Jellyfish – 3 Min Tutorial
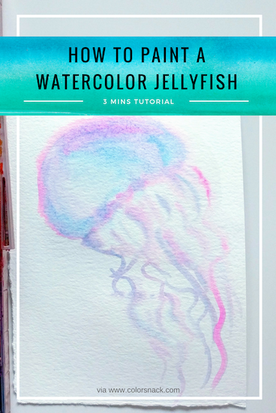

Are you guys ready for summer? I am seriously vibing some summer sunshine and the beach, and so I thought this little jellyfish would be perfect for this week’s Color Snack Sunday.
This is another sketch using the wet-on-wet technique because I wanted to give this watercolor jellyfish sketch a really soft and dreammy look. Plus it’s easy, fun and quick!
(Recommended) Watercolor Supplies:
-
- watercolors
- watercolor paper
- Water brush
- Paper towel/towel
- Your creativity
- A good & summery soundtrack
A happy playlist soundtrack:
Let’s get to sketchin’!
How to Sketch a Watercolor Jellyfish
Step 1. Glaze your watercolor paper.
This can be a little tricky, but with enough practice you will get the hang of it. It is important to make sure that the watercolor paper is properly wet, but not dripping with water. Otherwise it will not create a cool effect, but rather be super drippy. Start by adding a thin layer first and then add more if you feel that it is not properly wet.
Step 2. Start sketching the jellyfish head, or body.
Think of this shape as a semi-oval with a wavy line at the bottom. Don’t forget to leave some white space for your highlight, to give your shape more dimension.
I am using here Cerulean Blue by Daniel Smith, but you’re welcome to use any other type of blue that reminds you of summer and the beach.Step 3. Sketch the jellyfish tentacles.
Think of the tentacles as wavy lines. Some of these lines will also have additional ruffles, or wavy ridges. You can sketch these in a different color or mix your blues and pinks together to create a gentle purple (I am using Cerulean Blue + Opera Pink from Daniel Smith).Step 4. Go over your jellyfish shape with your second color to give it dimension and create a playful colorful look.
Because we are working with wet-on-wet watercolor technique, the edges will bleed a little into the background. But that’s totally ok! We want that, because it gives off this dreamy effect for us to play with it.
Step 5. Keep adding more light layers of watercolor to your jellyfish, until you’re happy with it.
Your jellyfish sketch is ready!
You can also check out the full video for this tutorial to see it in action.
Pattern and instruction options
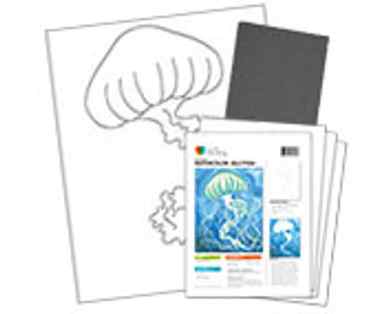
Watercolor Jellyfish – Printed Paint Kit
Show Details
Part Number: SADPK443
All the help you need to transform your paint and canvas into a work of art. Includes the following:
- Complete Design Instructions
- Reusable Pattern
- Transfer Paper
Temporarily Out of Stock
$9.98
Quantity:
Add to Cart
Watercolor Jellyfish – How To Instructions
*Instructions do not include Tracer Pattern
Show Details
Part Number: SAPPI443-W
Canvas Art Painting Instructions
What IS Included:
- Step by step directions that are easy to follow
- Instructions tell you what colors, brushes and techniques to use to bring this painting to life!
- Includes a handy supply list to gather before you start
- Includes Helpful Tips & Techniques Guide
What’s NOT Included:
- THESE INSTRUCTIONS DO NOT COME WITH A TRACEABLE PATTERN
- The traceable pattern must be purchased separately
- For some designs, the traceable pattern has been discontinued and will not be back in stock for the time being
$5.48
Quantity:
Add to CartPattern and instruction options
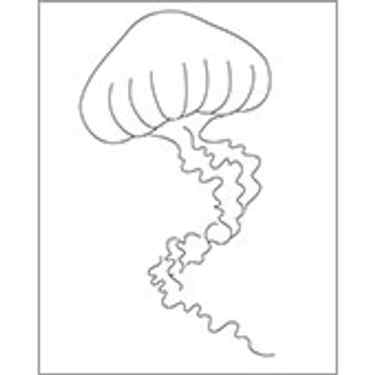
Watercolor Jellyfish – Reusable Pattern
Show Details
Part Number: SAPP443-W
Reusable paper pattern ensures reproducible designs by beginner painters. Printed in black and white. Pattern is sized to match design description size.


