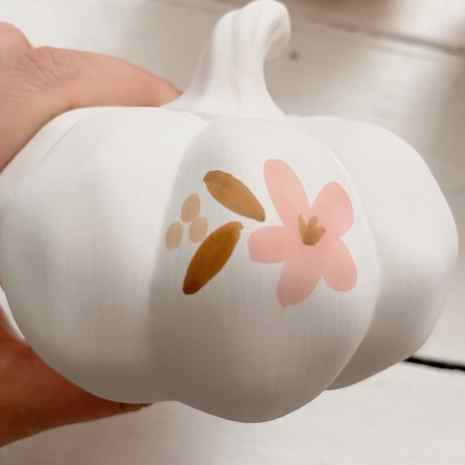
You can then add 3 more petals to the bottom half of the love heart shape to create your floral base.
How to paint pumpkins: Easy pumpkin painting tutorial
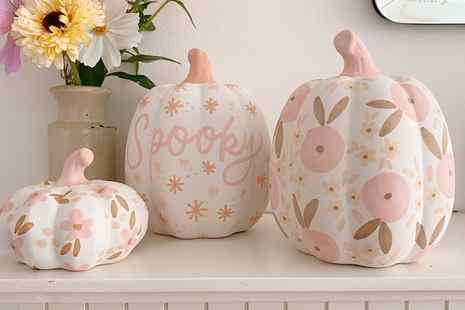
Celebrate Halloween in style or give your home a modern makeover this Autumn with these beautiful DIY painted pumpkins, with photo steps to make 3 designs.
- Share on Facebook
- Share on Twitter
- Share on Pinterest
- Share on Whatsapp
- Share on Tumblr
- Email to a friend
This competition is now closed
Published: September 22, 2021 at 10:10 pm
How to paint pumpkins – step by step
Supplies
- Ceramic Pumpkins, available from Hobbycraft
- Dual tip marker pens, available from Hobbycraft
DIY painted pumpkins tips
- These techniques can be applied using Acrylic, Posca or gouache paint as well as illustrative markers.
- You can rough out where you motifs will go using a pencil
- Have a practice on a sheet of paper before you work onto the ceramics
Advertisement
You Will Need
- Ceramic pumpkins
- Dual tip marker pens
Total time:
2 minutes
Step 1
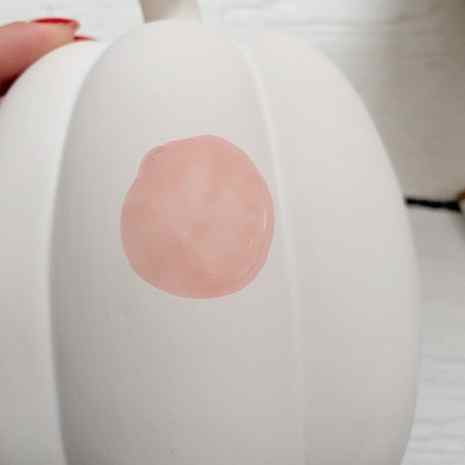
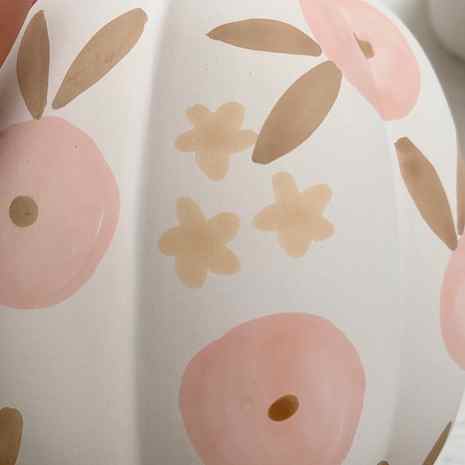
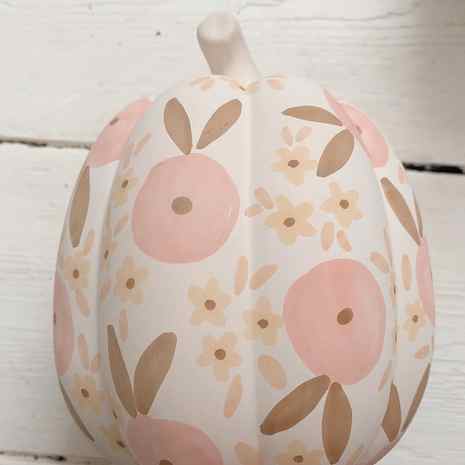
Your first pattern is made up of simple floral shapes, firstly draw a rough circle shape to form the first flower motif and colour in.
Step 2
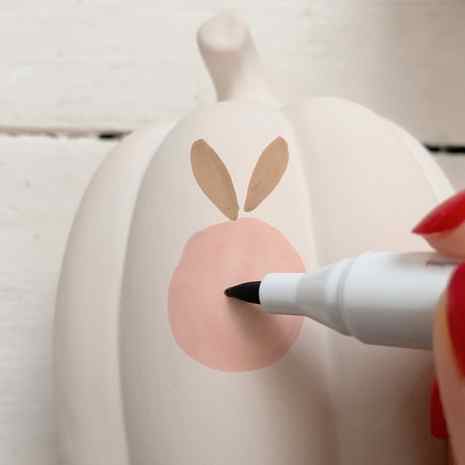
With another colour draw two leave shapes (elongated ovals with points) that work from the circle, colour in and add a small circle in the middle. This will complete your first motif shape.
Step 3
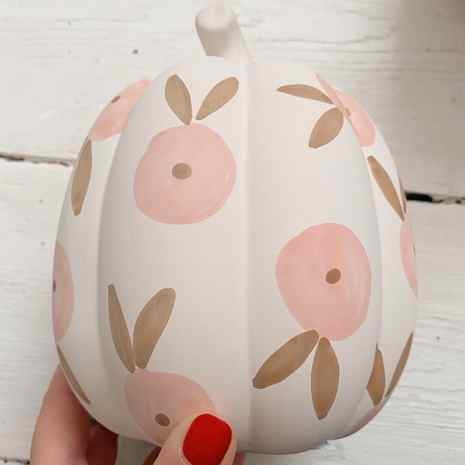
Repeat this motif across the pumpkin leaving equal space between the circles and adding in the leaves heading in different directions to create a fun floral pattern.
Step 4
Now in-between these main florals add smaller ditsy flower shapes in another colour, break the shapes down into 5 teardrop shapes that join at the centre if you are having trouble with illustrating them. Keep these in groups of 3 and 5.
Step 5
Add a small dot to the centre of the ditsy florals and then leaves working out from the groups of them. Your pumpkin should now be covered in a ditsy floral autumn pattern.
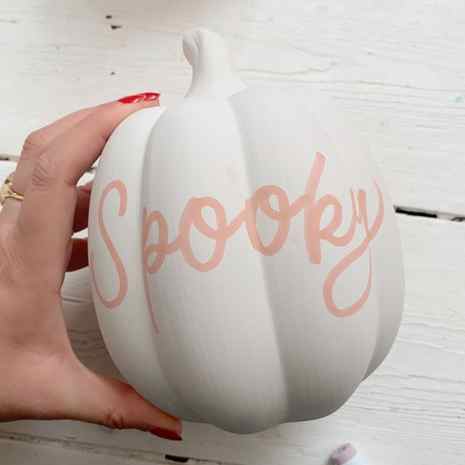
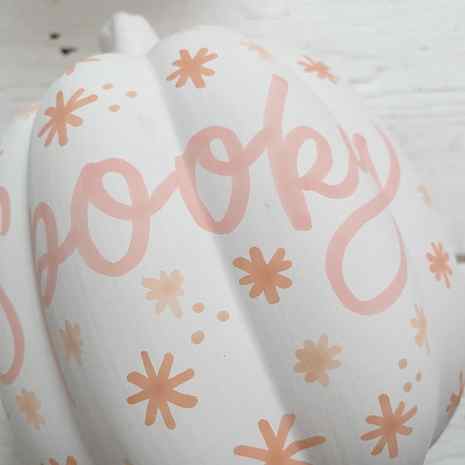
DIY painted pumpkins – Spooky pumpkin design
Step 1
For this next design, start by writing the word “Spooky” on to a ceramic pumpkin using the brush end of the dual markers. Download our Spooky practice template here if you’re feeling nervous about lettering straight onto the pumpkin.
Step 2
Using another colour begin illustrating stars across the ceramic pumpkin.
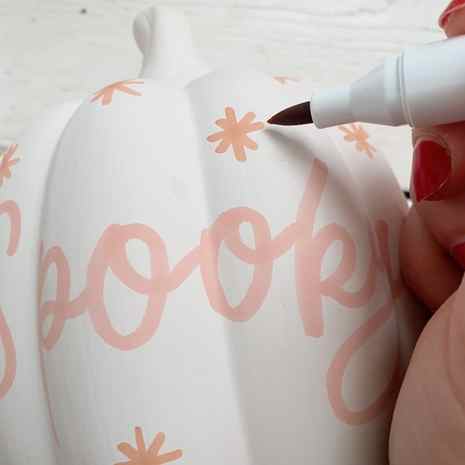
Step 3
Mix and match between colours and size of stars for a graphic style pattern, if you have any awkward spaces then add in some dots in groups of 3 or 5 to fill the space.
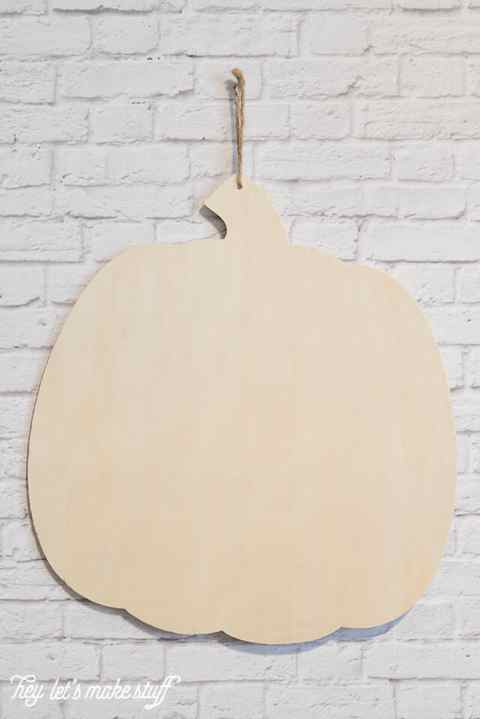
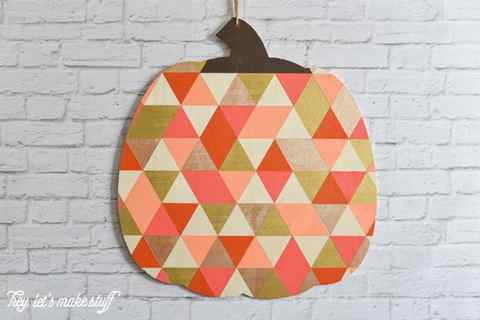
Geometric Wood Pumpkin
Today is such a fun day because I’m teaming up with some of my blogger friends for a “Pumpkin Smasher” challenge. We each picked up this plain wood pumpkin from Hobby Lobby and did something different with it.
I’ve been wanting to try out painting geometric triangles for a while now. I knew it would require some patience and Frog Tape, but I thought it would be worth it in the end. So in between nap times, I taped and painted. And taped again and painted again. Repeat a bunch of times. And this is what you get!
Not detailed enough for you? Here’s how I got the look.
Table of Contents
Supplies
- Wooden pumpkin
- Ruler with 60° line (like a quilting ruler)
- Pencil
- Frog Tape
- Craft Paint
- Paint brush
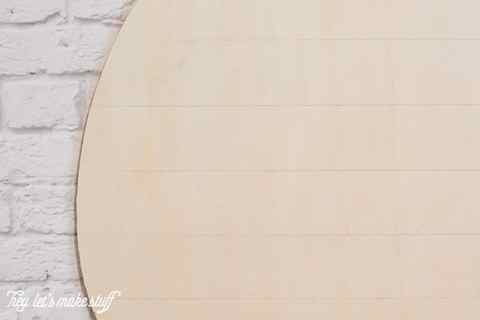
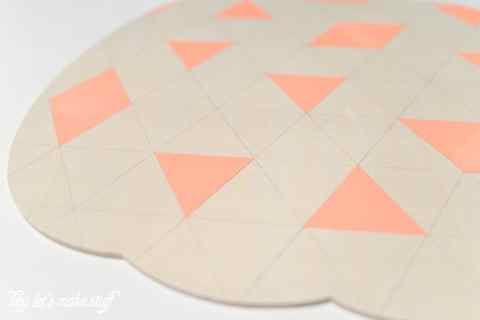
Using a pencil, draw horizontal lines across your pumpkin (or whatever you’re triangle-ing). For this project, I used lines 2″ apart.
Using the ruler, put the line marked “60°” on one of the lines you already drew. You’ll see that the right side of the ruler (or left side, depending on how you lay the ruler down) creates another edge of the triangle. Draw one line using the ruler, and then draw parallel lines that are also 2″ apart.
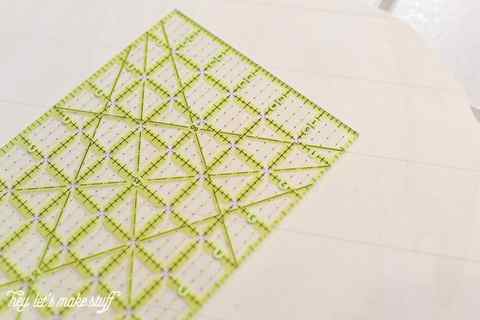
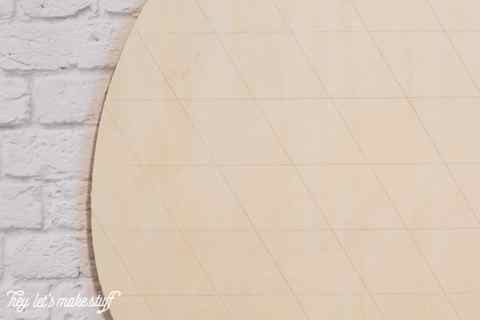
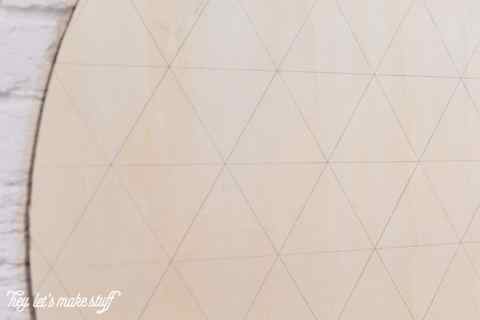
Turn the ruler, and finish making your triangles.
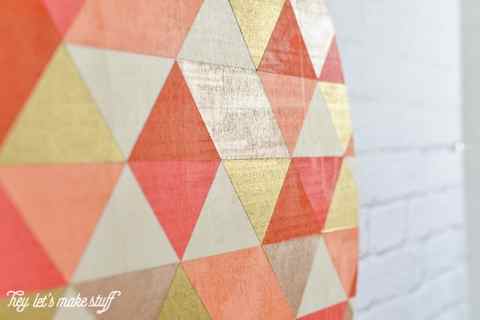
To create the geometric look, I taped off a bunch of the triangles with Frog Tape, making sure to press down the edges well. For a few, I kept two triangles right next to each other so it would look even more random.
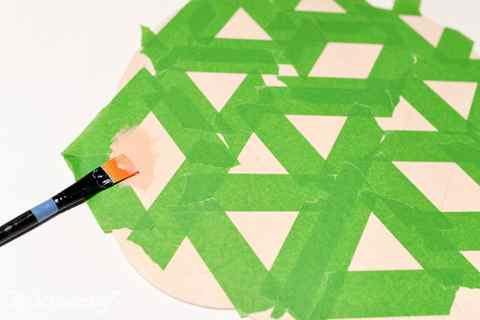
I did two coats and let it dry.
Then I peeled off the tape — this is what it looked like.
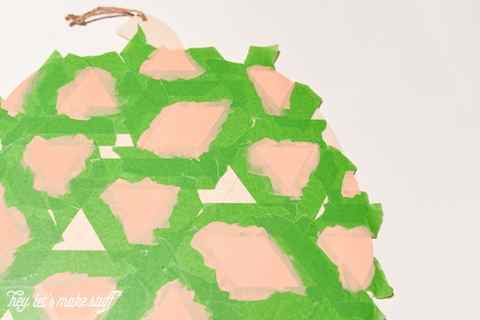
Then I taped of another bunch of triangles and painted them the next color. Two coats, let it dry, peel the tape off. And repeat, until you have all the triangles painted! I kept some of the triangles the raw wood of the pumpkin because I liked how it looked. You could paint every triangle if you prefer.
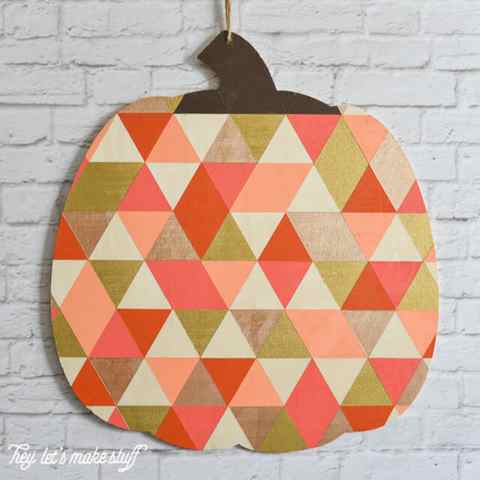
I started off by painting the stem green, but it was not at all right. Then I tried dark brown and was much happier with the result.
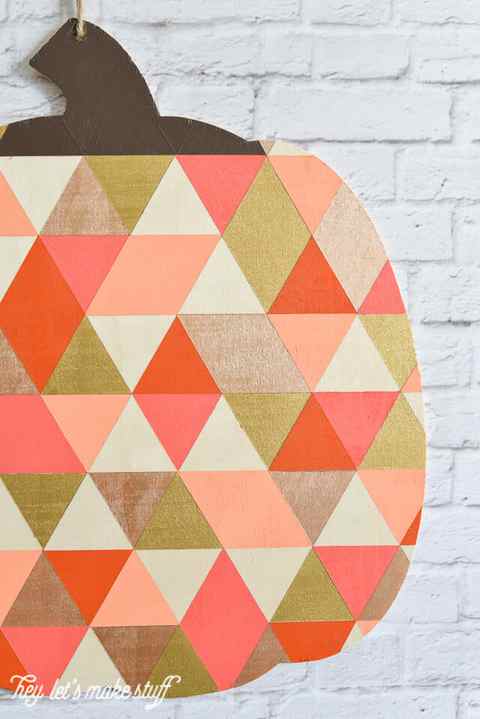
Two of the paints I used were metallic — a regular gold and a rose gold. I love how they catch the light.
I’m kind of obsessed with how this turned out. The Frog Tape creates such clean lines and I had to do very little touch up. It makes me want to tackle a project on a much larger scale, like a wall. I can’t wait to give it a try!


