Table of Contents
Learn To Make Shark Painting Step-by-step Tutorial
Painting can be hard at times and messy too, especially for kids. But you can surely learn to paint by practicing more and more and with this you can broaden the horizon of your creativity too. So, if you want to start learning how to paint this is your chance. Let’s get started!

Materials Required
- Blue craft paper
- Poster colour (Dark Blue, White, Pink, Dark Green, Light Green, Red)
- Paintbrush
- Googly eye
- Glue
Step 1: Taking Dark Blue Poster Colour

Your first step is to take a blue coloured craft paper. The blue coloured craft paper should be in a circle shape. Then, take a dark blue poster colour and a paintbrush. Dip the paintbrush in the dark blue poster colour and make a slant line on the blue coloured craft paper with a dark blue poster colour paintbrush.
Step 2: Making An Outline Of The Shark With Dark Blue Poster Colour
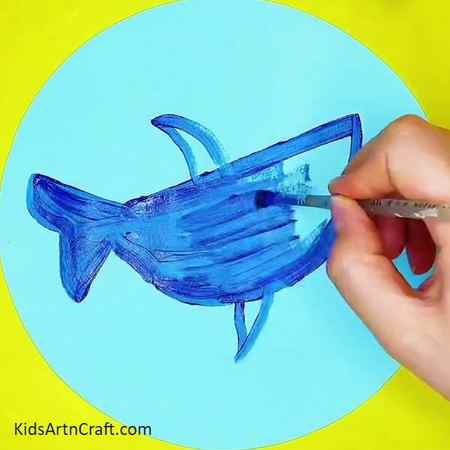
With the help of dark blue poster colour and paint brush, make an outline of the shark as shown. After making an outline, fill in the dark blue poster colour inside the outline of the shark with the help of paintbrush.
Step 3: Sticking Googly Eye With Glue
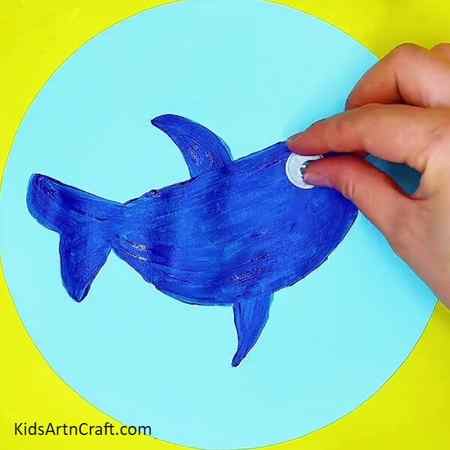
Now, with the help of glue, stick the googly eye on the dark blue poster colour which you have filled inside the shark outline.
Step 4: Making Teeth With White Poster Colour
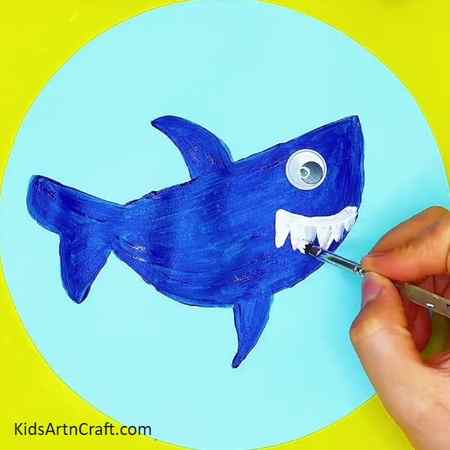
With the help of white poster colour and paint brush, make the teeth of the shark. Make the teeth right below where you have stuck the googly eye. Remember before making the teeth of the shark with white poster colour, you need to let the dark blue poster colour dry which you have painted in the shark, otherwise, your paint will spread and it will look messy.
Step 5: Making Blush With Pink Poster Colour
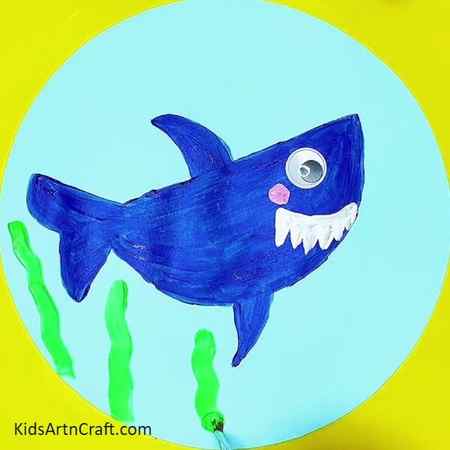
To give an effect to the shark, make blush of the shark with pink poster colour and a paint brush. Make the blush at the corner of between the teeth of the shark and the googly eye. Then, with the help of light green poster colour, make plants on the blue coloured craft paper with the help of paint brush. Remember when you are making plants with light green poster colour, leave sone gap in between each light green plants.
Step 6: Making Plants With Dark Green Poster Colour
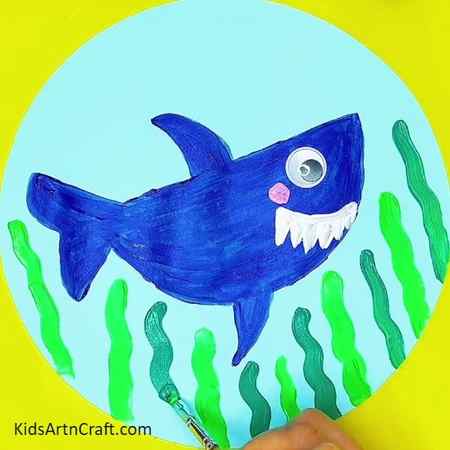
Take a dark green poster colour and a paintbrush and start making plants with the help of dark green poster colour and a paintbrush. Make dark green plants on the blue coloured craft paper in the gaps which you have left between light green plants in the above step.
Step 7: Making Small Fish With Red Poster Colour
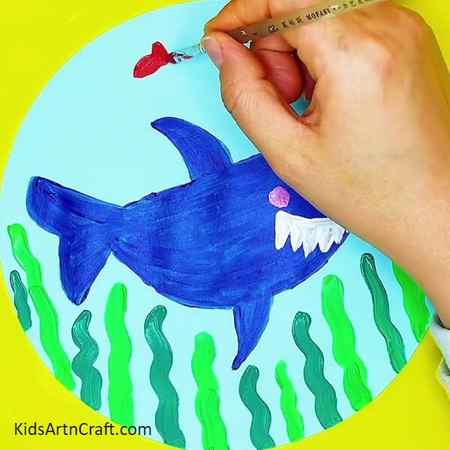
Now, with the help of red poster colour and a paintbrush, make small fish from red poster colour on the blue coloured craft paper as shown.
Step 8: Making More Red Fishes With Red Poster Colour
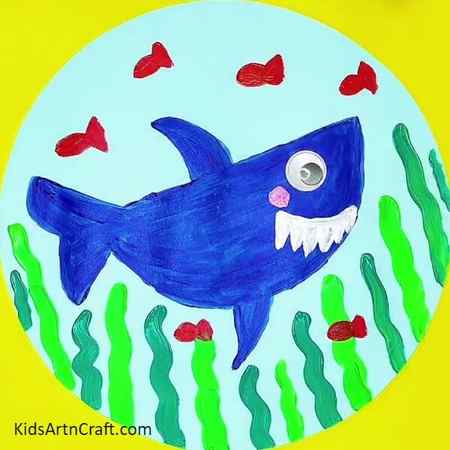
Keep repeating the step of making the small red fishes with the help of red poster colour and the paintbrush until you have surrounded the blue-coloured craft paper with the small red fishes.
Your Craft Is Ready!!
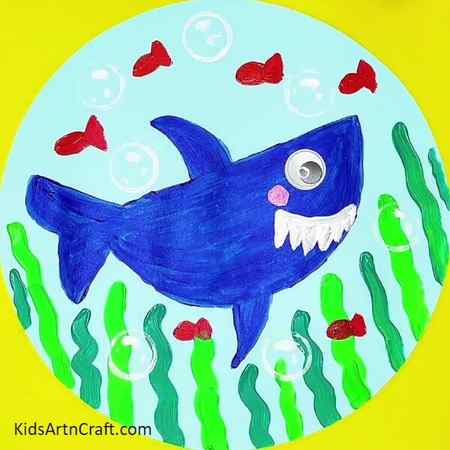
Finally, your shark painting is ready. You can even make bubbles around the blue coloured craft paper with the help of white poster colour as shown to give a more underwater effect. See, if you try something out, you will definitely succeed and this painting is proof of it. Just practice making more and more paintings and you will be a Picasso in no time.
You should definitely start making this painting if you want that your painting skills to be upgraded. This is the perfect opportunity for you to start painting. Enjoy every bit of your painting journey.
Follow us on Youtube for art and craft tutorials and much more.
More Articles from Kids Art & Craft
- DIY Easy Paper Strawberry Craft Tutorial
- Popsicle Stick Shark Craft Tutorial For Kids
- Easy Paper Butterfly Craft For Kids
- DIY Miniature Clay Cake Craft Activities for Kids
- Paper Fan Toy Craft for kids to Play Easy Tutorial
Related posts:
- Step-by-Step Drawing Tricks Video Tutorial for Beginners
- DIY Easy Origami Paper Shark Toy Tutorial For Kids
- Popsicle Stick Shark Craft Tutorial For Kids
- DIY Paper Tree Crafts for Kids Easy Tutorial
- How to Make Paper Flower Ring Easy Tutorial
- DIY Car With Balloon and Straw Easy Tutorial
- Easy Paper Bird Step by Step Tutorial For Kids
- Easy Chinese Paper Dragon Craft Tutorial
How to Draw a Shark in 10 Simple Steps
Are you looking for a fun activity that is simple and also educational? This easy shark drawing tutorial has 10 simple steps to follow, and by the end, you will have a beautiful and realistic shark drawing! First, you will create the foundation lines and details and add some color and texture. Grab your favorite drawing supplies in the medium of your choice and let us begin!

Drawing Sharks
These creatures are fascinating to watch, and that is why they are the kings of the ocean! The great white shark is the subject of this how-to-draw-a-shark tutorial. There are so many different types of sharks swimming in the deep blue sea! Looking at the individual species of sharks would be recommended before starting. You could even create a collection of realistic shark drawings!

Art Supplies Needed for Your Easy Shark Drawing
At the beginning of this how-to-draw-a-shark tutorial, you will be guided on the first steps to creating the shark’s foundation lines. Thereafter, you will build the layers and lines to develop the realistic shark drawing. You will require the following materials for your shark drawing:
Supplies for Sketching Your Shark Drawing

Supplies for Adding Color to Your Shark Drawing

How to Draw a Shark: A Fun and Easy Tutorial
This easy shark drawing tutorial will focus on the basic steps of drawing a shark. You can manipulate these steps for any species of shark, but today the focus will be on the form of the great white shark. After you have mastered the basic foundations of shark drawing, you can feel free to explore the world of shark species and adapt this tutorial to draw them too!
Step 1: Creating the Foundation Lines of Your Shark Sketch
Using a light pencil, you can begin by sketching the initial foundation lines of the shark’s body. Have a quick look at the picture below for a basic idea before you begin. The shape of the shark is almost an oval-type shape, you should start from the left side and draw a sideways water drop with a tail.
Remember that the left side should be larger than the right, as the shark’s head is large.

Step 2: Place the Lateral Line on Your Realistic Shark Drawing
Draw a lateral line that runs in the middle of your shark drawing. This line will help guide you in creating the body and movement of your realistic shark drawing. This line should go along the shark’s body, from its gills to its tail.

Step 3: Adding the Fins to Your Realistic Shark Drawing
In this step, you will add the fins to your shark sketch. There are six visible fins from this angle of the shark. Begin by drawing the dorsal fin on the top; draw this fin as a large crescent shape triangle. Next is the pectoral fin on its side and adding the smaller three fins close to the tail fin, and lastly, you can draw the tail.
Be sure to make the shark’s fins wide enough! These creatures are massive and powerful, with the ability to effortlessly glide through the water.

Step 4: Creating Facial Features in Your Easy Shark Drawing
Sharks may be big and scary, but did you know each species of shark has unique facial features that differ from the next? They are not just fish with fangs! The great white shark has the largest jawline, and this is what makes them so terrifying. In step four, you will create the facial features of your realistic shark drawing. Begin by adding the shark’s gills, do this below your lateral line from step two. Continue with the shark’s snout or nose, mouth, and teeth.
Great white sharks have a huge overbite, and this is a characteristic that can help differentiate between the different shark species.

Step 5: Constructing the Eye Shape of Your Easy Shark Drawing
The eyes are the windows to the soul, and in this case, it’s the way to add a sense of danger to your realistic shark drawing. To draw the shark’s eyes, simply draw two circles. First, draw the eye outline and sketch a smaller circle within the eye outline.

Next, you must fill in the second circle. Do this by circling into the center and leaving a small white dot-like shape. This will create a highlight and add some dimension to your realistic shark drawing.

Step 6: Adding the Final Outline to Your Shark Drawing
You have completed drawing the foundation outline of your shark sketch. You must create the final outline by tracing over the pencil lines with a black pen.

Be sure not to rest your hand on your shark sketch and smudge it as you trace the outlines. You can now begin to gently erase the pencil lines.

Step 7: Adding Texture to the Skin of Your Realistic Shark Drawing
To create a realistic shark drawing, you will need to shade the correct shadows and highlights on the shark’s body. You may use any shading technique you prefer when creating the shark’s skin texture. Use a pen and begin by making tiny dots to form a cluster and make shadows along the edges of the shark’s body.

Where the highlights fall on the shark’s curves, you will draw fewer dots. Therefore, there should be more dot clusters along the shadow area.

Step 8: Adding Shadows and Highlights to Your Easy Shark Drawing
In the seventh step, you created the beginning stages of drawing the shark’s skin and texture. You will continue to do this, but you must add extra emphasis on the shadows and highlights.

Think about how the light would fall onto the shark’s skin and then add shadows to the opposite of the light. Be gentle and work slowly to capture every detail.

Step 9: Applying Color to Your Realistic Shark Drawing
By the ninth step, you should have a lovely shark drawing! These final steps are optional, and if you want to add color to your shark sketch, you can continue this how-to-draw-a-shark tutorial.

The best medium for this particular shark sketch is that of watercolor pencils or watercolor paint because these complement the ink outlines of your shark drawing. Following the shark’s skin texture, you can begin by adding a diluted watercolor layer.

Step 10: Adding the Darker Shades of Color to Your Shark Drawing
You have reached the final step of this how-to-draw-a-shark tutorial. The last addition is to add a darker shade of color to your shark sketch. Gently shade the outer corners of the shark and glide your paintbrush from those corners inwards.
This step will help add the realistic dimensions and movement of the shark.

Congratulations! You have completed our how-to draw-a-shark tutorial. Sharks are wonders of the ocean, powerful animals gliding through the icy waters. This easy and quick step-by-step drawing lesson focused on the initial shark outline, shading, and color to create a realistic shark drawing. Now that you have drawn your first shark sketch, you can continue exploring unique sea creatures and add them to your ocean-art collection. Happy drawing!
Frequently Asked Questions
How Do I Draw a Shark?
To draw a shark, you should follow this easy 10-step tutorial. This lesson focuses on the basics of creating the outline of the shark, as well as how to add shading and texture to the shark’s skin. Lastly, we will show you how to add color to bring life to your shark sketch!
Is It Easy to Sketch a Realistic Shark Drawing?
Anything feels too difficult to draw in the beginning! But once you have grasped a better understanding of the proportions of the shark’s body and fins, the rest is easy! Follow our easy and simple how-to-draw-a-shark tutorial to create the best and most realistic shark drawing.
Izzy Benloulou ( Digital Artist and Content Creator )
Israel Benloulou aka IzzyBll is a digital artist and content creator from Israel, currently living in South Africa. Originally, he started his career in videography but later shifted his focus to digital graphic art. He specializes in using digital drawing software like Photoshop and Procreate. Drawing and photo editing have always come naturally to Izzy, and he now has 5 years of experience in the industry, working on commissions for various renowned brands such as Audi. Izzy creates drawing tutorials on his drawing tablet and produces related content for Craft Art since 2021.
Learn more about Israel Benloulou and about us.


