It is definitely worth it to buy the high-quality brushes and rollers. If you want your DIY wall painting to look professional, buy the professional tools – not the cheap crap. The last thing you want while painting is for the rollers to shed and the bristles to fall off the brush into your paint job.
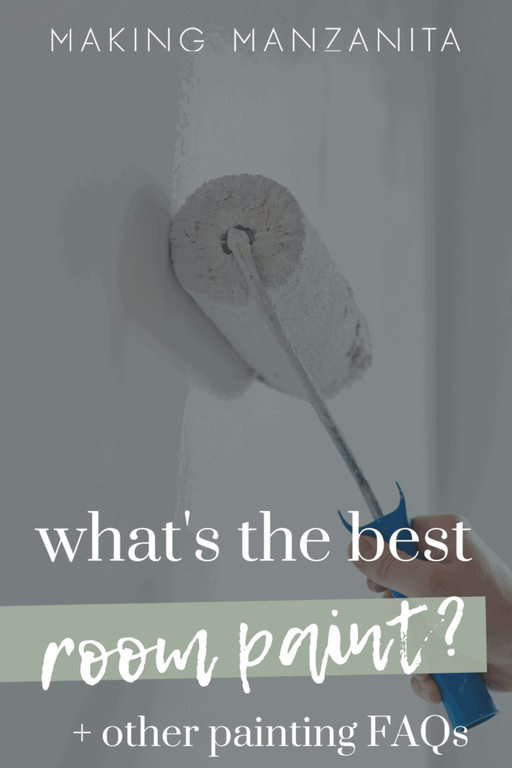
How To Paint A Room For Beginners | Ultimate Guide
Even if you’re not full-on renovating like we are, there’s definitely a time when a room is calling for paint. I definitely believe that paint is single-handedly the best and easiest way to update a room.
Although it may be a little overwhelming, painting is something that any homeowner can do – regardless of your experience level! All it takes is a small investment of resources and time, along with patience (and maybe a little trial and error too) to figure out how to paint a room for beginners.
Table of Contents
- How To Paint A Room For Beginners
- Supply list
- #1: Prep room for paint
- #2: Paint ceiling
- #3: Paint trim and baseboards
- #4: Cut in paint
- #5: Roll paint on walls
- #6: Touch up
- Don’t be in a hurry
- Spend the extra money on the right tools
 Contents
Further Reading – Are you thinking about painting your exterior? You’ve gotta read these exterior painting tips.
Related: Other Interior Painting Articles
- Choosing Front Door Paint Colors (& How To Paint A Door)
- Two Tone Walls in Bedroom: How To Paint Straight Lines
- Mountain Mural Tutorial (Featuring Behr Paint Colors Trends)
- Behr Chic Gray Paint Reveal (+ The Best Order of Painting A Room)
- Modern Sponge Painting | Semi Circle Pattern in Back of Locker Cabinets
- How To Paint An Arch Like A Pro
- A Basic Paint Sheen Guide for Interior and Exterior Surfaces
- How To Cut In Paint without Painter’s Tape
- How To Paint A Ceiling With A Roller
- Behr Fashion Gray | Paint Color Overview and Review
- How To Paint A Room For Beginners | Ultimate Guide
- Tips for Painting Baseboards and Trim
- Black Bamboo Behr | Paint Color Overview and Review
- Behr Meteorological | Paint Color Overview and Review
- Behr Falling Snow | Paint Color Overview and Review
- 16 Gorgeous Green Accent Walls
- Snowy Pine Behr Paint Overview
- In The Moment Behr Paint Color Overview
- 22 Front Door Paint Colors to Inspire You
- Master Bedroom Colors | 20 Great Paint Color Ideas with Pictures
- Behr Midnight in NY Paint Color Overview
- Graphic Charcoal Behr | Paint Color Overview and Review
- Do I need primer before painting?
- How to Paint a Room Fast
- How To Clean Walls Before Painting
- Interior Painting Tools List – 17+ Must-Haves for Homeowners
- Cost to Paint a Room – DIY vs Hire Comparison
In this article we’re going to cover the entire detailed process of how to paint a room for beginners. At the end we’re also answering some interior painting frequently asked questions and spilling some of our favorite painting tips to get a professional finish!
How To Paint A Room For Beginners | Step by Step Guide
This how to paint a room for beginners tutorial contains affiliate links, but nothing that I wouldn’t recommend wholeheartedly. Read my full disclosure here.
Supplies for painting a room:
- Screw driver
- Putty knife
- Spackle
- Sanding sponge
- Primer
- TSP
- Paint stir stick
- Ceiling paint
- Trim paint
- Wall paint
- Paint can opener or screw driver
- Angeled paint brush (for cutting in, if needed on ceiling)
- 4 inch paint roller & cover (for trim and baseboards)
- Paint roller covers – 3/8″ nap
- Paint roller
- Paintroller extension rod
- Paint tray (or use a power roller like this to avoid using paint trays altogether!)
- Painter’s tape
- Drop cloths
- Rags
- Swiffer sweeper
- Ladder or step stool
- Safety glasses
Step 1. Prep room for paint
Getting a room prepped before painting is an important step that you shouldn’t skip! Even though you may be wanting to try to paint faster, it’s well worth it to slow down and get the prep right. Here’s how to prep a room for painting.
Prepping for paint (at a glance):
- Remove/cover furniture
- Remove light switches and outlet covers
- Remove everything from walls
- Patch nail holes and imperfections
- Clean with TSP
- Caulk baseboards (if needed)
- Cover flooring
How to prep a room for painting (more details for beginners):
- Remove furniture from room or, at least, push it to the center of the room and drape it with either drop cloths, old bed sheets or plastic drop cloth to protect it.
- Take off light switch plates and outlet covers with a screw driver and put them in a Ziploc bag. When you’re painting a room, it may also be a great time to change an outlet or light switch to modernize it.
- Painting the doors too? Remove the handle and put in a Ziploc bag with all of the screws and parts.
- Remove everything from the walls (including curtain rods) and patch all nail holes for wall decor that isn’t going in the same spot. To patch nail holes, fill the hole with spackle using a putty knife and let it dry. When dry, sand smooth and cover with primer. Add primer to the patched nail hole before painting will help prevent “flashing”, which is when the paint sheen is a little different from where the patched nail hole is. This extra step is well worth it if you want your paint finish to be consistent and look professional!
- When you’re patching the nail holes, take a slow walk around the room to check for other imperfections. Fill any dents, scratches, bumps or holes on the walls with spackle (these areas also need to be sanded smooth and then primed too). Sand any peeling paint on walls with a sanding block.
- Don’t forget to inspect baseboards and trim too. Patch any nail holes or imperfections on trim or baseboards in the same way with spackle.
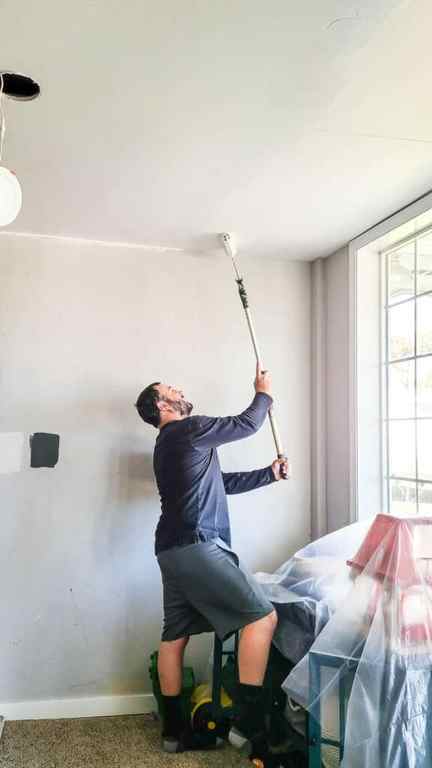
Step 2. Paint ceiling
When painting a room, you always want to start with the ceiling and work your way down to the trim & baseboards and then move on to the walls last. We explained more about why this is the best order of painting a room in this article if you’re interested.
Here’s the process of painting the ceiling:
- Stir ceiling paint and pour it into a paint tray
- Roll paint onto the ceiling in small sections
- Repeat with 2nd coat if necessary
We have a super detailed guide all how to paint a ceiling with a roller if you’re wanting more helpful tips and tricks.
Step 3. Paint trim and baseboards (and doors)
After you’re done painting the ceiling, it’s time to move on to the trim, baseboards, and doors.
If your doors don’t need a fresh coat of paint, feel free to skip them. If you do need to tackle doors, check out our step-by-step tutorial for how to paint a door.
Here’s the general process of painting trim and base:
- Use a 4-inch paint roller cover with 3/8″ nap on the edge and front of trim.
- We recommend a semi-gloss paint sheen on trim and baseboards – learn why in our paint sheen guide.
- Keep your paint roller filled up and apply the paint fairly heavily so you don’t have to apply multiple coats.
- Be sure to make sure the paint isn’t too heavy and dripping.
- If multiple coats are needed, wait for each to dry completely before moving on.
If you’ve never painted trim or baseboards before, it’s worth your time to read our tips for painting baseboards and trim.
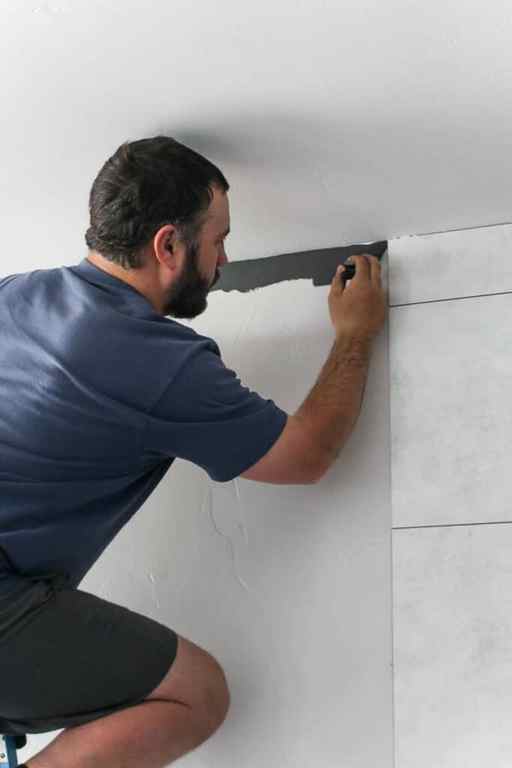
Step 4. Cut in along ceiling and around trim & baseboards
Next, you can move on to cutting in the wall color paint at the edge along the ceiling and around the trim and baseboards.
If your trim paint is still wet, start with cutting in along the ceiling and definitely wait until the trim paint is dry before cutting in next to the baseboards and trim.
What if I was to tell you that you don’t need painter’s tape to cut in EVEN if you’re a beginner?! We have a whole guide all about how to cut in paint without tape so you can learn the whole process. It’s worth it to learn how to do all of your cutting in with an angled brush so you don’t have to futz with so much painter’s tape.
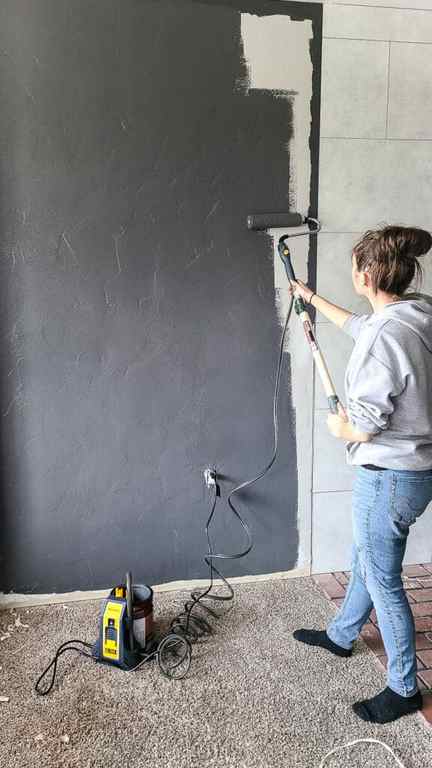
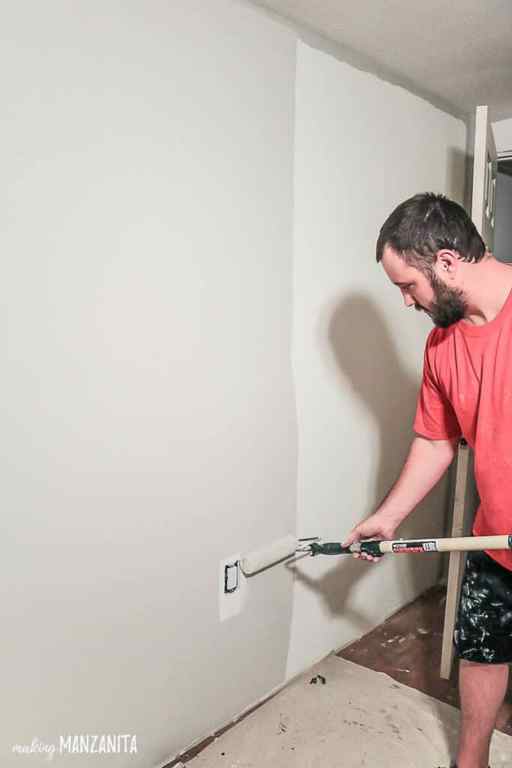
Step 5. Roll paint on walls
If you’re reading this guide on how to paint a room for beginners, you’re probably wanting some tips on how to paint a room with a roller. The alternative method of painting walls is with a paint sprayer, but I would not recommend this for a beginner because there’s a steep learning curve and it’s VERY messy.

Shake the can of wall paint and open it with a paint can opener (or a screwdriver). Next, take a stir stick and stir the paint well. This step is important because the colors and additives in the paint tend to separate and settle when it’s been sitting.

Carefully pour the wall paint color into a paint tray. Grab your paint roller, 3/8″ nap paint roller cover, and extension rod. Roll the paint roller into the paint tray and spin until paint is covering the entire roller cover.
Get excess paint off of the roller by rolling it back and forth on the ramp of the paint tray.

If you’re doing a lot of painting, it may make sense for you to purchase your paint in 5-gallon buckets instead. If you do that you can hang a grate in the bucket to roll off excess paint like this.
Tips for Painting Walls for Beginners
Bring your paint roller up to the wall and make a large W on the wall for the initial pass. Continue to roll the paint roller over the wall working in small 4′ sections overlapping the passes.
Use the extension pole on your paint roller to make it easier to reach up to the ceiling without getting on a ladder, which is no fun.
Once you’re done painting a section of the wall from top to bottom, do one long pass of the roller from the ceiling to the floor to get rid of any roller marks. Continue with the long passes slightly overlapping each.
Once you’ve done the floor-to-ceiling pass, don’t roll over that section again if you can help it.
If the paint isn’t showing full coverage after the first coat, that’s ok. You’ll almost always need to do 2 or more coats of paints, so that’s something you should be prepared for if you’re gathering tips for painting walls for beginners.
Try to avoid bumping the ceiling or baseboards when rolling the paint on the walls, but don’t beat yourself up if you do. It happens. You’ll worry about it later when it’s time to touch up.
Once you’re done with the first coat of paint on the walls, wrap a shopping bag around the entire paint tray and roller and put it in the fridge. This keeps the paint fresh so you don’t have to worry about cleaning everything in between coats.
Wait the recommended time for recoats as indicated on your paint can and follow up with a 2nd coat.
Wait for the 2nd coat to dry thoroughly before determining if you’ll need a 3rd coat of paint.
Step 6. Touch up and clean up
Once you’re all done painting the ceiling, trim, baseboards, doors, and walls – it’s time to touch up! If you’re a beginner painter, chances are there were a few places here and there where you bumped a paint color in a place where it shouldn’t have it. No worries, it happens to the best of us!
Touching up is pretty easy. Use either a very small craft brush for small areas or a regular paint brush for touching up larger marks. Once you the paint over the touched-up area, fan it out a bit to blend it in. This helps not make the touched-up area so noticeable.
Last but not least you want to clean everything up. Rinse your paint brushes out right away with warm soapy water and clean any roller covers that you want to keep. We find that rinsing our roller covers and paint trays is more pain than it is worth so we usually just trash them when we are done painting a room.
Remove any painter’s tape and fold up your drop cloths. Move your furniture back into place and…ta DA! You’re done painting your room.
Painting can be painless. Just do this one thing!
Russell Bates, Benjamin Moore corporate trainer for the southeastern U.S., explained how to properly prep.
“The painting process is really a three-step process,” Bates said. “The first step is prep, and to prepare a surface for painting you should really clean it especially if it’s a kitchen or bathroom that really has residue from food, so you need to clean the walls first, with soap and water works.”
Repair any nail holes with spackling / joint compound.
Primer is paint that covers and drowns out old paint (especially if it’s bright), bonds to the wall and creates a surface ready to bond with your new paint.
If you repair an area, prime it first. Some paints come with a primer all in one.
And if you’re painting fresh drywall that has never been painted, make sure to prime it first!
There are so many purported “magical” methods and tools to make the edges look perfect. but the truth is there’s no magic. Painter’s tape (usually blue) is the best tried-and-tested way. Run the tape along the edges where the paint will stop covering the area that you don’t want painted. Make sure to push the tape flat against the wall or the paint will run behind it!
“Taping is intriguing,” Bates said. “Because many contractors are so good at the free hand [they don’t use tape]. But homeowners and people who don’t do a lot of paintings should probably tape most of the time. So the trick here is to get the tape on the surface you’re not going to paint so it keeps you from painting over that area. And then you can use that as a barrier to make sure you have an easier time cutting into the color that you’re going to paint with.”
You may have to paint a couple of coats (wait for the paint to dry completely in between coats!). For new drywall, Bates suggests three coats. If you’re just repainting over a wall you might get away with one coat, unless the paint color is a bright finish, then you’ll probably need two coats.
Painters often start by painting a “W” on the wall using the roller so it spreads out the paint and confines them to one section at a time. They fill in the “W” and then move onto another section by painting a new “W.”
Pull off the tape ASAP!
“Really the trick to making painting work well is don’t let the paint sit on there long after painting!” Bates said. “So go ahead and pull it off very quickly even while the paint is wet. It’s okay to pull it off as long as you pull it off at an angle and don’t let the tape hit the wet paint. Because the longer you let the tape stay on the wall, the more likely it is to want to stick on the surface of the wall and you’re going to have to scrape it off and stuff like that!”
You just got results at home!
Get today’s headlines in minutes with Your Florida Daily:
Copyright 2023 by WKMG ClickOrlando – All rights reserved.


