Although the process is not easy, it’s worth the time investment if you want to produce high-quality products with great detail that will last for years on your shelves or give as gifts during the winter holidays.
How to make a snow globe
Snow globes are a popular addition to many homes, especially during the holiday season. Traditional snow globes are made to mimic falling snow and whimsical winter scenes. But they can also be designed to capture unique moments or preserve special memories.
Plus, snow globes are easy to make at home. Even though most are spherical in shape, you can use nearly any shape or size container you want. So, if you’re feeling artsy or want something to do with the kids, read on for instructions on how to make a snow globe.
Materials needed to make a snow globe
To make a snow globe, you’ll need the following:
Transparent globe or jar (with lid)
Hot glue gun or waterproof glue
Figurines or models of choice
Bells, ribbons and twine (optional)
Steps to make a snow globe
It only takes about 10-15 minutes to make a snow globe at home. Just follow these steps.
Prepare the jar or globe
For a spherical snow globe, get a glass or hard plastic water globe with a lid. Otherwise, look around the house to see what you have. Some great options include pickle, olive and mason jars and peanut butter containers. If it’s transparent and comes with a leak proof lid, it’ll work well. Feel free to experiment.
Once the container has been chosen, clean it thoroughly and let it dry. Then remove any stickers and residue.
Paint the lid
When using a metal lid, consider adding a splash of color to hide the metallic look. Painting the lid also adds to the theme, which gives the snow globe a more consistent appearance. If the lid comes with a ring, feel free to paint that as well since it might be seen through the globe. Make sure the paint dries completely before continuing to the next step.
Glue figurines to the lid
Nearly anything can go into a snow globe, as long as it’s waterproof and fits inside the container. Use a glue gun or waterproof glue to stick the figurines to the bottom of the lid. Wait until the glue dries, then make sure everything is secure by tipping the lid over. If anything is loose, add another layer of glue. Let it dry.
Add water, glycerin and glitter
Pour a layer of glitter into the jar or globe to cover the base. Avoid using too much or the glitter might overwhelm the figures inside. Fill the container most of the way with room temperature, distilled water and add around 2 tablespoons of glycerin.
Seal and shake the container to see if the glitter floats and slowly swirls back to the bottom of the container. Add more glycerin if the glitter isn’t floating. If the glitter clumps, there is too much glycerin. In that case, pour out some of the liquid and add more water until it has the right consistency.
Final touches to the snow globe
Turn the snow globe upside down over the sink to make sure it is fully sealed. Feel free to add glue to the underside of the lid to make sure it stays in place and doesn’t open or loosen over time. Finally, decorate the outside of the lid with bells, ribbons, twine or whatever else you desire to make it more colorful or festive. Secure the decorations in place.
Waterless snow globe
The steps to making a snow globe without water are nearly the same. The only difference is that instead of adding water and glycerin, add artificial snow. Once the figurines are glued to the inside of the lid, cover the bottom of the jar with snow and put the lid on. Turn it over and give it a shake to make sure the container is tightly sealed. Secure the lid in place with a dab of glue around the edges.
Snow globe themes
Winter: Since snow globes are popular in the winter, create a winter theme with a miniature snowman and some frosted trees.
Zoo: Get some toy animals and a tiny bush or two for a mini zoo.
Holidays: If the snow globe is for a specific holiday or event, fill it with different types of foods and decorations that represent that day.
Home: Make a tiny home scene with some figures and toy furniture.
Memories: Add a waterproof photo of family or friends to the globe. Make sure the photo is small enough to fully fit inside the globe without bunching or folding at the edges.
Tips on making snow globes
Check out these additional tips on making a snow globe
Cover your crafting space with a plastic, disposable tablecloth to prevent paint damage.
No glycerin? No problem. Use vegetable oil, baby oil or corn syrup instead. Start with about a tablespoon and add more as needed.
Use distilled water instead of tap water because it doesn’t contain any contaminants. This means there won’t be any mold growth or discoloration in the snow globe.
Avoid using extremely hot or cold water because it may cause condensation or cracking.
Want more glitter? Use a spray adhesive and glitter directly on the figures inside the globe before adding water.
Angela Watson is a writer for BestReviews. BestReviews is a product review company with a singular mission: to help simplify your purchasing decisions and save you time and money.
BestReviews spends thousands of hours researching, analyzing and testing products to recommend the best picks for most consumers. BestReviews and its newspaper partners may earn a commission if you purchase a product through one of our links.
Distributed by Tribune Content Agency, LLC.
The process
Step 1: Base and Painting
The manufacturing process of custom snow globes begins with a good design. This includes the CAD design of the figurines inside the globe and the design around the base of the snow globes. Following this, a 3D clay model of the base and figurines is made to understand better how this will look.
Check out this article to find out more.
Step 2:Molding and Casting
For starters, you will create the base with either glass or plastic(depending on the client’s requirements) and then add resin. Resin is a very durable and high-quality material to create the snowflakes that will be inside the globe. After the resin is added, the final step is to add the finishing touches such as inputting your brand label and embedding a logo into the design.

Step 3:Vacuating
After the base is molded and cast, it is placed in a vacuuming chamber to set as this process helps to strengthen the bond between the two materials.
Step 4:Finalizing the Sculpture
When finalizing the sculpture, you have to edit any last changes by trimming and grinding to be sure of even surfaces. Now, you are ready to paint the snow globe with your own customization.
Step 5:Painting the Snow Globe
The first step of the painting process is to spray the entire globe with a white primer. This allows for even coverage and makes the colors stand out more. Once the primer has dried, the next step is to start painting. We use a variety of different techniques to add color to the snow globes. Some of the most popular methods are airbrushing, hand painting, and decal application. After the paint has been applied, we apply a clear coating to protect the design. This also adds a bit of shine to the finished product.
Step 6:Waterproofing
Once the paint is dry, the snow globe is then sprayed with waterproof oil to protect it from wear and tear. Finally, the snow globe is set aside to dry. Once it is fully dry, the bottom base is smoothed out again to ensure that it is even.
Step 7: Assembly
When assembling the snow globe, a plastic gasket is attached to the bottom of the sculpture. This will create a seal that will prevent any liquid from leaking out. The sculpture is then cleaned and placed in the vacuating chamber for the final time. This step removes all the air from inside the snow globe, ensuring that it will be watertight.
Step 8: Filling:
When the assembly is done, a liquid is filled inside.The thickness of the liquid varies depending on the climate of the country you are shipping to.
For instance, in Russia, temperatures can drop below 0. In this case, it would be requested that the snow globes remain liquid at a temperature of no less than -10 to avoid freezing or breakage.
Last but not least, these custom snow globes are wrapped in Styrofoam to protect them from any malfunction during the shipping process.
Some Minor Inconveniences
One of the most recurrent issues is that the water inside the globe can turn yellow after a period of time. This can happen due to a variety of reasons, including:
- The quality of varnish used on the figurine inside the globe can cause it to fade and lose its physicality over time.
- The quality of the antifreeze used in the globe can cause the water to turn yellow after a while.
- If the snow globe is left in direct sunlight for extended periods of time.
In order to overcome this obstacle, manufacturers must employ a rigorous quality control process to ensure that all products meet the required standards.
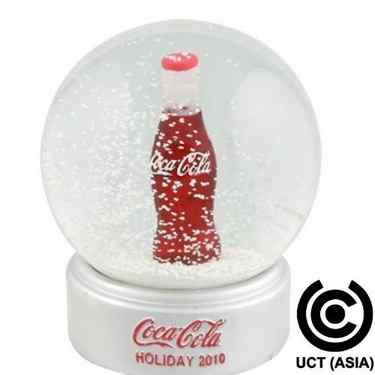
Advertising Tips for your Customized Snow Globe
A customized snow globe can be a great way to promote your business or organization. They make perfect POS displays on your shelf or office. This product can also be used as giveaways or gifts with purchase. You can also add a personal touch including a handwritten note or special message to increase brand loyalty.
But how do you make sure your snow globe stands out from the rest?
Here are a few tips:
1. Use bright, eye-catching colors.
2. Make sure your logo is clearly visible.
3. Use attractive packaging to make your snow globe even more appealing.
4.Give your snow globe its own unique identity. Make it memorable and different from the rest.


