For the ground texture, I used a fan brush to “sponge on” the texture. With this technique, you load the brush in two different greens and tap just the tip of the brush around the ground.
Step By Step Forest Acrylic Painting By Artist Mahith
Today’s featured artist is Mahith from India. He is a self-taught promising artist who is working as a software engineer. Art is his passion and in the midst of tight work schedules, he finds time for his creativity. Let us hear the forest acrylic painting process from the Artist itself.
Artist Bio
I am Mahith Mohan. I am a software engineer in Infosys by profession. Drawing and Painting are my hobbies. I am a self taught artist. I am learning different techniques in painting and sketching by watching youtube videos. I do color pencil sketches more than paintings. Recently I started trying acrylic painting. Also I am interested in creating bigger and beautiful Pookalam for our traditional festival – Onam.
About the painting
Title: “Lost in Jungle”
Step By Step Forest Acrylic Painting
I thought of trying to paint a view of a misty forest where sun rays come between the leaves.
- I started painting the base with very light green at middle and it goes darker to outside horizontally.
- Trees that are far away was made in lighter shade than the ones nearby.
- Once the branches were done, a semi transparent layer of light green mixed with white was painted on top.
More water in the paint will make it semi transparent. Next came the nearest trees which required maximum dark.
- For grass, first a dark (green + black) background layer was made and then on top of it used sap green to highlight grasses.
- Once grass was done , a semi transparent white layer was applied to obtain the misty look.
- Similar semi transparent white layer was used to highlight the sun rays.
Then the grass and leaves which would get the sunlight were given a lighter shade to highlight the effect. Also used a more darker color to give a shadow effect for the branches and trees.
How to Paint a Breathtaking Mountain Forest with 9 Easy Steps
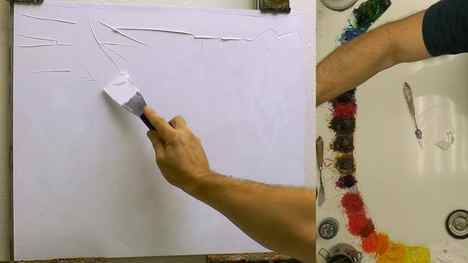
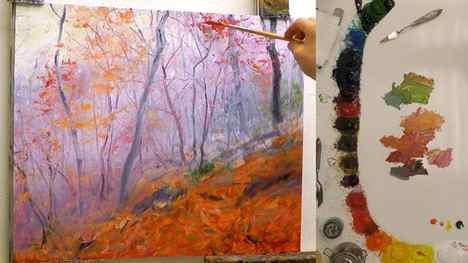
That trowel has been used to prime my panels from time to time, but this was the first time it was used to begin one of my paintings.
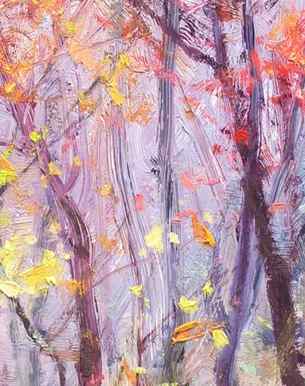
It was the rich red, orange and yellow fall leaves in my reference photos that inspired the idea.
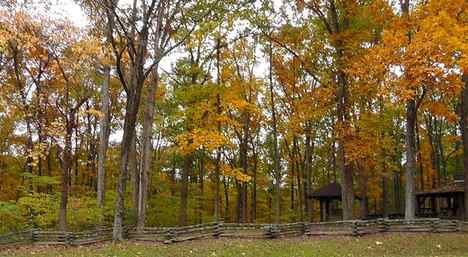
Brown County State Park fall trees – photo by Bill Inman
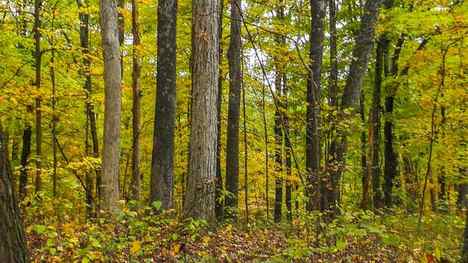
More beautiful leaves in Brown County State Park near Nashville, Indiana – photo by Bill Inman
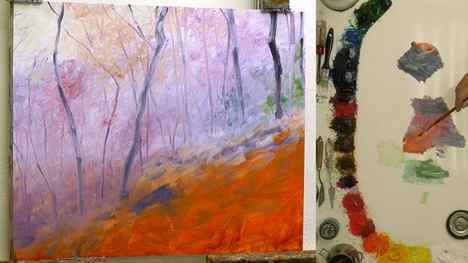
I’ve been playing and experimenting with texture since I first learned oil painting in the mid 80’s – both the thin texture that comes from a dry-brush stroke, and texture created by applying thick paint.
All that beautiful fall foliage just begged to be painted with thick textured strokes.
An idea came to me to see if starting with a bunch of thick white paint would help create the wonderfully textured leaves and branches I had in my mind.
I figured, instead of mixing those fall colors on my palette, I could skip a step and simply mix them all right on my panel.
So, I took Gamblin’s titanium white straight from the tube and covered the top half of my panel using a 2” putty knife.
Step 2
Alla prima or wet-into-wet is my favorite way to paint. I love how easy it is to soften edges and harmonize colors as one area picks up colors from another area.
So, filling my painting with a lot of white paint didn’t intimidate me too much until the time came to add darker tree trunks and branches into the mix.
Adding a one-stroke tree branch by pushing a paint brush through thick paint isn’t tough – it just needs to be done deliberately with a hog bristle brush and in one fluid motion to avoid pulling up the color underneath.
The difficulty with painting larger branches or tree trunks on top of thick white paint is that the white tends to either blend in with the new darker color and change the value, or it grabs on to the brush bristles and shows through as strong bright streaks in-between darker streaks of paint. That striated look can be beautiful, especially with rich colors that harmonize well, but when pure white is placed side by side with a darker value it can look unnatural. The white also tends to deaden the new color and strips the life out of it.
So, while it worked great for the lighter lavender background colors, it took extra effort since I had to rework the tree trunks several times each to get the values and colors the way I wanted them.
Fortunately, the striated paint had the look of tree bark and I was able to use that to the painting’s advantage.
Step 3
That strong diagonal tree trunk, I quickly realized, was way too strong a statement without plenty of verticals to soften the visual impact.
The other major diagonal – the ground sloping downhill – also needed some visual lines and shapes to balance the downward direction toward the bottom left corner. Without some counter balancing with smaller tree trunks and shapes of color in strategic places the large diagonal shapes would demand so much attention from the viewer that the rest of the painting would suffer.
The goal is to have a powerful primary idea or center of interest while allowing the viewer to enjoy all the parts and nuances of the painting.
The X-Long Filbert Utrecht 103 you see in the photo has been replaced with Rosemary’s 2085 Egbert brushes. They are so much fun to use for quickly applied plants and shapes where we want unpredictable brush strokes, edges, shapes and movement. The long hog bristles really move the paint around and we can push and pull and splay the bristles without damaging the hairs.
With the warm fall foliage colors, I was not casually throwing leaves around to make the painting exciting. Each group of leaves becomes a shape and each shape is used to guide the viewer on a path around the painting.
We are designers. We use colors, values, shapes and lines to compose. Rarely, if ever, do we want to use our reference photos exactly how we see them. They are the starting points or guides to give us some initial direction.
Then our imagination and knowledge as artists will take those references and make something soul stirring – something worth the viewers’ attention and time.
Highlight Path
Use the tip of your #12 bright brush and raw umber to paint a layer of light brown on the path.

Paint left and right strokes with the raw umber and leave a lot of the brown still showing through.

Mix a small amount of white with the raw umber. Then paint this lighter brown color on the furthest part of the path and gently blend it down. The path should be slightly darker on the bottom.

Paint Shadows
Mix the raw umber with about equal parts dark green. Water it down slightly to a thin consistency. Then use the tip of your 12 bright brush to paint shadows under almost all of your trees.

Paint the tree shadows so that they go diagonally to the bottom of the canvas. I made the shadows on each side of the path kind of go in opposite directions. You can do the shadow going in left and right strokes to form the shadow shape or you can do one continuous diagonal stroke. This should be somewhat translucent with the green texture from the ground still showing through.


Final Touch Ups
As a final touch up, you can use your round brush and titanium white to paint little white dots in the sky area to represent little fireflies deep in the forest!


