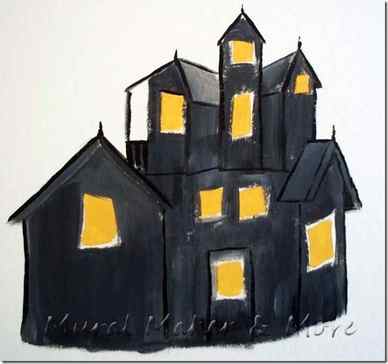
The Halloween season is coming fast! Here is a great design that is simple, fast and easy to do. You can do the haunted house in different shapes, add a fence, add grave stones, a cat, anything! Make it your own or follow this design.
Paint a Haunted House – 31 Days of Easy Holiday Paint Projects
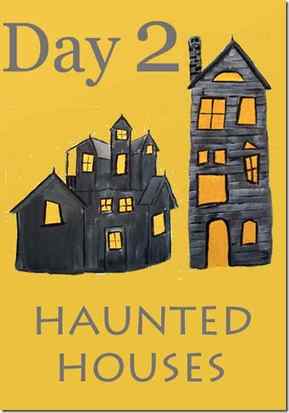
This is the second tutorial in 31 Days of Easy Holiday Paint Projects. Today we’re painting Haunted Houses. If you’ve ever said “I can’t even draw a stick figure” this paint tutorial is perfect for you.
In fact, the more crooked, wavy, and ‘off’ the lines are, the better spookier your house will look!
I mentioned in the Bat & Harvest Moon tutorial that we’ll put these Halloween images all together in one paint project in a few days – a tealight lampshade.
We might even paint another project or two, (maybe a burlap table runner?) so take a look at how simple these houses are to paint.
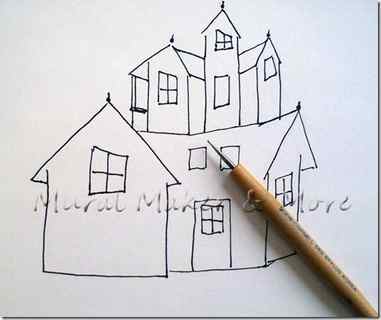
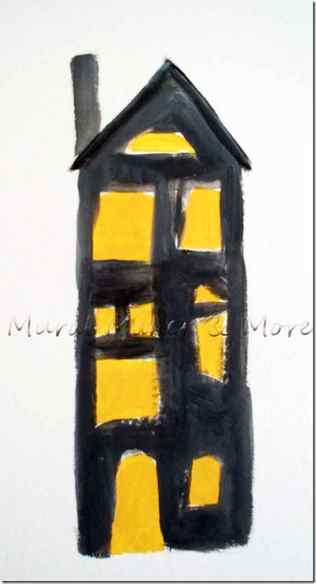
Start by drawing an outline of a haunted house. Just make sure you have a few windows for ghosts and witches to peek thru.
If you’re not comfortable drawing your own, I’ll be happy to give you these patterns or you can grab some clip art you like online.
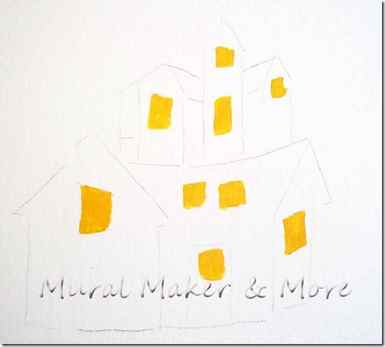
Next, paint all your windows. I used Turner’s Yellow by Plaid.
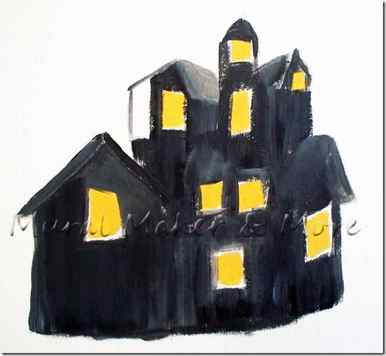
For the house walls I mixed light grey and black because a) I wanted it lighter than true black and b) I wanted a slightly blotchy look.
You could also paint a small section black and then stroke on some light grey to get that old, worn look.
Then outline the rooftops and walls with black. Add some finials (just a ball and a thin line) to the top of each roof.
Finally, just outline the windows in black.
Super simple, right? You don’t really have to do the whole grey + black thing. You could just paint the whole house black and have a nice silhouette of a haunted house. But c’mon. . . it’s really much more fun to have your haunted house look old, isn’t it?
Ready for a bit more?
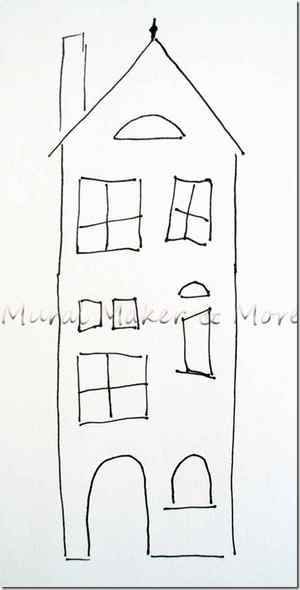
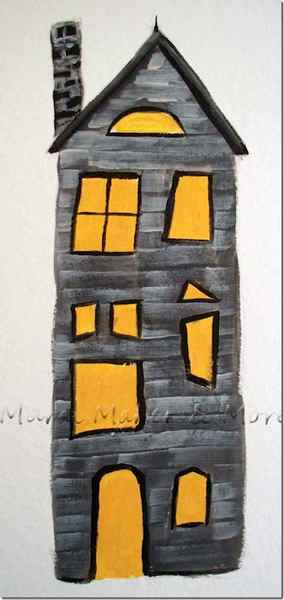
I labored for hours on this sketch. Can you tell?
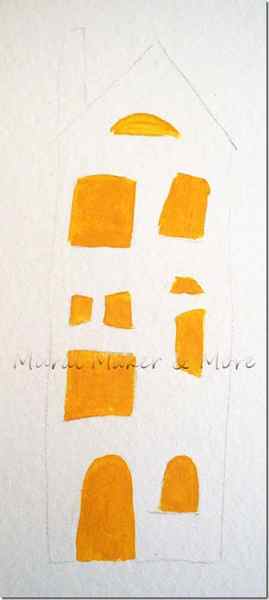
Paint the windows first again, just because it’s easier to paint black on yellow, than yellow over black. Just in case you paint outside the lines a bit.
Not that I’d know anything about that. I’m just sayin’ . . .
Basecoat the house with grey + black again.
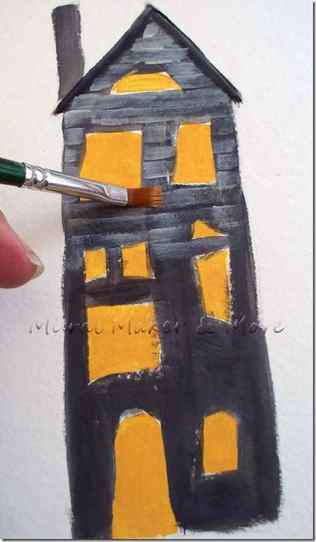
Then take light grey and brush it on in horizontal strokes.
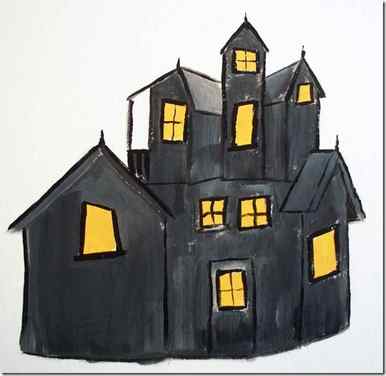
Ta-da! An old clapboard house. Kinda.
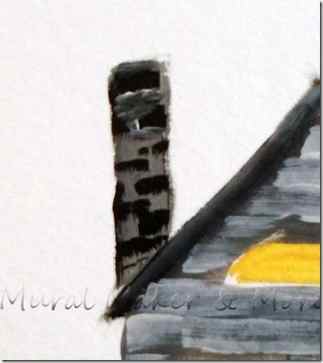
Dab some black on the chimney . . .
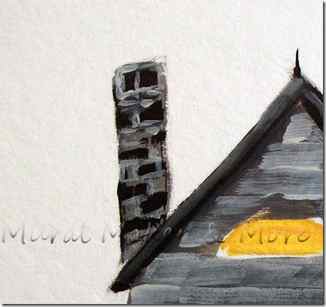
Then dab some light grey around the black dabs.
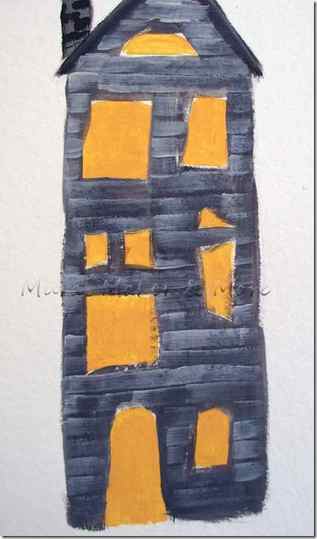
Outline the windows and door in black. Don’t forget the little finial on top of the roof.
I have no idea why, but I’ve seen finials on nearly every haunted house I’ve seen. And I’m not one to break with tradition.

For just a little extra detail, add a little black here and there between the grey strokes. It’s a small thing, but those little details make a ton of impact in paintings.
Well I think a haunted house needs a scraggly old tree next to go next to it so that’s what we’ll do tomorrow on Day 3. Then on Day 4 we’ll put the house, tree, bat and harvest moon together on something you’ll actually want to put up for Halloween.
Have you checked out any of the bloggers doing Nester’s 31 Day Challenge? Last I looked there were close to 600! Six hundred. I haven’t had a chance to visit very many, but I really like what Kelli’s writing at Adventurez in Child Rearing. Hope you’ll stop by and pay her a visit!

Linking this project to these fun Sunday parties –
HAUNTED HOUSE BUILDING SUPPLIES

CALL: (800) 227-8479
CALL: (800) 227-8479
STEP 1: Safety
Safety is always your top concern. Check for safety concerns on our Haunted House Building Safety Tips page.
STEP 2: Planning & Designing Your Haunted House
Right after safety, planning for your haunt is easily the most important, and therefore next step in the process of building a haunted house. For tips on planning your haunt, visit our Planning Your Haunted House page.
STEP 3: Building Walls / Panels For Your Haunt
Building walls and panels will be your next step. For tips on building walls and panels for your haunt, visit our Building Walls & Panels For Your Haunted House page.
STEP 4: Building Doorways For Your Haunt
Building walls and panels will be your next step. For tips on building walls and panels for your haunt, visit our Building doorways For Your Haunted House page.
STEP 5: Sound / Audio
Sound is a very important aspect of haunt building and creating an atmosphere of fright. For tips on sounds and audio, visit our Haunted House Sound & Audio page.
STEP 6: Lighting & Shadows
Choosing the right lighting can be the key to how scary your haunted house will be. For tips on lighting your haunt, visit our Haunted House Lighting page.
STEP 7: Props
When it comes to scaring people in your haunted house, there’s no substitute for spooky props. For tips on building props for your haunted house, visit our Prop Building For Haunts page.
Haunted House Building Supplies
-
- Home
- Black Plastic Sheeting
- White Plastic Sheeting
- Painter’s Plastic Sheeting
- Plastic Sheeting Hangers
- Adjustable Poles / Posts
- Buckets
- Concrete Mix
- Staplers & Staples
- Spray Adhesive
- Duct Tape
- Hammers
- Shovels
- Measuring Tapes
- Levels
- Black Paint
- Paint Brushes
- Paint Roller Frames
- Paint Roller Covers
- Paint Roller Trays
- Painter’s Tape
- Waterproof Coating
- Caution & Danger Tape
- Extension Cords & Adapters
- Safety Glasses
- Flashlights
- Batteries
- Respirator Masks
- Hazmat Style Suits
- Portable Restrooms
- Tips on Building Haunted Houses
- Site Map
- Contact
-
- Norkan Industrial
- Color Chips
- Floor Chips
- Color Chip Selector
- Discount Visqueen
- Air Machine Superstore
- Norkan Elite
- NK Baxter
- Paint Superstore
- Pure Metallic
- SIKA Center
- Epoxy Superstore
- Poly Hangers
- Application Tools
- Air Filter Replacement
- Respirator Protection
- Concrete Floor Prep
- Lead Abatement
- Portable Sanitation
- Wood Stain & Finish
- Youtube
The Haunted House Building Supply Store
Located at: Norkan Inc., 25200 Easy St., Warren, MI 48089, USA
1-800-227-8479
© Norkan Inc. All rights ReservedTools:
1. Starting with the hydra face painting sponge, wet your sponge using the water spritzer, or just by dipping into your water and squeezing excess water. Use one side of the flat edge of the sponge and drag along the top of the yellow paint. Repeat with the other side of the flat edge of the sponge and the orange face paint.
2. Next, place the sponge where you want your design to. Dab the sponge down, and twist! Let the yellow stay in the middle and the orange on the outside. Make sure to let this dry well before going on to the next step.
3. You’ll want to clean up the edges of the circle by taking a baby wipe and going around the edge. Next, using the black face paint and the #0 round brush, start to add grass at the bottom. You can do this by starting at the bottom edge of the circle, and pressing down firmly with the brush, and flick up. Repeat this until you are happy with how much coverage you have.
3. Now you’ll want to start with the outline of the house. I like to start at the bottom and work my way up. I also want to keep the haunted shape to the right side. This will ensure you have enough room for the tree and bats. Go ahead and put in any windows, or doors you want to show, in the outline.
4. Fill in the outline of the house, making sure to not fill in any windows! Next paint in the bare branches of the tree. Have the tree follow the outside edge of the circle, then pull the brush out to make the dangly branches. Finally add some bats and you have a spooky Halloween house!
Add some orange or white glitter to the design and it will sparkle!


