The Fairy Lights are optional, and the gold gilding is optional as well. But they give so much dimension to this painting, I highly recommend both of these supplies!
Acrylic Moon Painting!


Create an out of this world moon painting with acrylics on canvas! In the video below I create my sky with multiple brushes/techniques (a stencil brush, sea sponge, flat brush & paper towel) you can use all methods or choose what you have on hand to create your sky with!
- Canvas – I used an 11″x14″ stretched canvas
- Acrylic Paints – I used Apple Barrel craft paints in Bright Blue, Black, White, Bright Red, Bright Yellow
- Paint brushes – A 1/2″ or 3/4″ flat brush and some smaller brushes for details
- Paper plate
- Pencil
- Paper towels
- Optional: Stencil brushes and/or sea sponges

Step one: Trace a circle on your canvas – I used a plastic plate. Paint your background all black!

Step two: Begin to add clouds to your sky with other colors – I used blue, red, & white (which made pinks and purples) – see the next step for more details!

Step three: Use a firm/stiff regular flat brush, round stencil brush, sea sponge or paper towel to create a cloud texture. “Pounce” or “Dab” your paint on your canvas with any of the tools listed to create this effect. You only want a little paint on your brush/tool. Dip in multiple colors or build layers of colors on your clouds.

Step four: If you have any clouds that are too bright, you can repeat the same technique, but with black paint to help it fade in. Be careful not to mix too many colors or your clouds can end up muddy! If that happens, let your paint dry, paint it over with black, and try again!

Step five: Water down a little white acrylic paint and splatter it on your sky for stars!

Step six: Mix white and a little yellow paint to create a cream color and paint your moon!

Step seven: Mix blue and little black paint together to create a dark blue paint and make random spots on your moon. These will be the moon’s craters!

Step eight: While the dark blue spots are still a little wet, take more of your cream color and blend the edges of your spots into your moon!

Step nine: Keep blending until you’re happy with your moon! Check out the video below for more details on creating your own moon painting!
Moon gazing Hare

I loved playing with this idea! I have created this using Acrylic paint pens but such an easy transition for people that create with brushes or pens ! The techniques are the same , either you colour with a pen or a paint and brush . Either way the blending is done with a brush .


When the light blue is dry – Use a white fineline acrylic paint pen and draw small lines of colour and while wet, blend with your damp brush as explained.
This picture is the light blue and white blended on the rock .
Don’t worry if it gets on the Hare, you can go over that with your black pen in the final stage.

O n your rock draw your design with a HB Pencil , sketch it until you are happy with your design.
Draw the image on your rock with a white acrylic paint fineline pen in size 0.7m.
Let the pen dry completely and then erase any pencil lines from your rock. Use a white polymer eraser as it is the easiest one to use on rocks. The pencil will leave some graphite residue in the white paint – that’s ok! I like to do that purposely so a bright white line does not shine through the colours on top.

C olour in the image using your black acrylic paint or acrylic paint pens. Only paint one layer at this point.
Yes many would paint the background in first – I do not always do that as it gathers up many layers of paint. The more layers on the rock the more chance there is of it chipping once sealed . But use your personal preference, I have many tutorials on painting the background first so you can decide what suits you best.
#TIP you will always get an even finish building up the layers. This is for Acrylic Paint or Acrylic Paint Pens .

Colour the moon in white and the night sky a very dark blue with Acrylic Paint Pens or Acrylic Paint .

Do you use acrylic paint pe n ? It is so easy to blend with them check out our TECHNIQUES page.
But briefly here is how – dab on a small amount of paint, while it is wet, take a damp brush (excess water removed) and smoosh it. This moves the paint around giving the blended look on this rock.
You can do this exact technique with paint and the trick is to let the base colour dry first and smoosh the wet blending colour.
Use a lighter blue fineline acrylic paint pen and draw small lines of colour and while wet, blend with your damp brush as explained.
This picture is the light blue blended on the rock .

Let the previous colours dry.
Paint a 2nd layer over the Hare and the grass.
Dot some stars across the sky with the point of your pen.
TIP – do not push down when making dots with your paint pen, just dot the tip. If you push it will release a gush of paint from the barrel .
Have you joined us on Social Media? We would love to hang out with you there, jump on these links & come introduce yourself.


Click on our “Let’s Learn Links” below to learn some great techniques.


Below are some awesome products we used to create this tutorial and many others. If you need supplies, consider buying through us. The seller pays a small commission (not you) and this contributes to the costs of sharing tutorials. More products can be found here SHOP NOW
How to Store Gilding
Store your Liquid Gilding upright to prevent any gilding from leaking into the threads of the jar and preventing you from being able to open or close it. Beyond that, all you need to do is store it in your craft closet or with your other supplies. Just don’t store it in direct sun or heat.

What is Gilding Anyway?
Liquid Leaf Gilding is an art supply that mimics the look of gold leaf. It’s metallic, it’s lustrous. It’s beautiful! It’s an enamel paint that’s so versatile. It can be used on almost any material – glass, metal, wood, paper and more.

Want to see what I mean? Here are some of my favorite projects: These Gilded Dinosaur Planters are almost too much fun! And these Gilded Seashell Candles are one of our most popular candle making kits!

Where to Hang Your Light Up Moon Painting
What I love about this Light Up Moon Painting is that it’s perfect for your bedroom. This is especially perfect for anyone that values their sleep or has trouble sleeping because it’s a beautiful reminder of the night. And you can turn the lights on to give yourself just a small amount of light.
It’s also perfect for a teen’s bedroom too!

You can also hang this Light Up Moon Painting in a dark hallway or in a space where you don’t have enough outlets. This would be perfect for a laundry room or a closet.
If you hang it in a place where you want to turn the light off and on a lot, just be sure to place your fairy lights in a way that you can easily access the switch.

Ready to make this Light Up Moon Painting for yourself? Show me in the comments how yours turned out! And let me know below if you run into any questions! Happy crafting.

Let’s Stay Friends!

Looking for something similar?
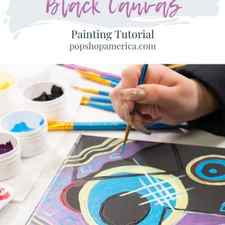
Kandinsky Inspired Black Canvas Painting Tutorial This blog is the Part 1 of 4 Tutorials for the January Craft in Style…
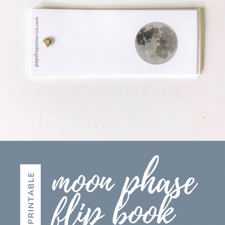
How to Make a Moon Phase Flip Book with Printable Want to make a dreamy Moon Phase Flip Book? It’s an adorable prop that is…
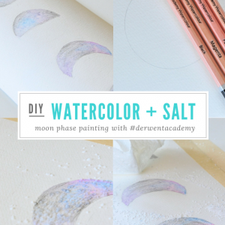
Moon Phase Watercolor Salt Painting This post was sponsored by Derwent Academy as part of an Influencer Activation for Influence…
This entry was posted in Craft in Style Subscription Instructions, DIY. Bookmark the permalink.
Brittany Bly
Hi. My name is Brittany and I founded Pop Shop America in 2012. I’ve been a maker my whole life and have made just about everything under the sun-from clothes to terrariums and comics to fine art. I like doing a little bit of everything.


