SHIPPING POLICIES
NO GUARANTEES OR REFUNDS: Delivery dates are not guaranteed by The Sugar Art.
Learn How To Paint on Chocolate!
Learn how to paint on chocolate with Courtney of @bellysbakeshop – a very talented cake decorator in the DFW, Texas area. Be sure to follow her on Instagram and TikTok for tons of amazing sugar art demonstrations! And if you’re located in Dallas and would like more information about Belly’s Bake Shop – be sure to check out her website below:
https://www.bellysbakeshop.com
Today Courtney is using our painting powders, Elite Colors and The Color Solution to create the BEST edible paint on the market! But first, let’s talk about the versatility of the Elite Color Collection. As you see here, Courtney begins by coloring her chocolate with our Sincerely, Holly Spring Collection – which are, Elite Colors.
PAINT ON CHOCOLATE
Now, let’s learn how to paint on chocolate! The Color Solution is the answer to ALL confectionary painting! Use this amazing dilution solution with matte painting powders or metallics! That would be Elite Colors or Sterling Pearls! Today, Courtney is using Elite Colors.
Creating the perfect consistency is KEY when painting onto any confection. You want to start with a very small amount of Elite Powder and add The Color Solution drop by drop, until you achieve the perfect painting consistency. It will remind you of acrylic paint! The amazing perk to using Color Solution instead of alcohol for confectionary painting are the gums inside of it . it gives you a MUCH LONGER working time than straight vodka or ever clear. However, all you have to do is keep adding small drops of Color Solution if the paint begins to dry too much during your process.
Once you have the perfect painting consistency, simply begin painting . you will find the smoothest finish with Elite Colors and Color Solution. It will take 3-5 minutes for it to fully dry on your confection, but once it is dry – the Color Solution locks in!
EDIBLE PAINTING PRODUCTS
To create your edible paint, you’ll need a list of products: a good PAINT BRUSH SET, palette, The Color Solution and of course – your colors! Again, Elite Colors (not Master Elites) and Sterling Pearls are best when creating your edible paint! All products on this project have been listed below!
We appreciate your support so much and thank you for being TEAM SUGAR ART!
Chocolate Decorating Tips with Edible Art Paints: Ice Cream Series
Today we’re sharing some chocolate decorating tips with edible art paints! In this post you’ll learn how to make chocolate look like ice cream! Using chocolate molds in ice cream shapes you’ll be able to paint them to look just like the “cool creamy” stuff with a few simple steps and products!

We’ve been celebrating the launch of our new party pastel rainbow ice cream cups in polka dots and stripes all month and have ice cream on the brain. We thought it would be fun to create chocolates that look like ice cream!! Bonus, if you mess up it is easy to wipe away the paint (once dried) with a paper towel and start over. or change the mind on the “flavor” you are painting!
Ice Cream Chocolate Decorating with Edible Art Paint – Supply List
white chocolate Candiquik

The supply list above was used to create all the samples shown. What supplies you’ll need will depend on how many kinds of “ice cream” chocolate flavors you are making. These really took no time at all! Use the pops for party favors, cake toppers or just to enjoy!

Chocolate Decorating Tips: How to make Blackberry Ice Cream Cones
Use the hard ice cream cone chocolate mold. Melt some white chocolate Candiquik per package instructions. In a small microwave safe bowl add a few tablespoons of melted chocolate, then add a couple drops of plum purple edible art paint and mauve edible art paint. Mix until almost combined. Do not mix the color all the way into the chocolate to create the look like “churned” ice cream. If the chocolate is too cool when you add the art paint you may find it stiffen up. Microwave for 5 seconds or so and it will remelt just fine! Add the purple chocolate to the “scoop” part of the mold. Working quickly add the white chocolate to the “cone” part of the mold. Lightly tap the mold on the counter to help the chocolate settle and get rid of any air bubbles.
Allow the chocolate to set up completely before removing from the candy mold. To speed up the process, put the molds on a cookie sheet and place in the refrigerator for 20 minutes or until the chocolate sets up fully. Once you release the chocolates from the mold set them on a paper towel. You’ll learn how to paint the “cones” later in the post.

Chocolate Decorating Tips: How to Paint Chocolate to Look Like Ice Cream
For the samples shown above you do not color the chocolate at all, you paint the color on them! This is perfect if you want to make a variety of “flavors”. Use our hard ice cream cone lollipop mold with our 4.5″ white paper lollipop sticks. Once you have some of the lollipops ready it is time to decorate your chocolate with the edible art paints and luster dusts to create the “flavors”.
TIP: To get the paint to stick well to the chocolate use a soft paper towel to gently wipe the sheen off the surface of the chocolate. Often when you remove chocolates from a candy mold they have a shiny appearance, that can actually make the paint not stick well, removing it creates a matte surface for the paint to adhere to.
To make the “mint chocolate chip” ice cream lollipop use: Pastel green edible art paint with medium sized flat paint brush to paint the scoop, working quickly. Allow the paint to dry fully, then add the “chips” using a small paint brush with the black edible art paint.
To make the golden strawberry lollipop use: Pastel pink edible art paint. Create a water color style look by applying the paint quickly and unevenly, leaving a couple areas almost bare. Once dried brush on some edible kings gold luster dust to create some highlights. and lets face it pink and gold look great together even on ice cream!
To make soft serve ice cream cone lollipop: Use our soft serve ice cream lollipop mold, apply super pearl white luster dust to the swirl of “ice cream”.

To make the chocolate lollipops above: Use the party food lollipop mold to make the small soft serve ice cream cones and creamsicle. Decorate the swirl of “ice cream” with super pearl white luster dust to create the same look as the larger soft serve chocolate ice cream cone. Add rainbow jimmies sprinkles to the swirl with a little more melted chocolate applied with a tooth pick, add one jimmie sprinkle at a time. This was the most labor intensive one to make but so worth it! The creamsicle chocolate lollipop was made by painting on orange edible art paint while adding just a touch of white edible art paint to one side to give it a highlight.
Chocolate Decorating Tips: How to paint ice cream cones!
Once you have all of your ice cream cone chocolates painted it is time to make the cones look like cones! We did a couple techniques, all were pretty fast and easy. If you like painting you can have fun with this step to create different looks.
For the black raspberry ice cream cone mix a little kings gold luster dust with TruColor copper shine edible paint powder. Add a few drops of water or Everclear (grain alcohol) to create a paint. Using a high percentage alcohol with the powders will allow the paint to dry fast on your chocolate. Brush on the “cone” part of the chocolate and allow to dry. Once dried take a soft paper towel and brush over the cone to remove just the paint on the top raised surface of the cone. Paint will remain in the crevices creating the look of a sugar cone!
To create the looks on the mint chocolate chip and golden strawberry ice cream chocolate lollipops use peach edible art paint to brush over the “cone”. For contrast and shading a little pastel yellow edible art paint was used on the mint chocolate chip cone and kings gold luster dust was mixed with golden strawberry to give it a little special shimmer. For the vanilla softer serve a mixture of the TruColor copper shine paint powder and kings gold luster dust was used.

We hoped you enjoyed all of our chocolate decorating tips with edible art paints to make ice cream chocolates! You will be able to make pretty and fun chocolates in no time! Next week we’ll share how we used these chocolates to decorate another sweet creation!
Until next time sweet friends!
PS: If you enjoyed our post please share the love and pin it to save for later!
This post was written, styled and photographed by Esther of The Bakers Party Shop. If you share a photo from our post a link must be displayed back to this post and credit given to The Bakers Party Shop. All photos and content are copyright of The Bakers Party Shop – The Bakers Confections, All rights reserved 2016.
Powdered Food Coloring
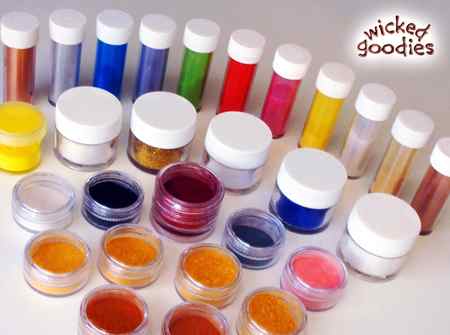
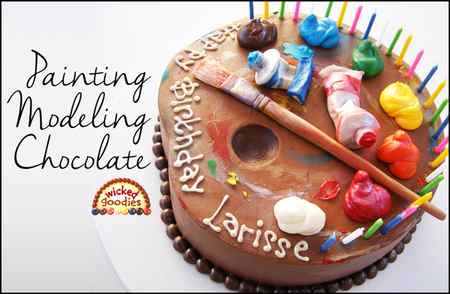
Powdered colors work well for dry painting accents onto modeling chocolate. Note that modeling chocolate is the most receptive to powdered colors when it’s freshly rolled or modeled.

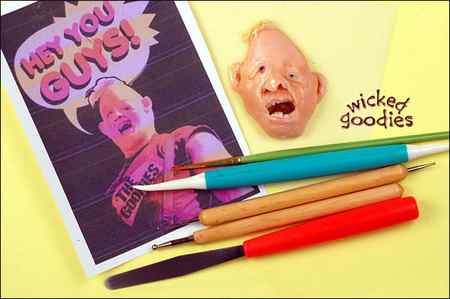
Right after modeling chocolate has just been handled, it’s soft from the heat of your hands, which makes it tacky so that powdered colors cling. You may use a small paint brush to add details or a blush brush to cover larger surface areas.
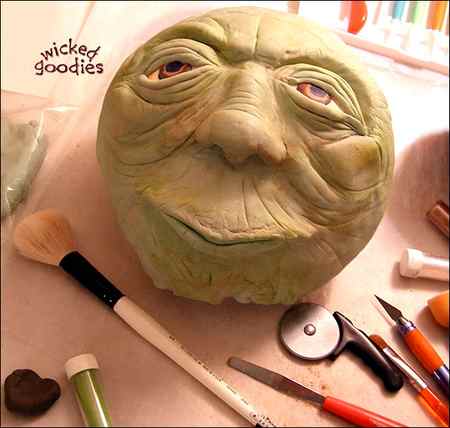
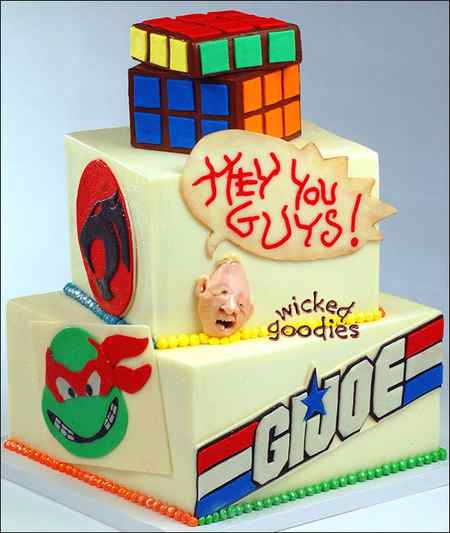
The modeling chocolate head featured above, which was molded first on a styrofoam ball before being transferred onto the cake, was accented with green pearl dust, pink pearl dust and cocoa powder.
Cocoa Powder
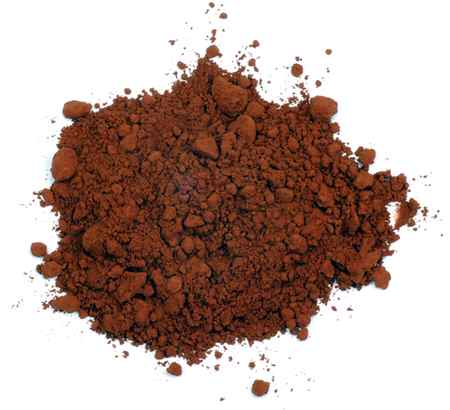
Cocoa powder makes an excellent coloring agent when you want to add contour or shading to modeling chocolate as well as to fondant and gumpaste.

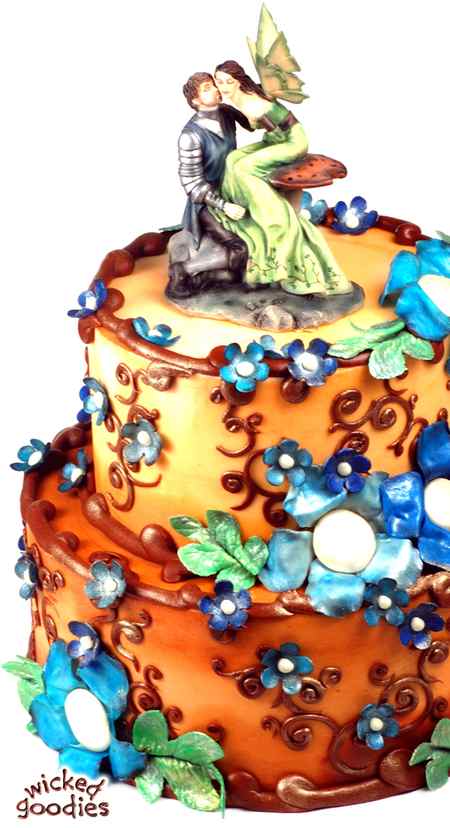
Use it to make a cake decoration look dirty, sandy, antique, weathered, skin-like, hide-like, shadowy or worn. In the above example, the modeling chocolate leaves were brushed with cocoa powder to enhance the detail of their veins. In the example below, modeling chocolate fairy flowers were dry brushed to give them shadow and sheen.
When painting directly onto a cake that’s covered in modeling chocolate, it’s better to do so before the modeling chocolate sits in the refrigerator. Modeling chocolate that’s exposed to refrigerator air is likely to grow moist and sticky on the surface. Too much of this moisture interferes with painting on colors.
To keep a modeling-chocolate-covered cake dry while still holding it in the refrigerator, seal its surface under plastic wrap until it’s time to paint on the cake. Once you’ve painted the cake, don’t put plastic wrap on it again. Painted modeling chocolate is prone to smudging and should not be touched after the job is complete.
When NOT to use powdered color: When a modeling chocolate decoration sits uncovered for hours, its surface hardens and no longer absorbs powder as well. Then, paste or gel colors are a better option. Conversely, when modeling chocolate is moist, all colors are more likely to bloom, streak, and puddle. In that case, use a clean paper towel to blot away moisture.
Using Powdered Food Color as a Paste: You can mix powdered colors or luster dusts with vodka or cocoa butter to make a wet paste. When modeling chocolate is too dry to accept powdered colors or when you want the color to go on thick, this method works well. It also allows for added detail and control.
Gel and Liquid Food Coloring
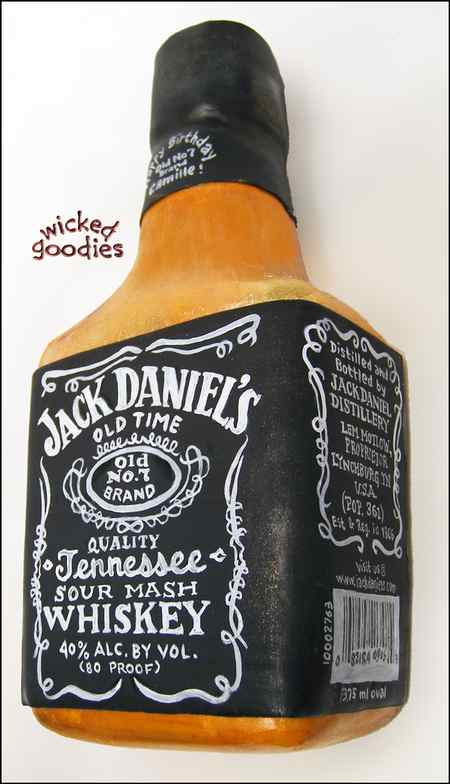
Painting onto modeling chocolate with gel or liquid food coloring is feasible but not ideal. The liquids tend to bead on the surface of modeling chocolate. You may have to paint over your design a few times in order to make it crisp. For this reason, liquid food coloring is not ideal for painting on modeling chocolate. Gel colors work better but may still be a challenge. In the whiskey bottle below, I hand painted the label using titanium dioxide (natural white food coloring). The color was too liquid for working on modeling chocolate so I thickened up its consistency with a little corn starch.
Tip: To make modeling chocolate easier to paint with liquid or gel colors, dust its surface with corn starch (a.k.a. corn flour). This adds a thin layer of absorbency, making it easier for liquid colors to adhere.
Airbrush Color
Airbrushing onto modeling chocolate may also result in the liquid beading on the surface, but it can still be done. Don’t airbrush heavily – going light is the key. Follow the tip above to achieve optimal results with an airbrush machine.
Edible Markers
Edible markers are not the most compatible with modeling chocolate for the same reason that liquid colors are more difficult to apply. They also work best when the modeling chocolate is dry on the surface and dusted with cornstarch.
Sample the book


