Here you go! Materials
white craft paint
3 shades green craft paint I used DecoArt’s Festive Green, Yellow Green, and Hauser Green
black craft paint
porch leaner
large brush and detail brush
deco art craft twinkles in crystal
clear poly for top coat
snowflake stencils
Instructions
Freehand the snowman outline onto your board.
Fill in the outline with a wet brush dipped in white paint for more coverage.
Add snowflakes around the snowman using stencils
Paint in the scarf using the medium-toned green. Then add the dark green to the edges to give definition to the scarf. Layer in the darker green for even more depth.
Paint the snowman’s face – eyes, eye centers, nose, and smile.
Add fringe to the scarf with black paint and a detail brush. Then, use the same brush and paint to outline the scarf to define it clearly.
Paint detail onto the snowman’s hat. I added a bit of green for definition and depth.
If you would like, add a few more snowflakes to your design.
Use your fingers to rub glitter glue onto the snowman’s belly.
Let your art dry for a day or so, then add a clear coat of poly spray.
Display and enjoy! Reply
how to paint a wooden snowman
Y’all are never gonna believe this…but as I looked through my Christmas decor, I realized I have ONE thing with a snowman on it…just ONE! I had to change that, because that is just unacceptable! I found a wooden snowman cutout at Hobby Lobby and decided to paint it to go on my TREEEEE.
I just love how it turned out!
I will try to walk you step by step what I did, so hopefully I make good sense LOL

Supplies Needed:
*some are linked with my referral link for convenience*
Wooden Snowman cutout
Acrylic Craft Paint: white, black, light pink, orange
Embellishments for hat
Scrapbook paper for the hat and buttons
First, I painted the snowman white! (except the hat! We are adding scrapbook paper to it!)

Once I had a couple of coats of white on him, I took some of my gray and added JUST A TAD bit to the sides for some highlights! You can kind of see that on the next picture.
After that dried, I traced some super cute black and white striped scrapbook paper for the hat and then mod podged it on!!


Now onto the next step! I picked some super cute scrapbook paper for my scarf and cut it down to size to look like a scarf. I don’t know what I am doing LOL so I did the best I could!


Once my scarf was all ready, I mod podged it on!

Now it is time for the BUTTONS! I decided to use the same scrapbook paper for my buttons! I simply cut them into circles (I didn’t measure)! After cutting them, I mod podged them onto my snowman!

Now onto the PAINTING of the face! The fun part!
You do NOT have to be a good painter to paint a snowman face, I promise. I am 100% not the best painter. I realize I didn’t take pictures of the process, but as you can see, I made 2 oval eyes and squiggly eyebrows, an orange crooked carrot nose and some light pink polka dots as cheeks Not hard at all! Don’t be scared…just go for it!

You may also notice the embellishments on the hat! I took a pick from Walmart and dissected it apart to make the fun little side part of the hat! I also just took a piece of ribbon and glued it across the part of the hat that intersected with the painting!

OH YEAH…and one more thing! When complete, I sprayed my whole snowman down with mod podge spray and then sprinkled iridescent glitter allllll over it!
And……now for the FINISHED product on my living room tree !
I LOOOOVE HIM! Why do I not have more snowmen. Like, for real? He looks super cute on my tree!


I keep going back and forth on whether or not I need to add stick arms….What is your opinion?

PIN FOR LATER!
How to Make a Porch Leaner
If you have no idea what a porch leaner is, let me explain. You probably have even seen these before without realizing they had a name!
A porch leaner is simply a piece of art or a saying that’s painted on wooden slats that are joined together, or on one single wide piece of wood.
How you make these can vary, and the dimensions can vary too! This one is four feet tall and about 18″ tall.
The really fun thing about a porch leaner is that you can often use both sides of it. I like to do a fall-themed design on one side, and a holiday theme on the other. When seasons change, all you have to do is flip it.
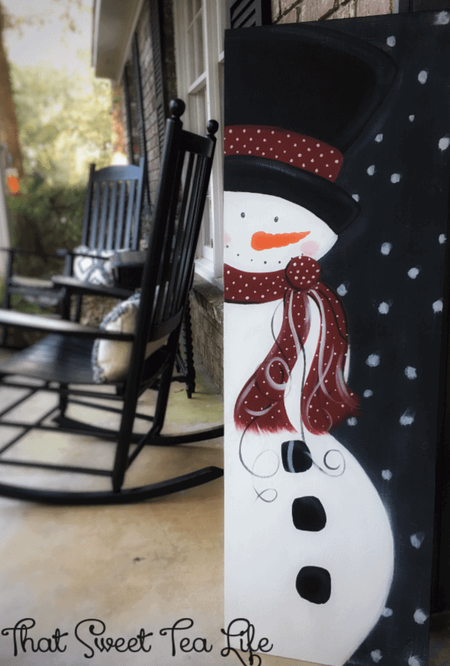
How to Paint a Snowman Sign
This post (and video) will show you exactly how to paint a snowman sign from start to finish. I’ll even let you in on my secret weapon to give it that wow factor. You’ll love having this painted snowman on your porch this year—plus it would make a super fun gift for someone else too.
The video below will walk you through each of the steps detailed below. If you are more of a visual learner, skip down to the video and paint with me!

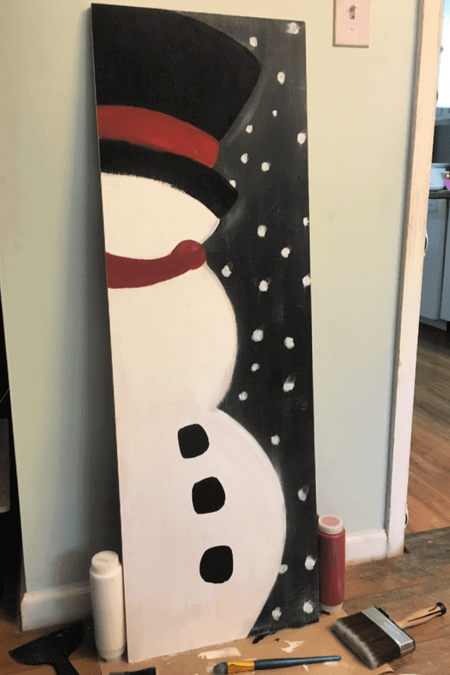
1. Freehand the Snowman
Yup, we are going to freehand this guy. But, it’s not as hard as it looks! I’ll show you exactly how to tackle it in the video below (I do mine on a napkin first).
Remember, it’s just paint! We can always figure out a way to fix it whether it’s wiping it off, painting a different layer, or just starting all over. It happens. Art isn’t supposed to be perfect, so just enjoy the journey.
Once you have your snowman outlined (don’t forget the hat!), rinse the brush and get it nice and wet to get even more coverage. The paint will apply a lot quicker with a wet brush. I use DecoArt craft paint in the color Snow.
2. Apply the Snowflake Stencil
I am a HUGE fan of Essential Stencils. Plus, you can get a 20% discount off stencils with coupon code TEXASHEIDI. They have all kinds of super cute designs there!
On this painted snowman sign, I use several different stencils. I just add them in any blank areas that I feel need some jazzing up.
When stenciling, don’t forget to offload – you need to dip it, then dab some paint off before blobbing the paint in. Technical term, but it makes sense when you watch the video! This is truly my form of art therapy – dabbing the stencil is a great way to get out the aggression.
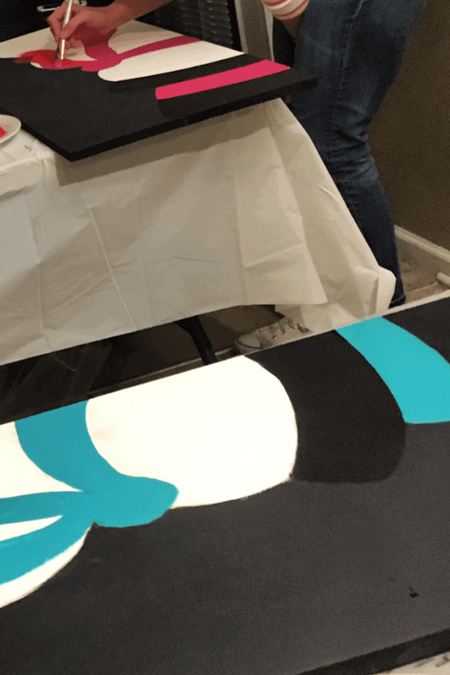
3. Add the Scarf
You can use whichever colors you’d like for the scarf. Personally, I used DecoArt Festive Green and Yellow Green. Apply the Festive Green as the base of the scarf, then add a bit of the Yellow Green on top to give it a little highlight.
Then, I added a darker green to give the scarf definition. The one I chose was Hauser Dark Green, but again, use whichever color you’d like! Add it to the edge of the scarf and bring it in a bit.
Note: make sure you shake the paint well before using it. Otherwise the paint will be really oily and a bit separated. You’ll see in the video what it looks like when you don’t shake well. Thankfully, I was able to just paint over my mistake – easy peasy.
4. Detail the Face
I drew my face out when I did my napkin sketch, then freehanded the face onto my painted snowman.
For this part I used a detail brush. I started by doing ovals for the eyes, then did the nose and the dotted smile.
Initially, his eyes looked a little creepy. To fix this, we have to add a center of the eye. This part is super easy! I just do it wet on wet, so you don’t need to wait for it to dry or anything.
5. Finish the Snowman’s Details
While you have your detail brush out, go ahead and add a bit of fringe to the scarf too! I also recommend outlining the scarf to give it even more definition.
Then, take your big brush and paint black on top of the white hat. Blend the colors together and make it gray. Next, take that detail brush we were using before and do some fun squiggles on the hat. Give that a minute or two to dry then come back in with the bigger brush and add a bit of green for a variation to the hat.
Rinse out your detail brush and paint in the snowman’s nose. I did something fun and used this pretty 24 Karat Gold DecoArt Metallic. But you could also stick with a normal orange or red if you prefer. I didn’t have those colors on hand (long story!) so I just had to work with what I had on-hand…getting creative and doing your own thing is the fun part of art!
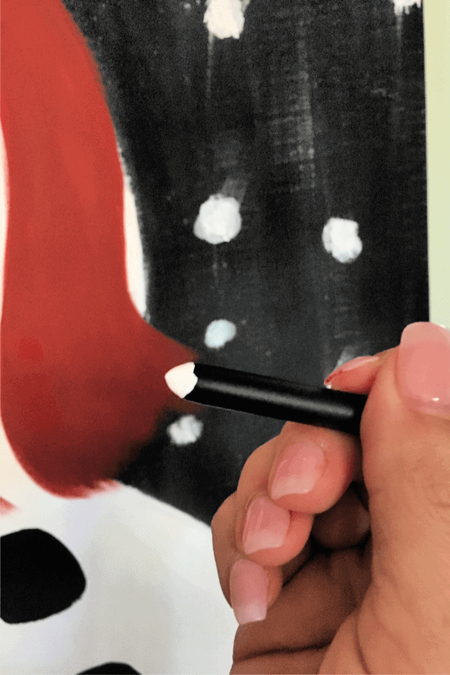
6. Add a Few More Snowflakes
If you like, you can go in and add a few more snowflakes. I added just a couple more, but you could also add some fun word stencils or just leave the snowflakes more sparse.
7. How to Paint a Snowman with Glitter Glue!
I call this one my secret weapon, but I’ll let you in on it…glitter! DecoArt’s Craft Twinkles is the BEST! I like to use the Crystal one basically everywhere. I squirt it right on to my painted snowman and rub it in all over his belly. You could use a brush, but why pass up the opportunity to fingerpaint?
8. Let Dry
Now that you know how to paint a snowman, let’s talk about preserving that hard work. Let your piece dry for a day or two. Then, give it a protective top coat. I use clear poly spray, because I find it easier than brushing a top coat on. It also gives it a little bit of a glossy finish too, which is fun.

Video: How to Paint a Snowman
Give this video a watch and paint alongside with me! It’ll take just about 30 minutes from start to finish, and will look SO cute on your porch!
Share this:
- Click to share on Twitter (Opens in new window)
- Click to share on Facebook (Opens in new window)
Learn how to DIY Wooden Christmas Signs like this painted snowman!
Whether created on pallet wood, spare doors or drawer fronts, spare wood, or wood blanks purchased from the home improvement store, DIY signs are easy to store or even simply flip over to reflect a new decorative sign! Whats fun and less intimidating about this guy though is there are no painted letters or numbers to intimidate us!
PLUS be sure to head down to the bottom of this article for LOTS of other great project ideas including a link to my article “DIY Signs You will Love and Want to Make”!
Where in the world, you ask, did I find the inspiration for this adorable DIY project?? Well, Im so happy you asked! BECAUSE I HAVE to point you over to exactly where I pulled this from.

I did what any respectful hope-to-be artist might do. I messaged her! It meant swallowing every bit of pride and flat out telling her I just love him and asking if she minded if I created him! (I cant even say “inspired by”- I was terrified to not basically copy it brush stroke by brush stroke for fear of messing it up!) SHE WAS SO SWEET! She absolutely loved it.
I still wasn’t convinced I would brave it but then a sweet friend messaged me asking if I would host a paint party! ….I let her know I had the PERFECT design in mind and of course they all loved it!
What you will need to paint this snowman on wood
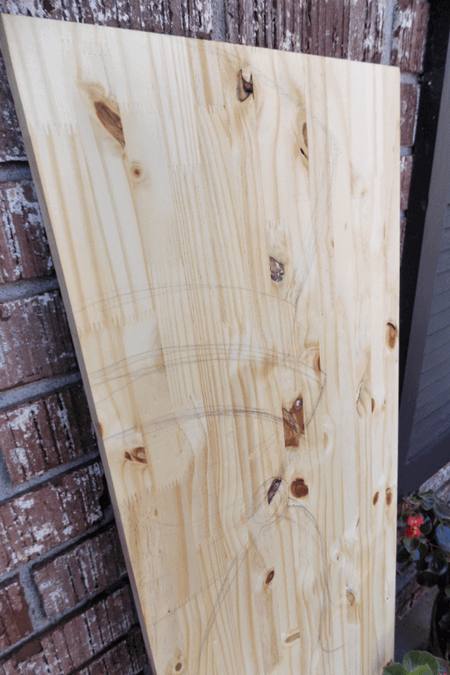
A Board: this can be a canvas, spare wood, or wood purchased from the home improvement store. Just get something that will suit the size you need! Mine happened to be a 48″ x 16″ plank from Lowes
Pencil: To draw the outline
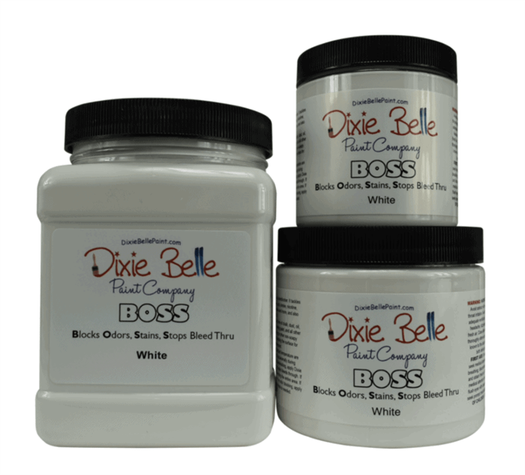
Primer: If I have a raw wood board I always seal it first. Otherwise oils from the wood can seep through and discolor my work! I favorite primer to use is water based, non smelly, and has NEVER failed me! It’s called BOSS from Dixie Belle. Of course you can, and I used to use shellac but I really never loved all the precautions and such that I had to take with it! You can find Dixie Belles BOSS in both Clear and White here! I love keeping a container (Or lets face it-4) on hand for my projects!
Sealer: I LOVE Dixie Belles Gator Hide because its Water repellant. Perfect for my porch sign! And one container will be enough for MANY projects! For signs that will be kept indoors I love to seal with Big Mamas Butta! Just wipe it on, then wipe excess off! You can find Gator Hide Here or Big Mamas Butta Here
Paint: I love to have products on hand that will last and I dont have to buy each time I have a project. So I get containers of Dixie Belle Paint (that are available in 8, 16, 32 oz and EVEN 1 Gallon!!) and they are ready when I am! For this project I used “Cotton” (white), “Caviar” (Black), “Florida Orange” (Orange… lol) & “Barn Red” (Red!) …of course you can use any colors you like! But you can find Dixie Belle Paints Here. I tend to prefer their paints because they are similar to chalk paint in their ease of use and adhesion but less “chalky” so they need less sealing, look more consistent, and are easier to work with.
Paint Brushes: Believe it or not I used Makeup Brushes a lot! You can find my Make Up Brushes Here but I also keep my favorite flat brush on hand for larger areas and those are the Dixie Belle (super friendly to your hands) Synthetic Brushes! You can find Dixie Belle Paint Brushes Here.
Water Bottle: in case the paint begins to drag. I tend to always spray as I go to minimize drag and texture in my paint. You can find my Misting Bottle Here
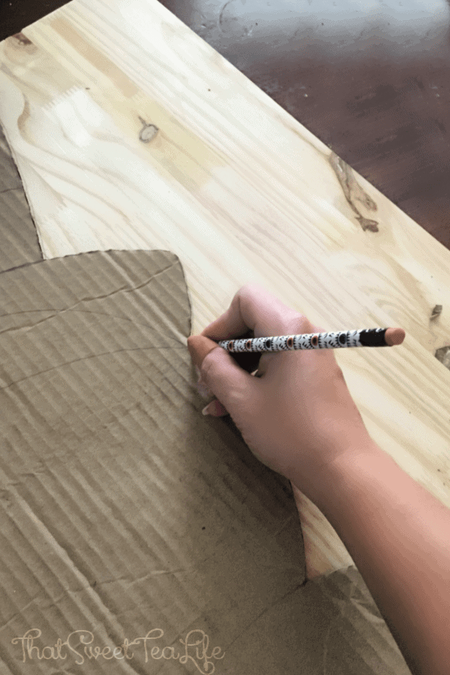
Cardboard: If you want to reproduce them you may want to make a template out of cardboard that you can use to recreate the outline with!
DIY Wood Signs : Snowman : The How-to
First thing is priming. (assuming the surface is clean and smooth-if not address that first) This is seriously a must no matter the paint you use. If you don’t, you risk the paint lookin odd in different areas or the oils and stain from the wood bleeding into your paint! (Especially that white!!).
My favorite primer to use is Dixie Belles BOSS since you can use it safely indoors! BUT it also does the job which is kind of unheard of when it comes to water based products. It comes in White and Clear. I used Clear for this project.
I laid two coats (allowing 30 minutes between the two). Then after everything was dry I went on to draw out the outline!
Later I ended up redrawing the snowman on cardboard cut to the same size as the class boards we would be using. Then I cut out the edge to serve as a template so each board would have the same beginnings of a snowman!
The next step is color blocking our snowman painting. At this point we are just laying the base color for each space. I was far too excited to paint and completely forgot to photograph mine in this phase! BUT I did take a picture when I was teaching the class.
You may need to do 2-3 coats of each color block, using your brush to sharpen the edges as needed. Be sure to allow each coat to dry well before adding another coat. You can leave it and come back or grab a hairdryer set to low heat.
Once you have the use colors laid, its time to embellish. You can add shimmer, polka dots, swirls. the possibilities are endless! JUST HAVE FUN! After all. its only paint!
For the polka dots there are a couple things you can do to make it easier on yourself. I didn’t use them, but for the snow you may opt to use these sponge pouncers. Personally I wanted imperfect and used my paint brush for that then proceeded to use it on his pink cheeks and the coal lumps. (for the cheek color I just mixed a tiny amount of the Barn Red into my cotton)
For the tiny dots you can usually use the back end of a paint brush! Don’t be scared to load it up (to the point just before dripping) then just dab it on the surface and pull it back up straight! I used this approach on the scarf and band around the hat.
Last is the carrot nose! Feel free to sketch it out with pencil or chalk before hand. And we are done! I ended up just using my lovely Big Mamas Butta! Just brush it in, leave it for a while and wipe away any excess with a lint free cloth.
Isn’t our Snowman Painting so happy and cute??
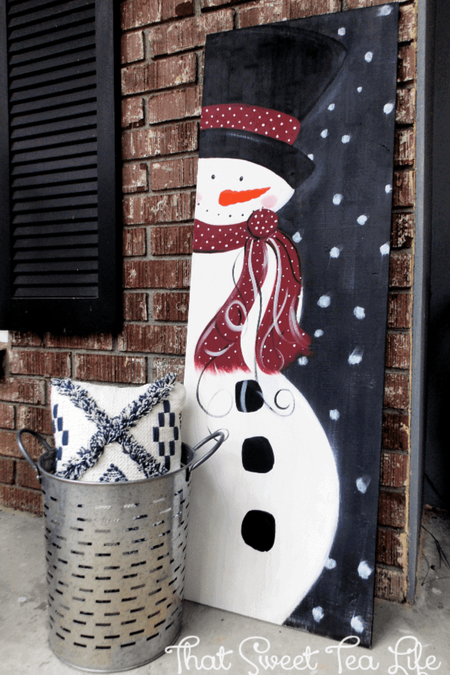
I love that it can be used in so many places and you can even paint the back side in a different theme! I could see it in a smaller size on a counter or mantel, or an oversized one beside a fireplace! Want to see more DIY Sign Ideas? be sure to check out DIY Wood Signs You will Love (And want to make!)
Posted on Last updated: December 7, 2022


