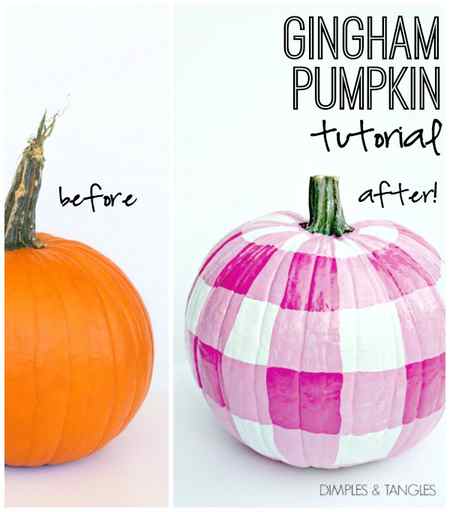
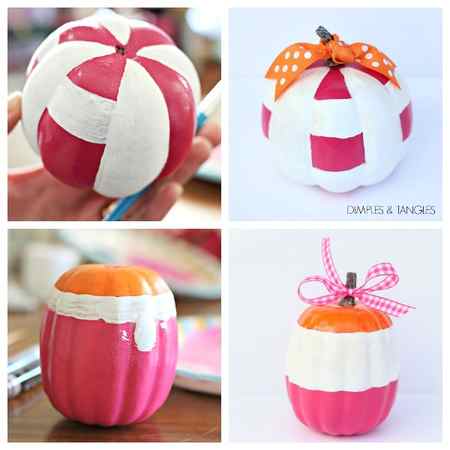
GINGHAM PAINTED PUMPKIN TUTORIAL || PAINTED PUMPKIN TIPS AND DESIGN IDEAS
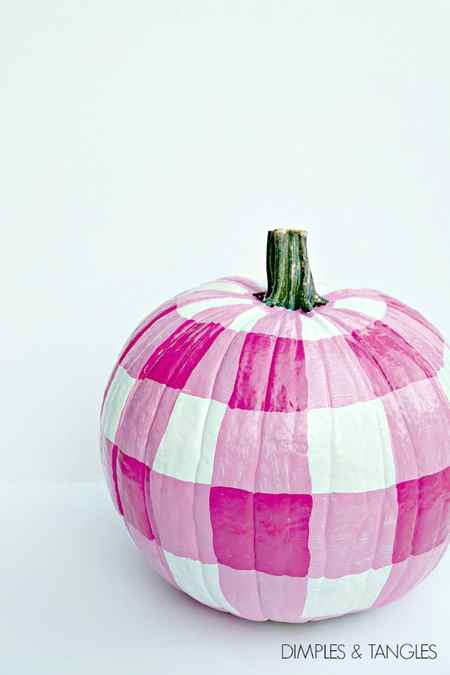
When I posted this photo on Instagram over the weekend, everyone was so sweet and went crazy for it! I’ve had several people express interest in instructions for how to make it, so I put together this gingham painted pumpkin tutorial for you today. I’ve been busy for the past few days painting lots of pumpkins, so I’ll share some other design ideas with you too.
*this post contains affiliate links
I do want to give Courtney from A Thoughtful Place credit for probably giving me this idea. Several years ago she painted a darling black and white buffalo check faux pumpkin and created a vase out of it, it’s perfect for a centerpiece or Fall accent! I think I kept that idea tucked in my brain somewhere, and remembered it when I was trying to think of designs to paint on my pumpkins this year.
I painted 5 real pumpkins for my front porch, and several faux ones to use inside this year. I’ll share the gingham tutorial and then show you how they all turned out at the end of the post.
For the real pumpkins, I started off by rinsing all of the dirt off and letting them completely dry, then taping off the stems because I wanted them to remain natural.

Then, I sprayed a few of them white. I didn’t prime or seal them first and they’ve been fine.

I used acrylic craft paints (Hobby Lobby or online here) and a variety of brushes for the designs on top after the base layer was sprayed.

For the pink gingham (adapt for whatever color you’d like), you’ll need a darker and a lighter color. I just mixed some white in with my fuchsia to lighten it.

Beginning with your lighter color, paint vertical stripes around the pumpkin. You can use the ridges in the pumpkin as a guide, but they’re not always in the right place for even stripes so you don’t have to stick strictly to using those. Draw your own line if necessary. Your stripe will taper in and get skinnier towards the stem. As you work around the pumpkin, try to space your stripes evenly but they don’t have to be perfect.

Next, create horizontal stripes by filling in some of the white space around the pumpkin, connecting it to your vertical stripes. Try to make them about the same width as the vertical stripes, and be careful to keep it fairly straight as you work your way around the pumpkin so the end of your stripe will match up with where your stripe started.

The top will be a little messy where you taped off the stem, so I just outlined the base of the stem with a small brush. Left side before, right side after.

Now, add your darker color. Fill in the square where your vertical and horizontal stripes cross.

Continue around until all of the overlapping squares are painted with the darker color.


FYI, I didn’t worry about covering the bottom of the pumpkin, it doesn’t show.

For a final finishing step, I sprayed the entire pumpkin with a clear glossy topcoat. The acrylic paints leave a very flat finish, so the glossy topcoat makes the colors really pop and look polished and finished. Disclaimer- I just grabbed a sealer I had on hand. I know when painting white furniture that polyurethane has the tendency to yellow over time, but I wasn’t too concerned since these pumpkins are short lived. It might be an issue on the faux pumpkins I painted below that I will keep, time will tell. Here is a similar gloss sealer topcoat that is non-yellowing.


I know this color scheme for Fall isn’t for everyone, but I was in the mood to do something different than my usual Fall reds, yellows, oranges, and browns this year. Remember that all of these ideas can be adapted for any colors you’d like!
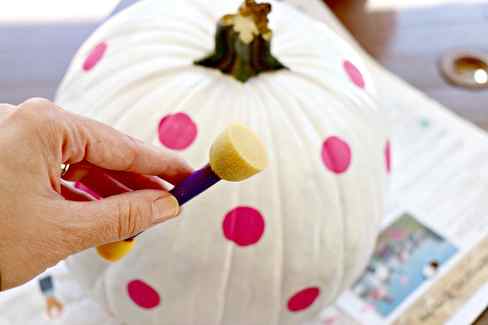
I painted simple polka dots on another white pumpkin. This sponge tool was from Hobby Lobby (online option here) and is my favorite for dots! Load it up with a thick layer of paint, press gently onto the pumpkin, and pull off for easy polka dots.

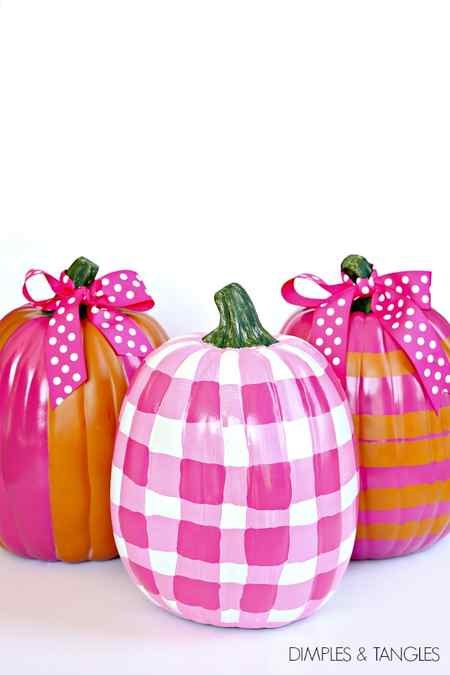
I used masking tape to tape off some striped patterns for some pink and orange pumpkins. No measuring or anything, I just eyed it and pressed the tape down well around the edges.


I’ve had some faux pumpkins stashed that I’ve never done anything with, so this year I decided to make them cute and use them in the house.

I used the same process that I did with the real pumpkins. I can’t resist adding a bow to things here and there, so some of the pumpkins got a mix of patterned and solid ribbons.
I also bought a handful of mini pumpkins to paint. I didn’t take a before photo, but you know the ones. green and orange speckled for around $1 each at Walmart or Dollar Tree. These were from WM and I liked them because they had some variety in their shapes and sizes. (similar online here)
Here’s a trick- gently pull out the plastic stem, then insert a wooden skewer to make them easier to paint.

I just hold the skewer in my hand and rotate the pumpkin as I spray, then stick them in the yard to dry. Easy! No moving the pumpkin around and waiting for it to dry before you can spray another section.

The skewers come in handy after painting designs on top too. Again, the pumpkins can rest on the skewers while they dry. I used the sponge again for more polka dots, and some small brushes to paint a few more random designs.

Paint pens come in really handy for more detailed work too.

Remove the skewers and pop the stems back in when the paint is dry. A few designs in progress and finished. checkerboard and color block stripes.
I think this turned out to be my favorite little guy! Wish I had done a big one like it. Actually, I still have 2 more faux pumpkins to paint, so I think one of them will definitely match this one.

All finished!

Such a happy, colorful, little pumpkin patch!

I’d love to know if you’re painting some pumpkins this year! Invite some girlfriends over for a painting party or get the supplies ready and let your kids go at it. fun for all!
I sure would appreciate it if you’d pin your favorite finished pumpkin photo from this post. thanks!

I’d love for you to join my email list! You’ll receive a notification straight to your inbox any time there’s a new post on Dimples and Tangles, simply enter your address below.
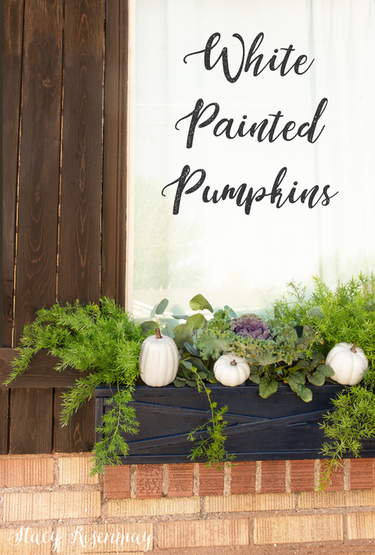
White Painted Pumpkins
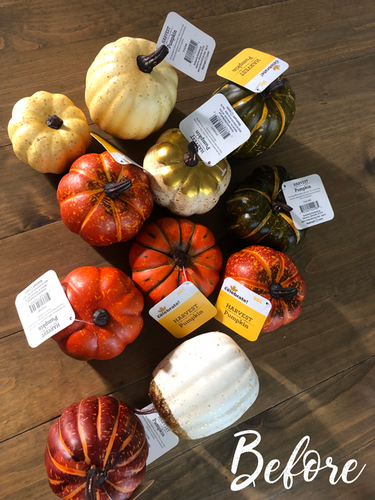
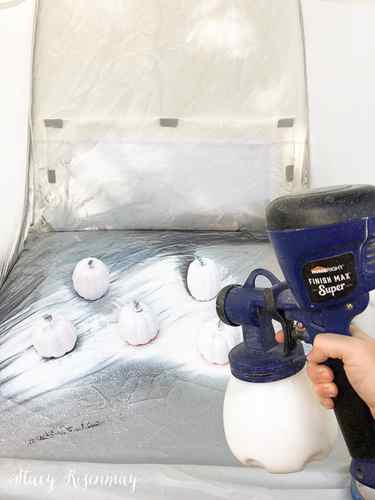
This has been an unusual year. Because of the extremely wet Spring, Fall has been delayed. I had such a hard time finding regular orange pumpkins and there were absolutely no white pumpkins available anywhere. I have never used faux pumpkins before, but I didn’t want to wait until mid October to decorate so I decided to shop around for some. I was only able to find orange, green and gold. No problem! A little paint goes a long way. For my HomeRight post this month I’m sharing my tips on painting faux pumpkins and other small things with the Super Finish Max! I used these white painted pumpkins inside and out to add simple Fall touches.
Keep reading until the end to enter a GIVEAWAY!
This post post is sponsored and has affiliate links
White Painted Pumpkins
Step 1
Make sure the items you are spraying are clean and that there isn’t any sticky residue from labels or price tags.
Step 2
If the item you are spraying are lightweight, add some tape to the bottom to stick it to the surface you are painting on.
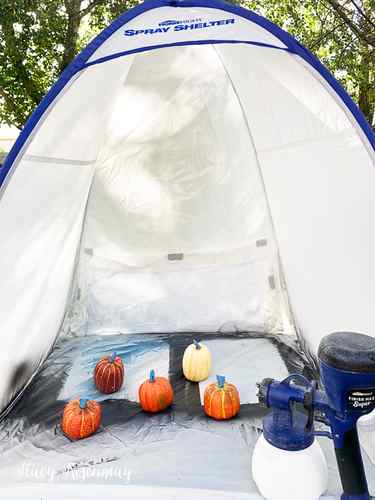
Step 3
Protect the area around you from overspray. I like to use the pop-up small spray shelter. It literally pops open itself and is super easy to put away. It has a floor too which is so nice!
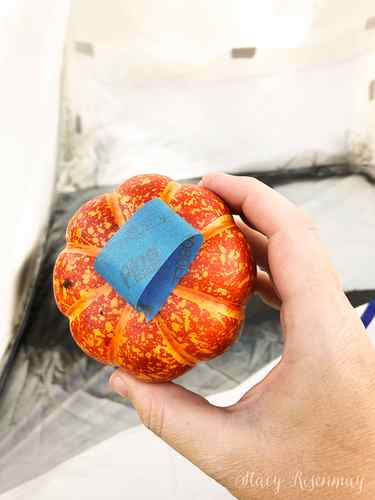
Step 4
Tape off anything you don’t want to get paint on it. I wrapped the stems with painter’s tape.
Step 5
Use a good paint that has a primer in it. The orange coloring on the pumpkins will bleed if you don’t have a good primer to stop it. I chose a warm off white color to mimic the color of real white pumpkins. I sprayed them with my Super Finish Max sprayer Super Finish Max sprayer from HomeRight.
I think the faux pumpkins look pretty good! And the best part is that I can use them again next year 🙂

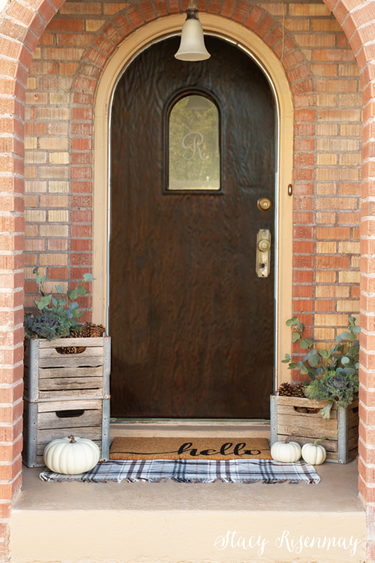
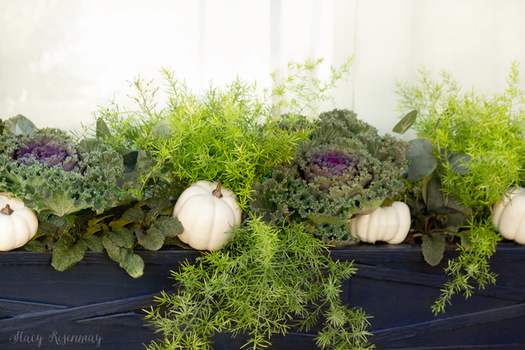
One of my favorite Fall plants to use is flowering kale or ornamental cabbage. I like how they look in these old wooden crates.
I used skewers in the bottoms of the faux pumpkins to be able to stick them into the dirt in the window boxes.
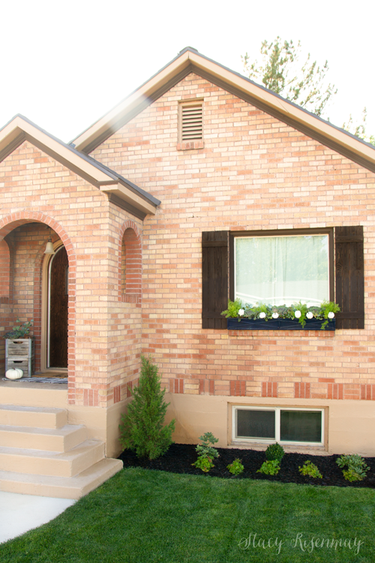
I pulled out the petunias and other annuals that were spent, but kept the asparagus ferns. I added some flowering kale and filler plants.
I like to keep things simple in my outdoor decor so I think these painted white pumpkins are the perfect touch! I recently share my Fall home tour if you want to hop over and see my living room all spruced up!
Do you decorate for Fall? Inside, out, or both? I’d love to hear what your favorite thing to decorate with are!
PIN for later:
HomeRight is offering to giveaway one Small Spray Shelter! They are so handy and just pop right up. They are easy to fold back down and don’t take up very much space at all. They are perfect for small to medium projects.

This post was sponsored by HomeRight. All opinions and ideas are 100% my own.


