You may also need photo editing software to remove any personal information that appears on your photos.
How to Transfer Photos Onto Canvas
wikiHow is a “wiki,” similar to Wikipedia, which means that many of our articles are co-written by multiple authors. To create this article, volunteer authors worked to edit and improve it over time.
This article has been viewed 269,923 times.
Canvas is a beautiful medium onto which paintings are usually drawn. But canvas is also a great surface for carrying photographs, especially photographs of friends, family, or stunning scenery. If you’ve got 20 minutes for some crafting, no experience or fancy materials are needed to turn an everyday picture into a beautiful work of art.
Steps
Method 1
Method 1 of 2:
Rustic Transfer (B&W, Sepia-Tone Images)
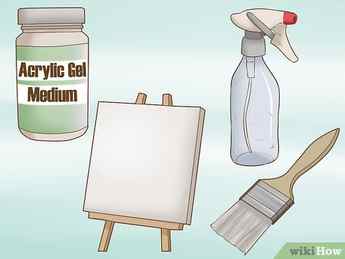
Gather your supplies. For this project, which gives you a beautifully rustic transfer onto canvas, you need four basic materials. See the “Things You’ll Need” section. Nothing fancy — let’s get started!
- The size of your image and the size of the canvas don’t need to be exact, although they look best when the two match perfectly. If you photograph is slightly smaller than the canvas — e.g. less than an inch (3 cm) — the final product will still look professional.
- Get ready for the image to be reversed. If you think reversal will look strange, or you’re partial to the current arrangement on the photo, reverse the image before you print it out.
Advertisement
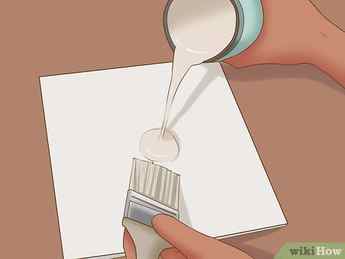
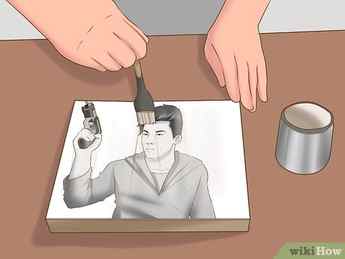
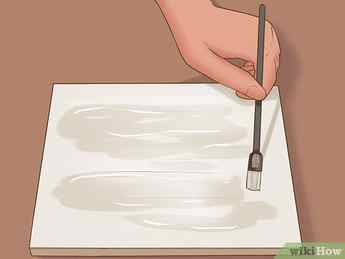
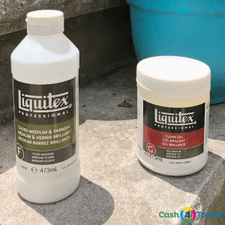
Use a thick coat of gel medium to cover the front of your canvas completely. [2] X Research source No need to spend a whole lot of time on this step, but do make sure that there are no gaps in coverage, or the photo ultimately won’t transfer.
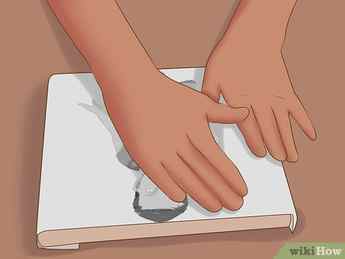
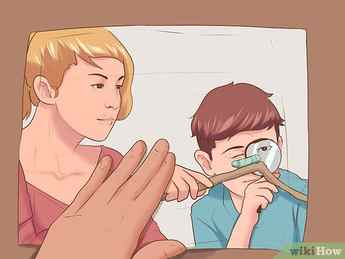
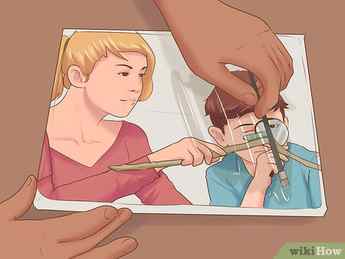
Line the image up with the canvas — ink-side down — and press down to flatten. [3] X Research source Instead of trying to line up the whole image perfectly in one fell swoop, line up one edge first so that two corners of the canvas and two corners of the photo match perfectly. Once that side is put onto the gelled canvas, flatten the rest of the photo onto the remaining canvas in a sweeping motion.
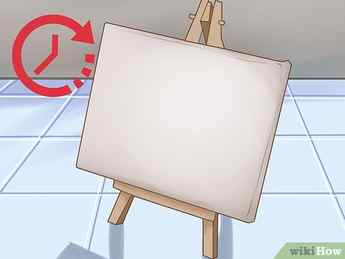
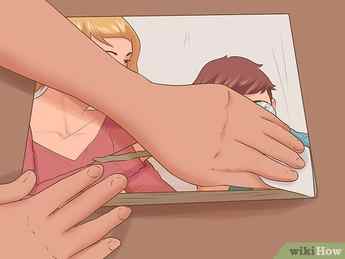
Allow canvas to dry overnight. [4] X Research source Place in a cool place devoid of excessive moisture while the gel medium dries.
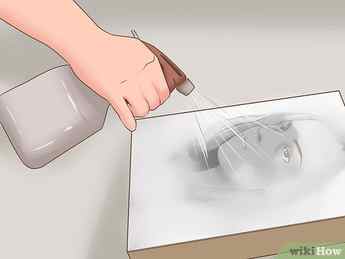
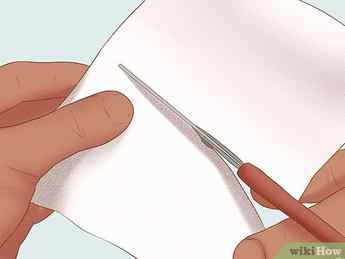
- Don’t scrape too hard or you’ll scrape away the underlying image. Expect for it to be messy.
- Don’t be afraid to leave a small amount of distress or paper on the canvas. This is what gives the image its rustic or vintage look, and it pairs especially well with black and white or sepia tone images.
Apply a final coat of gel medium to the canvas once you’ve stripped it of paper. Allow the canvas to dry again overnight before hanging, gifting, or using. [6] X Research source
Advertisement
Method 2
Method 2 of 2:
Clean Transfer (Color Images)
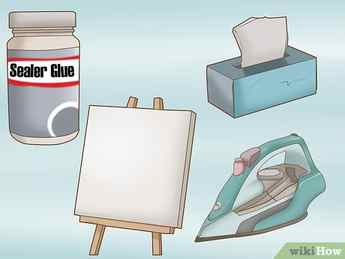
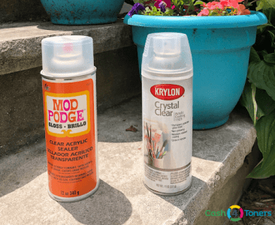
Gather your materials. This special way to preserve color images requires only the following supplies: fine tissue paper; an iron or other flattering material like a stack of books; a canvas; and sealer glue, such as Modge Podge.
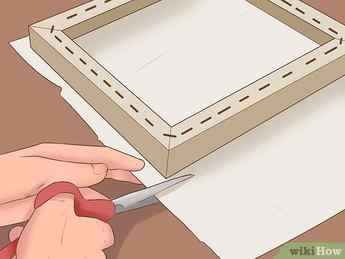
Trim the tissue paper so that it’s the same size as the canvas you’ll be using. Place the tissue paper onto a table or other hard surface and lay the framed canvas upside down onto it; the front of the canvas and the tissue paper should be touching. With a pencil, trace around all four sides of the canvas, and then cut around the four corners of the tissue paper.
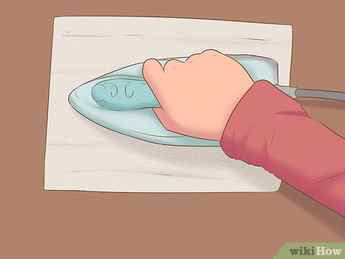
Straighten out any kinks or creases in the tissue paper with a clothes iron. Use the high setting without any steam.
- For this reason, it’s best to use a standard size when selecting a canvas to use. An 8 1/2 x 11 canvas, for example, would be extremely easy to work with, while a nonstandard-sized canvas would be more difficult to get a match for.
Apply a thin coat of Modge Podge to the canvas, making sure to get even coverage. Use a brush to get good coverage with your adhesive.
Working quickly, center the tissue paper picture over the canvas before pressing it down onto the adhesive. Get one corner centered perfectly before placing the whole image down onto the canvas.
With a clean foam brush, smooth out any creases in the tissue paper. Work from the inside and brush outward for best results.
If necessary, trim any remaining tissue paper from the sides of the canvas for a clean look.
Cover with another layer of clear adhesive before letting dry (optional). Use the same coat of Modge Podge, if desired, or pick another type of (matte, etc.) finish to seal your newly-minted canvas photo. [7] X Research source
Advertisement
Expert Q&A
Search
Question
How can I transfer a drawing to canvas?
Kelly Medford
Professional Artist
Kelly Medford is an American painter based in Rome, Italy. She studied classical painting, drawing and printmaking both in the U.S. and in Italy. She works primarily en plein air on the streets of Rome, and also travels for private international collectors on commission. She founded Sketching Rome Tours in 2012 where she teaches sketchbook journaling to visitors of Rome. Kelly is a graduate of the Florence Academy of Art.
Professional Artist
Expert Answer
Make the drawing that you want to transfer the same size as the canvas on tracing paper. Making the tracing paper a little bit larger than the canvas is ideal so that you can tape the sides down when you go to transfer the drawing.
Thanks! We’re glad this was helpful.
Thank you for your feedback.
As a small thank you, we’d like to offer you a $30 gift card (valid at GoNift.com). Use it to try out great new products and services nationwide without paying full price—wine, food delivery, clothing and more. Enjoy! Claim Your Gift If wikiHow has helped you, please consider a small contribution to support us in helping more readers like you. We’re committed to providing the world with free how-to resources, and even $1 helps us in our mission. Support wikiHow
Question
Which gel medium do I need to transfer a photo or print to canvas?
Community Answer
You can use any type, including acrylic and brilliant gloss gel medium.
Thanks! We’re glad this was helpful.
Thank you for your feedback.
As a small thank you, we’d like to offer you a $30 gift card (valid at GoNift.com). Use it to try out great new products and services nationwide without paying full price—wine, food delivery, clothing and more. Enjoy! Claim Your Gift If wikiHow has helped you, please consider a small contribution to support us in helping more readers like you. We’re committed to providing the world with free how-to resources, and even $1 helps us in our mission. Support wikiHow
Question
What is a gel medium?
Community Answer
This Liquitex Gloss Gel Medium is a great item for both beginning and experienced painters. The gel can be used as a thick glaze for extravagant impasto effects or can be mixed with acrylic paints for a glossy appearance.
Thanks! We’re glad this was helpful.
Thank you for your feedback.
As a small thank you, we’d like to offer you a $30 gift card (valid at GoNift.com). Use it to try out great new products and services nationwide without paying full price—wine, food delivery, clothing and more. Enjoy! Claim Your Gift If wikiHow has helped you, please consider a small contribution to support us in helping more readers like you. We’re committed to providing the world with free how-to resources, and even $1 helps us in our mission. Support wikiHow
Ask a Question
200 characters left
Include your email address to get a message when this question is answered.
Advertisement
Tips
Submit a Tip
All tip submissions are carefully reviewed before being published
Thanks for submitting a tip for review!
Things You’ll Need

How to
Stretch a Canvas

Framing Canvas Art Quickly and Easily
How to
Paint Acrylic on Canvas
How to
Adhere Paper to Canvas

How to
Reuse a Canvas

How to
Transfer a Drawing to a Canvas
How to
Hang a Large Canvas
How to
Hang a Canvas Painting
How to Build a Canvas Out of Wood & Boards
How to
Print on Canvas
How to
Dye Canvas
How to
Repair Canvas
How to
Sew Canvas
How to
Apply Gold Leaf to Canvas
Advertisement
References
- ↑http://www.onlinelabels.com/howto/how-to-determine-your-printer-type.htm
- ↑https://abeautifulmess.com/2012/07/diy-canvas-portrait-part-2.html
- ↑https://www.youtube.com/watch?v=g7UnsCio_KU
- ↑https://www.youtube.com/watch?v=g7UnsCio_KU
- ↑https://abeautifulmess.com/2012/07/diy-canvas-portrait-part-2.html
- ↑http://www.abeautifulmess.com/2011/10/make-your-own-canvas-portrait.html
- ↑http://www.littlebitfunky.com/2011/10/20-minute-crafter-diy-photo-canvas.html
Transferring An Image To Canvas With Gel Medium
This is the same method we used when transferring an image to wood and creating a custom wood sign.
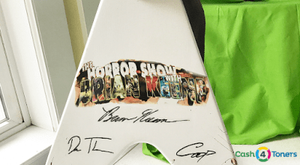
You can even transfer a photo or graphic onto a wood guitar with gel medium! It’s the most popular way to transfer a photo to canvas.
How To Transfer Photos onto Canvas
Your first step is to get a canvas. They come in all sorts of pre-framed sizes and they’re available at your local craft store.
These canvases will already be stretched and mounted on wooden frames.
They usually sit anywhere from half an inch to an inch in depth.
These photo transfers make great wall art because they’re easy to hang but also stand on their own on a windowsill or shelf.

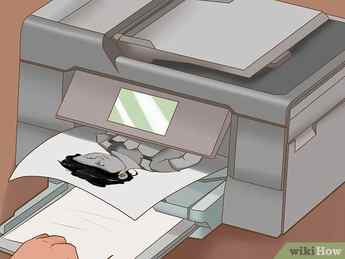
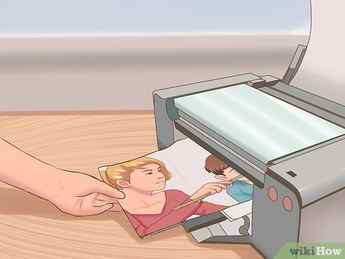
Step 2: Regular printer paper
Print the image you want to transfer onto plain paper.
Actually, we have had good results using thin sheets of paper in our inkjet printer.
Print your image on your home inkjet printer or laser printer.
There are pros and cons to inkjets and lasers, but both laser prints and inkjet images will work to create an image for photo transfer.
Should I use photo paper?
We don’t recommend it. It’s only going to mean more paper to remove/rub off later.
In this case, you are better off using plain printer paper to transfer photo or graphic images to canvas.
Photo paper is very thick, with a glossy finish.
This doesn’t work great for image transfers. You want to use plain paper in order to get the cleanest finished project on your stretched canvas.
Should I use tissue paper?
If you’re careful you can print on tissue paper. The benefit of using tissue paper is that it dissolves easily when wet.
Tissue paper makes removing the image backing a breeze.
- Cut the tissue paper to precisely the same size (or slightly smaller) than the paper size you will be feeding through your printer. (11”x17”, 8.5”x11”, etc.)
- Gently smooth the tissue paper atop a guide sheet and attach the edges of the tissue paper with tape or a glue stick. This guide sheet is the tissue paper’s “tour guide” while printing, providing clean edges for the feeder rollers to grab and support for inkjet photos or toner application.
- Run the guide sheet with attached tissue paper through your printer. You can use either an inkjet or a laser printer for this step. Make sure you position the sheet in the printer so the ink or toner ends up on the tissue paper and not the guide sheet behind it.
(If you do make this mistake, simply flip the paper over and print the image again.)
Tissue paper can be fickle, so make sure it’s completely flat before running it through the printer.
Should I use a color laser printer?
We personally like the end result a laser printer delivers when creating a transfer image.
An inkjet photo printed on photo paper is glossy, but you don’t want that when you transfer images.
Toner forms a thin layer of plastic to create images.
Toner images adhere well to the latex gel and are slightly easier to work with during the damp sponge stage.
While inks tend to print a bit more vibrantly than color toner, it can also run and/or blur if the transfer medium is unevenly applied.
This doesn’t happen with toner.
For that reason, we recommend using color laser printers for your next photo transfer project.
Should I use an actual photograph?
NO! Absolutely not! Photo chemicals don’t play nice with the coat of latex transfer medium.
Only half your photos will transfer, if that, and you’ll ruin your favorite photo!


