June 29, 2019
Tutorial on painting trees in oil

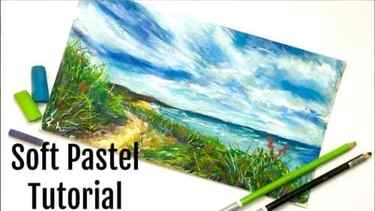
How to Paint Trees with Oil Pastel
How to Paint Trees with Oil Pastel
- Post published: June 8, 2018
- Post category: Pastel color tips and tutorials
- Post comments: 0 Comments
Video by Paint Academy
In this video, we follow along as Paint Academy takes us on a Watch step by step demonstration on how to paint trees using Oil Pastel.
Hope you like this video and share with your friends. And if you want to know more about the artist, check the links below the video.
For more from Paint Academy
- Facebook:- https://www.facebook.com/ThePaintAcademy
- Twitter:- https://twitter.com/paint_academy
- Google+: https://plus.google.com/u/0/107218607349165275727
- Etsy: https://www.etsy.com/in-en/shop/PaintAcademy
Share on Facebook
Tweet

Follow us
Save
See also DIY Easy Jewelry Holder

You Might Also Like

June 29, 2019
How to draw a stream in an autumn forest with soft pastels REAL-TIME

August 19, 2018
March 19, 2019
Resize text – + =
| M | T | W | T | F | S | S |
|---|---|---|---|---|---|---|
| 1 | 2 | 3 | 4 | 5 | ||
| 6 | 7 | 8 | 9 | 10 | 11 | 12 |
| 13 | 14 | 15 | 16 | 17 | 18 | 19 |
| 20 | 21 | 22 | 23 | 24 | 25 | 26 |
| 27 | 28 | 29 | 30 |

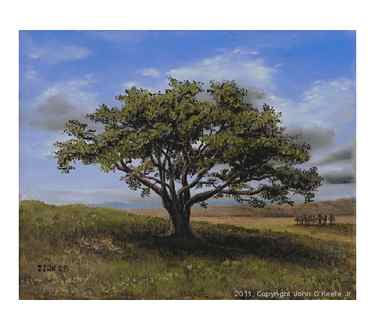
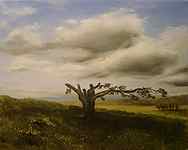
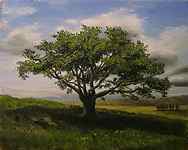
Composition and Materials – “Big Cork Tree”
I wanted to compose the scene to fit into an oval-style frame, work on my technique for trees, and improve my use of shadows, with the tree being the center of interest. After finding an engraving of a cork tree, I sketched a rough outline of the frame opening and drew the tree on a sloped hill inside. Also, in the distance would be a vast plain, and distant mountains would make up the horizon.
- Support: Pre-Stretched & Mounted Medium Textured Cotton Canvas (Acrylic Primed)
- Size: 8 x 10 inch
- Medium: Winsor & Newton ‘Artist Oils’ Professional Grade Oil Paints
(Ivory Black, Titanium White, French Ultramarine Blue, Sap Green, Naples Yellow, Raw Sienna, and Raw Umber) - Finish: Winsor & Newton Dammar varnish
Step-By-Step Tutorial – “Big Cork Tree”
Day 1 / Hour 1
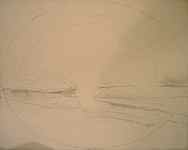
Here is the initial sketch for the painting.
Day 1 / Hour 4
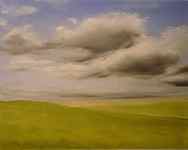
Sky and clouds were added first from a photograph taken by my wife, Jennifer. I blocked in the land features: A sloped hill, a vast plain, and distant mountains.
Day 1 / Hour 5
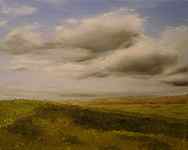
While the foreground paint was still wet, I began to add details to the land features. I laid in a rough outline of the tree shadow.
Day 1 / Hour 6
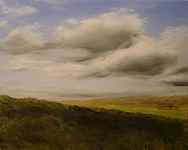
More details are added to the fields. I wanted a second area of interest on the plains, and you can make out a group of trees on the middle right.
Day 2 / Hour 7
After a few days of drying, I was ready to begin adding the tree. I usually wait for the paint to dry a little before adding my main features, in this case, the cork tree. After a bit of time went by, I added the trunk and some branches. I used a very dark base at this point because I plan to add my highlights later. Also, I added some highlights to the foreground, bringing out some small plants and grasses. The group of trees on the plain is detailed and shadowed.
Day 2 / Hour 8
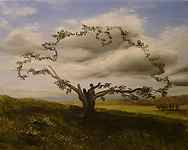
I painted the outline of the cork tree. (Note: I painted the entire sky beforehand because I wanted to try and make this tree without having to go back and add light holes later.)
Day 2 / Hour 9

Carefully following the reference engraving of the cork tree, I started blocking the bulk of the tree leaves. I used a dark green for this because I intend to build up the tree in layers from farthest to closest. I will add the highlights as a final layer.
Day 2 / Hour 10
Once I had the leaves blocked in, I painted the branches and was careful to taper them as they extended toward the outer part of the tree. Near the outside area, they disappear.
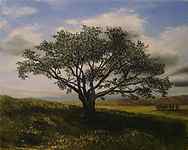
Day 3 / Hour 12
I added my first layer of highlights using a brighter green to capture the sun’s rays on the leaves. Also, I added more highlights to the foreground to improve the balance between the tree and the grassy hill. The shadow under the tree also takes on a better definition.
Day 3 / Hour 12
As a last layer on the tree, I added some darker areas. Subsequently, I felt the tree top continued to be too bright. I passed over the hill to highlight the grasses and tree shadows further.
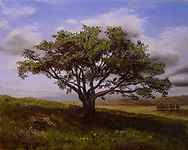
Day 4 / Hour 15
Now for the final touches. First, I added more shadow to the tree leaves to give a greater sense of light coming straight down from the top. Then the leaves on the underside are shadowed for better effect. Lastly, I added a highlight across the hill.
Finished Painting – “Big Cork Tree”

I hope you enjoyed my tutorial “Big Cork Tree” by John O’Keefe Jr.
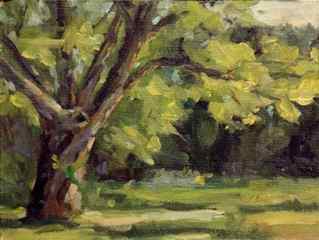
Painting Trees Means Knowing Their Anatomy
We often think of trees in a very human way—that they have personalities and traits that distinguish them from all the rest. Their symbolism can be powerful and moving, and they are definitely a landscape painting essential.
To better understand their structure and how to paint them realistically in an outdoor painting, you don’t want to just paint what a tree is in general or what you see in your mind when you think, “tree.” Instead, landscape painters paint the specifics. That is why you are painting outdoors, after all.
So study what kind of species it is, go up to the tree and get a look at its leaves, study the overall shape of the tree—is it round or conical, does it droop or is it more erect and broad? What about the angle of its branches and their connection to the trunk? What is the texture of the bark?

Asking yourself these questions is not meant to force you to go detail crazy in your painting, but to sink into a familiarity with your subject—really see it—so that you can create a compelling, believable plein air landscape painting.
Here are some details to keep in mind when you turn your attention to a few species of leafy brethren.
Large and in charge—the Elm
-Grows to be 120 feet tall and 50 feet wide
-Vase-shaped with branches growing from the top of the trunk
-Gray-brown bark
-Flowers are reddish-brown
-Dense, overlapping foliage
Stands out from afar—the Sycamore
-Reaches 50 to 60 feet in height
-Pyramid-shaped form when young; grows to have a round or irregular shape
-Distinctive white bark that is smooth in texture
-Spiky, circular-shaped fruit
-As it ages, its branches droop.
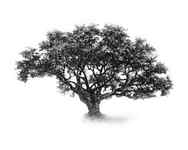
Wild and unpredictable—the Oak
-Branches come off the trunk nearly horizontal or parallel to the ground, and can grow in twisted, tangled ways
-Bark is crackled and rough
-Tubular or cone-shaped
-Produces acorns, which will often be littered at its base
What kind of trees did I miss and what can you tell us about their appearance that will help when it comes time to paint them? Let me know! And for more on the wonders and skills associated with landscape painting, consider this new resource bundle: Beautiful Watercolor Landscape. Enjoy!


