Category: Education
Wildflower Painting: Simple Acrylic Painting Ideas
I’ll demonstrate how to paint straightforward wildflowers with acrylic paint in this blog article. Beginners may create this simple abstract floral painting with just a few simple brushes and a few colors.
I adore taking walks in the outdoors, and I’m fortunate that our city is surrounded by a ton of woodlands and meadows filled with gorgeous, vibrant flowers. A field of wildflowers at sunset at the end of the summer served as the model for this painting. Some of them are almost dry, and they all have warm tones. Even though it’s still warm outside, the slight wind forces you to sit and enjoy the sunset.
You might have never enjoyed watching the sun set over a field of wildflowers, but I do! It’s calming, much like the recently popular art form of painting.
So I tried to make a painting that complements our bedroom’s colors and has the same feel.
Let’s now get started on the picture!
Equipment and supplies:
A canvas panel (you might also use a canvas board), acrylic paints (see the precise colors in the list below), a sponge, a broad flat brush, a cat’s tongue brush, a tray or paint palette, white permanent marker, metallic pen.
Colors incorporated into this painting:
- Lamp Black
- Yellow Ochre
- Burnt Sienna
- Yellow Ochre
- Titanium White
I haven’t utilized any of these colors in their purest forms, with the exception of white. I enjoy blending and making my own colors.
A step-by-step guide
Acrylic paint dries rather quickly, especially when combined with water and used sparingly. Although I built this painting up in layers, I didn’t have to wait for each layer to dry before adding new components.
I had enough time to allow the previous layer to dry after I finished mixing the colors.
Creating a background with a haze
You must paint a background that is fuzzy first. With a sponge, you can accomplish it with ease.Sand and nude are two beige or neutral hues that I blended. On the lower 3/4 of the canvas, I randomly placed nude patches with the sponge. I then filled in the spaces with the sand color.
I diluted some white paint and applied it in circles to blend the colors and create a blurred look.
I advise against doing a palate cleanser. Allow the white to blend with the other colors. Spread some of the off-white pigments on the area of your canvas that is still vacant at the top as well.
Layers
I believed that layering grass and flowers was the simplest method to paint a meadow of wildflowers. In order to create depth, I chose one element for each layer and made my color selections by going from lightest to darkest.
Don’t just paint the elements in “gaps” and empty places; make sure they overlap to create depth.
Initial layer
I used tall, pointy-leaved foliage for the top layer.
I combined white, raw umber, and a tinge of black to create the taupe hue. To make the paint easier to distribute, thin it out with water.
In the past several months, I’ve seen a few watercolor painting tutorials and I’ve really enjoyed the way they painted leaves. Simple leaves that you can create with just one brushstroke are my favorite. Fill the brush with paint first. When you reach the stem to make the finishing perfect, lightly touch the paper to begin, press down for the body, and then release.
To obtain a natural effect, avoid making the leaves perfectly symmetrical. Instead, include random overlaps and curves, some longer than others.
NOTE: To give the image a more dimensional appearance, I should have made this hue lighter.
I chose round-leaved vegetation for the second layer. I blended a lovely caramel shade because I wanted to create it in a warmer tone. After I finished the painting, I understood that in order for it to complement the other colors, I should have made it less saturated.
I mixed burnt sienna, yellow ochre, white, and a tiny bit of raw umber to get the caramel color.
For the stems, I used a circular brush, and for the leaves, a cat tongue brush. The’secret’ to painting these leaves is spinning the brush and applying different amounts of pressure to change the size and form.
Because you won’t be able to construct the leaves with a dry brush or you will need to go over them again, make sure your brush is always filled with paint.
I suppose it was time for actual flowers. By placing them in the foreground and making them the darkest part of the acrylic painting, I made them the focal point.
It would have been too harsh to make them black, so I chose dark brown. I blended all the colors I had on my tray before adding black and raw umber to get the hue I wanted. I used a circular brush to paint the stems before switching to a huge flat brush to paint the flowers and buds. To get a natural appearance, it is best to alter the petals’ size and position.
I enjoy including little extras in my paintings and other artistic endeavors. They transform a mundane object into something magnificent.
With a white permanent marker, I started. Around the grass I painted on the first layer, I created lines. This ‘effect’ makes me think of how the wind blows the grass.
The second layer was afterwards embellished with dots and specks.
Finally, I embellished the flowers with stamens.
I filled in the gaps with a gold marker since I adore the way paintings look with subdued metallic touches.
They appear in the grass as shimmering small bugs. Additionally, metallic acrylic paint can be applied with q-tips or the incorrect end of a brush.
Hints and techniques
1. Play around with the tools and paint
Grab a piece of paper and begin testing if you are a beginner and have never actually painted flowers and greenery before. I enjoy following methods for watercolor paintings, however you have to thin acrylic paint. This video, for instance, will demonstrate some easy leaf modifications.
The use of watercolors differs from the use of acrylic. However, the method makes extensive use of simple forms and components that you can utilize while painting with other media.
Experiment! For the same elements, experiment with various brush sizes and types, including synthetic and natural hair, soft and bristle, and thick and diluted acrylic paint.
2. View the work of other artists
Even experts might pick up fresh ideas and original methods from others. Watch as many videos about acrylic painting as you can. Although there are acrylic painting classes available, if you want to learn how to paint with acrylics, Youtube is a gold mine.
Final thoughts on depicting a wildflower meadow in painting
I’m pleased with the way my painting of wildflowers turned out and I hope you are too. It’s a simple craft that is suitable for people of all abilities. You can easily modify this lesson to fit your preferences.
This easy painting method provided me more creative ideas. This technique seems ideal for painting autumnal leaves.
FREE Video and PDF: 10 Abstract Painting Compositions

If you’ve ever wondered how to create an abstract painting composition, this video and pdf are for you!
Vlog

How to Dispose of Acrylic Paint Water
I get asked all the time how to properly dispose of acrylic paint water. There is no single answer for what is best, and there are many ways to approach the disposal. There are also lots of YouTube videos that show those different approaches. Many of the videos show the same approach with slight variations, so I didn’t want to cover all the same ground in this video.
My approach here is to give you some easy solutions that you may actually do, rather than some of the extremely complex approaches I have seen in other videos – let’s face it, we (as artists collectively) are most likely not going to take the time and effort required for some of these methods. I have also listed them in order of ease and cost: as you go down the list, the methods get more time consuming and more costly.
So, let’s take a look at my list:
- Use a drain screen. This is the simplest solution for removing the solids from your paint water. I buy them at the dollar store, 2 for a dollar. They work great and are easily and cheaply replaced when they get clogged with paint solids. Simply put into/over your sink drain so that it catches the paint solids. Once you empty the water, immediately clean the screen and place back into/over the drain.
- Use more clean water to dilute the paint water. This method assumes the use of a drain screen as well. I use this method too. I often add lots of tap water to my paint bucket and them pour a small amount down the drain, add more water and repeat until it’s all disposed of.
- Use a coffee filter. This is an easy and inexpensive approach. You can use a regular coffee filter, or you can buy the ones that are used in commercial Bunn machines that are about twice as large. You can tape these on top of a small container and pour your paint water through the filter into the container. The filter will remove the paint solids from the paint water.
- Use clumping cat litter. You may not have heard of this one, but it works great. Get a 5-gallon bucket, put 6-8 inches of clumping cat litter in the bottom and pour your paint water in there. Once it clumps, remove all the clumps and dispose of it in the trash. With this approach, none of your paint water goes down the drain.
- Use the GOLDEN Artist Colors “Crash” System. I have heard great things about this filtration system, but I have not used it (If you have, please leave a comment and let us know how it works). It comes with buckets, filters and cleaning/neutralizing agents to completely clean your paint water.
- Use a sand and gravel pit. This one takes some work, but it lets nature cleanse the water. Dig a pit of whatever size you feel comfortable with or have room for. It should be roughly 1’-6” to 2’-0” deep. Add 6-10” of sand in the bottom and cover with 10-12” of gravel. You can also add a screen over the top of the pit if desired (to catch the paint solids). You pour the paint water onto the gravel and the gravel and sand naturally clean and filter the water.
- Use a solids separator on your plumbing pipes. This is an expensive, but very effective method of removing solids from your paint water. A solids separator is typically used in commercial sink applications, like a school art room. The separator is attached to the plumbing drain so that all water from the sink flows through it. It has a filtration system that removes solids and harmful particles from the water that flows through it. I put this last because it is the most complex and costly option.
I hope these suggestions are helpful for you, and that you are able to implement one or more of them into your clean up process. Let me know in the comments if you have used something that worked well for you.
If you’d like to learn about abstract painting and making your own authentic work, then please join me for a painting workshop: (You can view a list of workshops HERE)
- March 4, 2021 Interactive (Zoom) Mini-Workshop: Painting with David, 3 hrs.Click Here for Registration and Information.
- March 17, 2021 Interactive (Zoom) Mini-Workshop: Bigger, faster, Fresher, Looser Abstract Painting, 6 hours.Click Here for Registration and Information
- March 31, 2021 Interactive (Zoom) Mini-Workshop: Abstracting the Landscape, 6 hrs.Click Here for Registration and Information.
- April 21-23, 2021 David M. Kessler Fine Art Studio, Winston-Salem, NC. This is a Studio Workshop in Abstract Painting. Click Here for Information and Registration.
- April 27, 2021 Interactive (Zoom) Mini-Workshop: Bigger, faster, Fresher, Looser Abstract Painting, 6 hours.Click Here for Registration and Information
- April 29, 2021 Interactive (Zoom) Mini-Workshop: Abstracting the Landscape, 6 hrs.Click Here for Registration and Information.
As always, thanks for your support!
David
I have just added 6 new Interactive Mini Workshops (on the Zoom platform) to my website. Most are 3 to 6 hours long and are a great opportunity for learning a lot in a short amount of time. You’ll be online and onscreen with me as I instruct, demonstrate, paint, and critique your work.

Simple Color System Colorwheel
If you have seen my videos on YouTube or taken one of my workshops, you have seen me use my Simple Color System Colorwheel. My Simple Color System is easy to use and assures that the color in your paintings will be harmonious. Proudly made in North Carolina.

ALL ABOUT COLOR is a great online course that will show you a straightforward, no nonsense, clear and easily understandable approach to using harmonious color in your paintings.

Abstract Painting Academy is an online workshop experience specifically designed to teach you how to paint Abstract Paintings (like only you can!), Loosen Up your painting style, and use Design Fundamentals to give your paintings Dynamic Visual Impact. You get David’s personal attention and feedback on all of your work during the course.
Click Here to Find Out More

The Painting Insider (formerly Abstract Painting Insider) now has a new format and is not abstract painting specific. Weekly lessons provide an abundance of information to painters at any level. I have poured information about everything I have learned about painting over the last 30 years into one course!
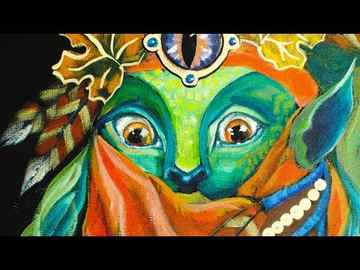
AMAZING Rainbow Drippy Realistic Eyes Acrylic Painting Tutorial Aboutface #13
Category: Howto & Style
Category: Howto & Style

Category: Howto & Style
Category: Howto & Style
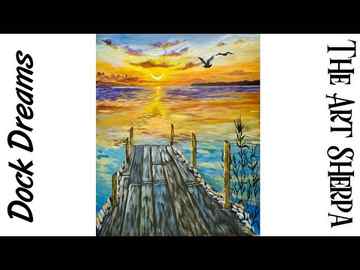
Learn to paint with Acrylics Step by Step with The Art Sherpa. There are 600+ free video art lessons for beginners. You CAN paint this. Begin YOUR art Journey today by finding the perfect acrylic painting on canvas to follow along with. With the #1 beginners acrylic painting channel on YouTube, there is something you will be excited to create, and can hang on your wall today. We have Big Art Quest lessons that will take you through every beginner step and lessons to get you painting your own masterpieces. Join our art family for Live streaming video lessons on YouTube and Facebook. Take your art to go with Mobile! Why are these art lessons free? So YOU can save for more art supplies and have fun!

©2023 The Art Sherpa | Privacy Policy | Terms Of Service | Contact Us | Acrylic April


