Making art can reduce blood pressure, improve brain cognition, fight inflammation and strengthen the immune system. It’s a win/win all around.
The Best Surface for Oil Paints: What Should I Paint On?
Knowing what the best surface for oil paints to use is one of the biggest questions asked by students.
There are many different types of surfaces we can paint on, from canvas to glass. Because of the wide variety of materials available, it can be difficult to know if the surface you’ve chosen is a suitable and lasting oil painting surface.
Oil paint done directly onto most surfaces will eventually rot the surface, so it is essential to prime your oil painting surface before you begin. Primer protects the substrate, whether canvas, board, wood, an illustration board, from the corrosive effects of oil paint.
But if you have a good primer or gesso, you can use a vast array of different oil painting surfaces for your work. Here are a few of our recommendations!
Quick Navigation
Oil Painting Surface #1: Panel
Wood, or panel, is one of the oldest oil painting surfaces. The Old Masters painted on primed pieces of wood to create some of the oldest masterpieces in art history. Older pieces of wood and panel are quality substrates when properly prepared.

This Evolve painting by Sheila J. is done on a linen canvas, which can then be glued with archival glue to a wood board.
The best surface for oil paints to work on regarding panels is arguably is an old piece of furniture or an old piece of wood, that has had a chance to acclimate itself to all kinds of environmental contamination, humidity, or pollution. So if you take an old headboard, and cut and sand it down, you will have an incredible substrate to work on.
Wood that has been exposed to elements for thirty to fifty years and has not split in any way will most likely last forever. And vintage dressers or older furniture can be a great source of that substrate.
Oil Painting Surface #2: Linen or Canvas
While earliest artists worked on wood panels, they soon discovered its limitations. How large a piece of wood they could find determined the size of painting they could produce. So artists began to paint on the cloth sails from ships and were no longer limited in size. From here, we have linen and canvas. Traditionally, you’re going to find that the top two oil painting surfaces are canvas and linen.
Canvas vs Linen
Though most think of canvas and linen and one and the same, they are actually quite different. At first glance, most are a fairly thin woven material, something like denim, but much thinner, and stretched taut over canvas stretchers.
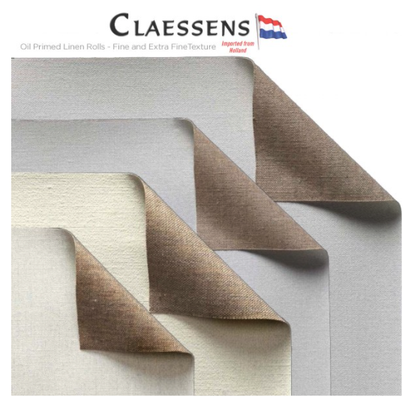
Example of different types of linen from Claessen’s Fine Linen.
After those similarities, canvas and linen are quite different. Canvas is made out of cotton and therefore quite affordable, but it has a short life span, and within 50 years it can begin to rot and degrade.
Now art historians can clean and restore rotted canvas by mounting new canvas behind it, but it does have a short lifespan.
Linen is made from the fibers of the flax plant and is very laborious to manufacture, hence a higher cost, but the fiber is very strong and lasting, with a lifespan closer to 200 years.

A painting on a cotton canvas done by Evolve student Sheila J.
As far as a painting surface, linen tends to be a bit more organic in its look. Linen surfaces aren’t perfectly smooth and exact. Instead, they have little knots and imperfections that give the paintings a natural feel.
Cotton tends to be more machine-like in its appearance, identical from corner to corner over even a 100-yard span, where linen has little differences every inch.
So if you’re looking for something a little more high end, something that has a little bit of its own personal fingerprint, linen is beautiful, but you must pay for it. If you prefer a more mechanical and consistent look, cotton provides that, but has a shorter life span and lacks a unique feel.

Masonite can be found at local hardware stores or readily prepared by art stores. Read more about preparing masonite here.
Jump to Section
- Learning Acrylic vs. Oil Painting for Beginners
- Main Differences Between Acrylic vs. Oil Paint
- Acrylic vs. Oil Paint on Canvas
- Acrylic vs. Oil Paint Price
- Acrylic vs. Oil Paint Sets
If you’re wondering how to start oil painting or how to learn to paint with acrylics, art classes are the best way to get started with a new hobby like painting. Classes make it easy to learn acrylic vs. oil paint for beginners.
From art classes in Atlanta to art classes in Chicago and art classes in Los Angeles, you’ll find a wide variety of ways to hone your skills and learn about acrylic vs. oil paint techniques.

There are plenty of art classes near you to gather tips and techniques. Check out online painting classes for even more convenience and to learn about acrylic vs. oil painting for beginners as well as some of the differences between acrylic and oil paints to get started with painting.
Main Differences Between Acrylic vs. Oil Paint
How They’re Made
Oil paints are made with binding agents, color pigments and an oil base (usually linseed or safflower), making them thick and oily. They also have a smooth and creamy consistency.
Acrylic paints are manufactured like oils but without oil. They’re water-based, which makes them safer to use. They’re a great option for beginners. You can gain practice and work on techniques before moving on to oil paints.
How They’re Used
Acrylic is a terrific choice for beginners as it can be used on any type of surface from paper, plastic and canvas to fabric, wood, metal, and glass. It does dry quickly.
So, why use oil over acrylic? Oil paints are thinner and take a longer time to dry. This gives you more time to work with them. You can start a painting, take a break and come back later to finish. Since they have oil in the mix, oil paint needs to be used on a prepared canvas or board.

Pros and Cons of Each
Acrylic paints deliver a crisp edge. You can mask areas to create graphic lines. They are harder to blend than oil paints, but a crylic paint stays bright and fresh over time.
The downside with acrylic paint is that it can change color after drying. It may seem lighter when the paint is first applied but then dry to a darker shade.
For smooth blending, oil paint is an excellent choice. Because they dry slowly, you can easily blend colors and achieve smooth lines. Oil paints stay predominately the same color; however, they can take on a yellow hue over time.
Acrylic vs. Oil Paint on Canvas
When it comes to the question of “Is acrylic or oil paint better for canvas?” it depends on what type of painting you’re doing and the type of canvas. A traditional art canvas is the perfect surface for acrylic paint.
When painting on canvas and thick boards, most artists use oil paints. Since oil paints have an oily base, they require a primer as a base coat to help the paint adhere to the surface.

Why do artists use oil over acrylic paint? Oil paints are excellent for portraits, as you can create layers and shadows. Acrylics dry too quickly for this technique.
However, when considering acrylic vs. oil paint for cabinets or other surfaces besides canvas, acrylic is the best type of paint to use for adhesion and color vibrancy. It’s not as likely to flake or peel from the wood over time. Apply a thin layer of wood primer before painting for the best results.
PRODUCT APPLICATION
Surface Preparation
Apply onto gessoed canvas, hardboard, wood or other surface. For more complete guidelines on preparing painting supports see the Tech Sheet on Preparing Painting Supports.
Absorbent Ground Application
Absorbent Ground can be applied with a brush, roller or squeegee. No thinning is necessary, although for increased leveling or ease of application, up to 25% water may be added. For best results apply Absorbent Ground over the regular Gesso in two coats – the first coat neat, then wait until fully dry (in 40-65% RH drytime is typically 8-12hrs). The second coat should be with some water (about 20%). We have found that, while building up many layers of Absorbent Ground increases the absorbency only minimally, there is concern with cracking when it is applied too thickly or too many layers are built up in a short period. If a thicker single application is desired, or if applying to a highly textured surface, blending any amount of GOLDEN Light Molding Paste into the Absorbent Ground will decrease the chance of cracking while maintaining considerable absorbency. The greater the percentage of addition, the more flexibility the film will have and the thicker it will become. Testing for your application is always recommended. If a very thick and textured absorbent surface is desired, consider using Light Molding Paste alone. Allow Absorbent Ground to dry thoroughly before paint application.
Acrylic Stains
Almost all GOLDEN Acrylic paints can be used for staining and wash techniques on Absorbent Ground. GOLDEN High Flow Acrylics are the proper viscosity for staining and therefore, offer the most intense stains. Heavy Body, Matte, High Load, and Fluid Acrylics will all need to be thinned with water to make washes suitable to stain with. Fluid Acrylics are the best choice out of this group, since they are the thinnest to start with and require less water to thin to a wash consistency. Stains must be thin enough to be readily absorbed by the surface. For additional staining effects, dampening the surface with water before applying paint will increase absorbency. Very small amounts of GOLDEN Wetting Agent may be added to the stain or water to create additional effects. If doing so, carefully follow the directions for Acrylic Flow Release, as overuse can cause problems with water sensitivity. Clean tools with soap and water.
Experimental
The following applications and techniques have not been fully tested and should be considered experimental. GOLDEN offers them for artists exploring these materials in innovative ways and for those who are interested in new possibilities and unique effects. Some of these ideas come from successful applications done by artists and GOLDEN welcomes any additions artists might have. To contact GOLDEN with your suggestions please call or email Technical Support at 1-607-847-6154 or techsupport@goldenpaints. com.
Because they are experimental, artists should fully test any procedure before using on anything important in order to work through any unforeseen problems and to make sure it meets their needs and expectations.
Watercolors
Watercolor paints work well when applied over GOLDEN Absorbent Ground and will retain all of their attributes, such as water solubility. The completed artwork can be mounted behind glass like traditional watercolor artwork, or sealed with an acrylic isolation coat and varnished. Care must be taken when applying the isolation coat as brushing over the watercolors will produce streaking. For best results the isolation coat should be lightly spray-applied and gradually built up until a non-porous film has been developed. An indication that this has been achieved is uniform gloss throughout the artwork. For more information please see our Varnish Literature:
- Volume 1
- Volume 2
- Volume 1: https://www.goldenpaints.com/technicalinfo_varnapp
- Volume 2: https://www.goldenpaints.com/technicalinfo_varnapp1
GOLDEN Absorbent Ground can also be used on watercolor paper to block out unwanted marks or mistakes. Apply the properly diluted ground evenly to the desired area in thin layers until the area is sufficiently covered. Allow the coats to completely dry, and paint over in desired manner.
Oil Paint
While we do not recommend applying full-bodied oil paint directly onto GOLDEN Absorbent Ground, application of thin washes or glazes of oil paint is possible. When doing so, make sure to protect the substrate from oil penetration by applying a minimum of 4 coats of GOLDEN Acrylic Gesso directly to the support, or an initial sizing of 2 coats GAC 100 followed by 2 or more coats Acrylic Gesso. For more information see our Tech Sheet on Preparing Painting Supports
Always allow oil paints to fully cure before varnishing. Most authorities will recommend waiting 6 to 12 months, although check with the manufacturer of your paints for specific guidelines. Once cured, DO NOT apply an acrylic isolation coat. Instead, apply GOLDEN MSA Varnish w/UVLS or its aerosol version, GOLDEN Archival Varnish, directly to the painting. Always use at least one coat of Gloss varnish to completely seal the surface before switching to a Satin or Matte sheen if desired. Failure to do so may cause the final varnish to have a cloudy or frosted effect. NOTE: Due to the absorbent nature of the ground, complete removal of the varnish will be difficult.
Different Media Applications
Application of products such as inks, pastels, chalks, etc. is acceptable on Absorbent Ground. However, when attempting to seal the work, changes in the colors and surface qualities can occur and may constitute unacceptable changes for many artists. ALWAYS TEST ON TRIAL PIECES OR INCONSPICUOUS AREAS BEFORE FINAL USE ON ARTWORK. Water sensitive materials can also streak if an isolation coat is brushed over them. For this reason, GOLDEN recommends spraying very light layers of High Flow Medium to initially seal the surface, working with low pressure, and then switching to a GAC 500/Airbrush Transparent Extender mix to progressively build up a thicker film.
ADDITIONAL INFORMATION
Sealing the Absorbent Ground Surface
The absorbent nature of Absorbent Ground mandates the need to properly seal the surface. After staining is complete, the surface must be sealed with a water-based acrylic polymer to prevent dirt, dust, oils or grease from becoming permanently embedded in the surface. This sealing coat is also recommended before applying thicker paints. Sealing the surface first will insure that subsequent paint layers form strong films with adequate adhesion.
To seal the surface, apply 2-3 coats of GOLDEN GAC 500 mixed 2:1 with GOLDEN Airbrush Transparent Extender for spray application, or GOLDEN Soft Gel (Gloss) thinned 2:1 with water for brushing. A final application of GOLDEN MSA Varnish w/UVLS, its aerosol version GOLDEN Archival Varnish, or GOLDEN Polymer Varnish w/UVLS (refer to GOLDEN Varnish Information Sheets for detailed varnishing instructions) is recommended for further protection.
Disclaimer
The above information is based on research and testing done by Golden Artist Colors, Inc., and is provided as a basis for understanding the potential uses of the products mentioned. Due to the numerous variables in methods, materials and conditions of producing art, Golden Artist Colors, Inc. cannot be sure the product will be right for you. Therefore, we urge product users to test each application to ensure all individual project requirements are met. While we believe the above information is accurate, WE MAKE NO EXPRESS OR IMPLIED WARRANTIES OF MERCHANTABILITY OR FITNESS FOR A PARTICULAR PURPOSE, and we shall in no event be liable for any damages (indirect, consequential, or otherwise) that may occur as a result of a product application.
- Follow Us
Copyright © 2017 Golden Artist Colors, Inc.


