Growing up, we had an old apple orchard with two acres of daffodils underneath that would be just magnificent in spring. I used to go out and play among them and gather up big handfuls for bouquets. I’m sure I wasn’t thinking, ‘Oh, I’ll grow up to be a gardener.’ It just became a natural part of who I am. — Bunny Williams
8 Gorgeous Ideas for Gardens from Bunny Williams
F or more than 30 years, esteemed decorator Bunny Williams has been tending to her gardens at her country estate in Falls Village, CT, with her husband, John Rosselli. And she shows no signs of stopping. “I am not able to work in my garden every day, but I am constantly thinking about it,” she tells us. For the renowned tastemaker, it’s a labor of love that yields endless joy and bountiful rewards all through the year—whether it’s planning the color scheme for her parterre in the dead of winter, deadheading, weeding, reviving plants in the greenhouse, or simply snipping lilacs and sunflowers in spring and summer.
But believe it or not, Bunny did not always have her green thumb. She learned it. “I am a self-educated gardener, as most of us are,” she says, though she grew up with a mother who loved to garden, grew all kinds of vegetables, and had a cutting garden for flowers. “In the 30-some years since I made my first little garden, it has been a constant source of pleasure to curl up with garden books, to visit public gardens around the world, to seek out-of-the-way private gardens, and to learn from the people who create and maintain both great and small ones,” she says. It’s that perennial curiosity that has fueled her lush, lavish gardens, which she’s beautifully documented in her book An Affair with a House. Come take a stroll with us in her wonderful and whimsical gardens and cull some of Bunny’s best-kept garden secrets and inspirations.
“This is the garden that John and I see from the porch,” says Bunny of the sunken garden, which is anchored with a koi pond. “I had a stone wall built to terrace the land. You have the sensation of moving from one space to another as you walk down the six big, wide steps that lead to the garden.”
#1: Start with Symmetry in Mind
Bunny’s gardens are laid out in the same manner as her impeccable interiors, with scale, balance, and a sense of intimacy. For the garden just beyond the main house, it meant leaning into classical symmetry—matching boxwood terraces and towering hedges, pairs of ornamental sculptures—to create the feeling of an enveloping outdoor room. “The koi pond in the center surrounded by a flagstaff terrace creates the sense of an intimate garden room,” explains Bunny. “Ornaments can bring your eye up from the ground to help you experience a space better and give focus to a garden. Two ornaments placed for classical symmetry will always formalize a setting. Great design, wonderful plant material, and delightful ornaments: A garden becomes a work of art when these three elements are at play.”
“I was inspired to make recent changes to this garden after visiting an English-style garden in Normandy created by the late, great landscape designer Russell Page,” says Bunny.
Manicured rows of terracotta planters line the stone paths, while a pair of antique ornamental garden lions stand guard.
#2: Consider Your Garden View
When you’re starting to plant a garden, it’s tempting to immediately fill it with perennials and flower beds. Bunny had the same initial impulse but soon realized patience and an understanding of perspective came first. “You have to consider views and the relationships between spaces and make a plan that works for the whole site,” writes Bunny in An Affair with a House. “Initially, I planted delicate coral bells and other little flowers. But this is the garden John and I see from the screened porch, and those were too small to register from a distance. I switched to plants with leaves the size of platters.”
This carved wooden garden bench is one of four that line the walkways framing the sunken garden, which lies just beyond one of the home’s screened-in porches.
I don’t think there’s anything more joyous than getting up at 6:00 a.m. with the birds and going out to look at the garden in the softness of the early morning air, with the dogs running about.
— Bunny Williams, “An Affair with a House”
Bunny and John’s bedroom on the second floor overlooks the stone terrace and loggia. “One of my favorite views of the house is from the porch right off our bedroom,” Bunny writes.
Whimsical painting ideas for wooden bunnies

Welcome to The Whimsical Wife. Thanks for popping in to share my adventures in the kitchen, in my home and my workshop as I Cook, Create & Decorate.

Mar 25
Mar 25 DIY Easter Bunny Crossing Sign
I can’t believe it is Easter week already and here we are on the countdown to Easter again. So I thought I would share with you a couple of great DIY Easter projects that you can have fun with the kids making in preparation for the BIG day. I know my kids get seriously excited about the incoming Easter Bunny so having them create something in preparation for the day makes them seriously happy.
Today I am showing you how to create a seriously cute DIY Easter Bunny Crossing Sign to pop in your garden or out the front of your house ready for an Easter egg hunt. Pop on a couple of cute decorated homemade buckets and your little Easter bunnies will have fun finding some chocolate eggs. So let’s jump into how to make your own.

Materials:
- Pink acrylic paint
- White acrylic paint
- White spray paint – Paint & Primer in 1
- Gold spray paint – Dulux Dura Max
- Bunny Face Template
- 30cm white ribbon
Tools:
- Drop saw
- Small Foam Roller
- Sharpie permanent marker
- Pencil
- Biro
- Small artist paintbrush
- Craft Glue
- Drill & Drill bit
Cut List:
** This is only a guide for what sizes of wood I used. You can use what you have lying around the house for something similar.
Premium Grade Pine
- Pole: 42mm x 19mm x 1400mm
- Bunny Face Board: 235mm x 19mm x 340mm
- Sign – Bunny: 89mm x 19mm x 400mm
- Sign – Crossing: 89mm x 19mm x 460mm
Fastener List:
- 6 x 10g 40mm Galvanised Countersunk Self Embedding Screws – USE: Bunny Face Board, Bunny & Crossing Sign.
- 2 x 32mm cup hooks USE: Crossing sign

Cut the lengths of timber required for the sign using a drop saw. Make sure that you cut the bottom end of the pole into a point to help insertion into the ground. Paint the pole using the white spray paint and let it dry. Two coats may be required for even coverage.


Spray the bunny crossing sign pieces with the gold spray paint. Apply two coats of the gold paint for even coverage. Let the pieces dry overnight before assembling.
Print off the letters required for the Bunny Crossing using a word document. Choose a font and size suitable for the size of the wood pieces. Colour the back of the sheets of words with the lead pencil. Turn over and centre on the first piece of wood.

Use the biro to trace around the letters onto the board. Remove the piece of paper, and you will see an imprint of the letters on the board. Colour the letters in using the permanent marker and set aside to dry. Repeat with the second board. Attach the two cup hooks to either end on the underside of the “crossing” sign.


Paint the bunny face board using the pink acrylic paint and foam roller. Apply two coats of the paint letting it dry for at least 2 hours between each coat.
Using the same technique as the Bunny Crossing Sign trace the bunny face onto the pink board. Paint the face silhouette using the artists paint brush and white acrylic paint. Apply 2-3 coats letting it completely dry in between each coat.

Draw on the face details with the permanent marker making sure to trace around the outside of the face and ears. Tie a small bow with the white ribbon and attach in between the bunny ears using the craft glue. TIP: Google “Bunny Faces” to use as a template for the Bunny Face sign.


To create the sign first attach the bunny face sign to the white pole by drilling two pilot holes through the pole and sign making sure not to go through to the other side. Secure using the two countersunk self-embedding screws with the drill. Leave a 5cm gap between the bunny face sign and repeat this process with the two sign pieces. Hammer into soft ground using a sledgehammer. Attach homemade Easter baskets ready for the kids to go easter egg hunting.


I am so happy with how this Easter Bunny Crossing Sign turned out. It’s super cute if I don’t say so myself. If pink isn’t your colour (i.e you have boys in the family) then go for a colour that suits say a mint green or baby blue. Pastels always go well on any Easter themed project. This sign featured in the March issue of the Australian Handyman Magazine so you can check the project over there as well. If you do make one of these for your Easter egg hunt I would LOVE to see it. Tag me over on Instagram or Facebook with your creation.


My little girl was smitten with this sign (because it was pink) ha but she also loved the bunny face. I was a little proud of how the bunny face turned out. I thought it was pretty darn cute. If you have any questions on how to put the project together don’t hesitate to leave a comment below.
Instructions
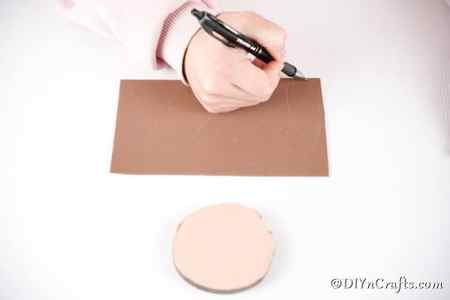
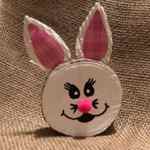
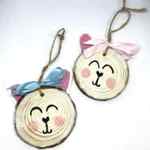
- Paint one side of your wood slice in pink or white then set aside to dry;

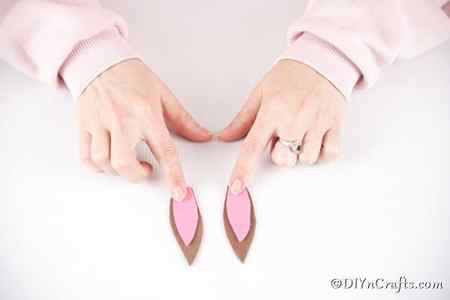
- Trace and cut out bunny ears from the brown paper, then slightly smaller ears from pink paper;
- Attach the pink ears to the top of the brown ears as shown;
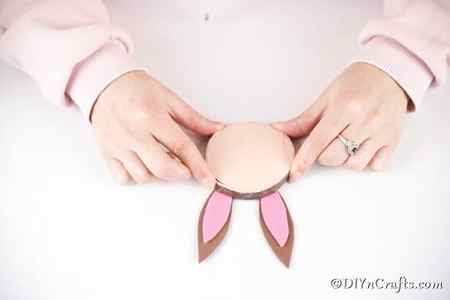
- Glue the bunny ears in place at the top of the wood slice on the back unpainted side;
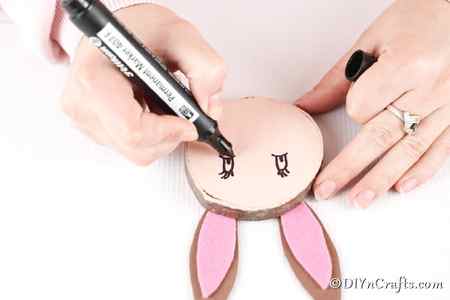
- Next, you will draw on the bunny eyes with black marker;
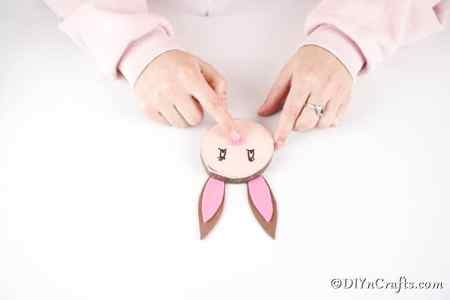
- Cut out and glue on a felt circle for the bunny nose;
- Add a simple mouth with big teeth smiling as shown;

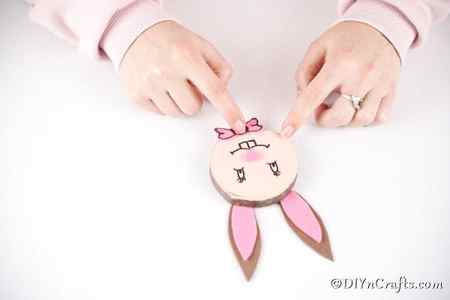
- Attach the felt bow tie with craft glue;
- Display as desired.
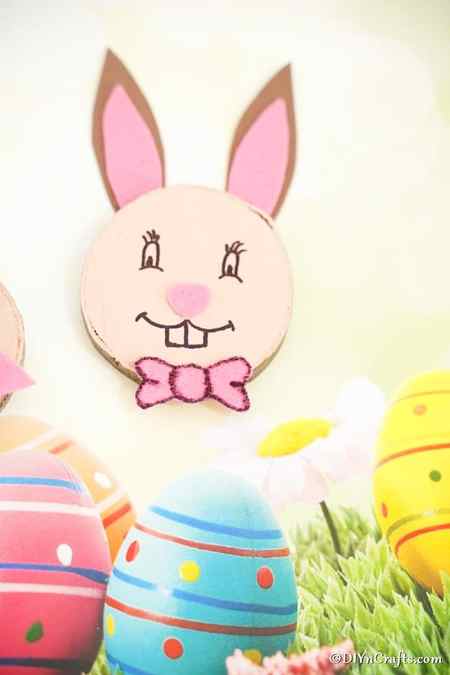
You can also paint these bunnies white, purple, blue, green, yellow, or any springtime colors you prefer!
Recommended Products
As an Amazon Associate and member of other affiliate programs, I earn from qualifying purchases.
Easter bunny wood slice
Easter Bunny Wood Slice Wall Decor
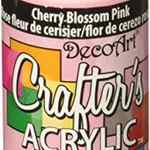
Pink Craft Paint
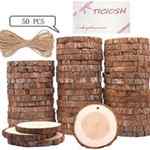
Wood Slices

Pink Felt

Colored Craft Paper
Similar Project: Easy Painted Popsicle Stick Chicken Craft
© Katie Hale
Project Type: Crafts / Category: Easter

More Easter
Cute Wood Slice Spring Chicken Decoration
Cute Yarn Sheep Easter Wreath
Adorable Wood Slice Bunny Rabbit Decoration
Upcycled Wooden Log Easter Bunny Decoration
Comments
Leave a Reply Cancel reply
I love these. I work with wood so I would take a third circle. Symmetrically cut out an arc off of each side for the ears. and the concave part between the 2 convex pieces for the ears, I would make the bow. The 2 ears glue behind the head and glue the bow on the front of the head..
I do love your version soooo cute.


