If you love Halloween, you might love this Edgar Allen Poe mantelscape, this tutorial on how to paint fake pumpkins to look a little but more realistic, and
How to Make a DIY Witch Hat from Canvas
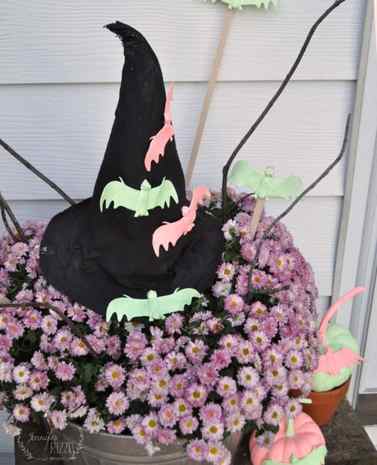
October is almost here and witch hats are always a great the fun decor item at Halloween. They are easy an inexpensive to make, and can be fun to use in everything from hanging decor to an adult witch’s costume. This witch’s hat is no sew so it’s even easier! I made one to go in my planter and decorated it with fun bright colored bats. It’s easy to make a DIY witch hat from canvas and super inexpensive using duck cloth or painter’s tarp. You can grab the cone pattern at the end of the post to get started.
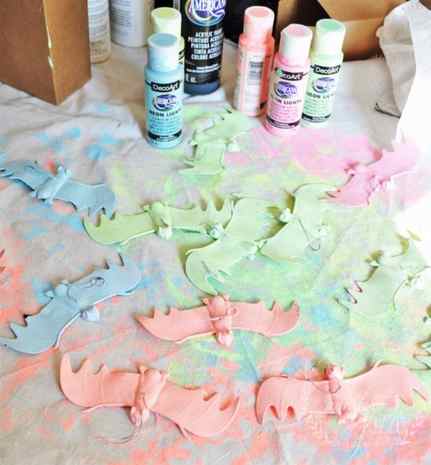
Before making the witches hat (directions and template below), I painted my bats so they had time to dry.
I bought the plastic bats at the craft store, and started painting. It was after the paint dried, and it started peeling right off of my bats that I realized my craft fail.
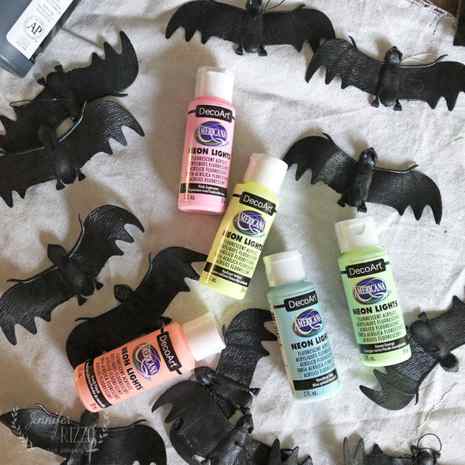
I didn’t use a Paint Adhesion Medium, which helps the acrylic paint adhere . You would think I would have figured it out by now, like when I paint furniture. So, learn from my mistake, and if you are going to paint something with a slick surface, use the medium before the paint. (the colors I used for my bats are Pink Explosion, Radiant Yellow, Green Energy, Knock Out Blue, and Peach Punch)!
To create a DIY witches hat from canvas you’ll need canvas (or cotton duck or an old painter’s tarp), white craft glue (or a hot glue gun), scissors, glue, black paint, and scrap cardboard, poster board or a cardboard cone.
To make the base of the hat, first roll a piece of cardboard (or poster board) to create a form for the witches hat in a cone shape, or use a pre-made cardboard cone. Using the template, trace and cut out a cone shape (template at the end) on the painter’s tarp. If this is for a costume, measure the adult wearer’s head circumference with a fabric tape measure, and size the circle accordingly. Then use a pencil to trace and cut a large circle on the fabric for the brim. The diameter of the circle depends on how big you want the brim( 16 inches across is a good place to start).

Fold the cone shape canvas over and glued the edge. Place the glued fabric over the cardboard cone and let dry. The hat maybe a little slouchy at the bottom of the cone (which I liked, It made it look more “hat like”..). to make it less slouchy either stuff the tip of the hat with paper, or trim it down a bit at he base.
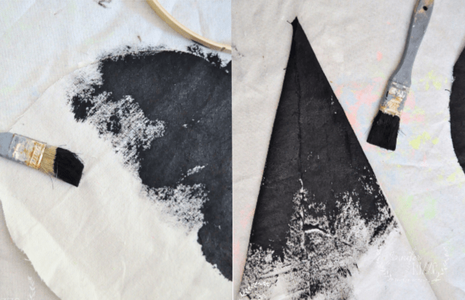
Paint the brim and the hat top with black acrylic paint (craft paint is fine). This will help to stiffen the fabric. This may take multiple coats. Let dry. If you want to make a top point on the hat where it bends a little, you can bend it over and clip it while the paint is still wet so it dries that way.

To add the brim of the witches hat to the top, cut slits an “x” in the center of the base of the brim to create an opening, and glue to the inside circle of the hat. You can glue a black or other colored ribbon where they meet to clean up the edge or add a bit of color.
how to paint a witches hat
No Halloween decor is complete without a fun and whimsy witches hat in the mix, am I right?? I love cute, not scary, Halloween decor…and this diy witches hat that I painted sure fits the bill!
I am going to walk you through the process the best I can! The pictures explain a lot too!
Supplies Needed:
Any surface to paint on. I used a wooden planked surface that I have had for a long time!
Paint colors of your choice! I used the following colors (all acrylic Apple Barrel):
– Jet Black
– Snow White
– Harvest Orange
– Limeade
– Fruit Punch
– Royal Violet

I wish I remembered where I got this surface, but I don’t. I see them all the time, so any craft store or even Walmart or Target will have them.

First, take your limeade and brush it all over your surface.


While the paint was still wet, I added a little bit of white to my paintbrush and made polka dots on the green. I simply wanted to see a lighter shade of green, but I wanted it to be very subtle! Turned out PERFECT!

Once the green paint had dried, I took my black and gently drew the outline of a witches hat on my surface. I made sure to make it fun and whimsy!

I filled in the hat with black paint, and I put it on extra thick. Once it had somewhat dried, but not completely, I added in some purple streaks!

Once the black was dry (mostly), I added the “belt” of the hat…with white paint. I put it on thick!

The next step is to add black polka dots really thick onto the white! I just hand drew them, and they look fun and whimsical, which as you know, is my favorite style.

The next step is to add stripes! I simply hand drew them on and made sure they didn’t look “perfect”…bc I didn’t want that. I did orange, then black. You can see by looking at the picture above how I did them!

I felt like the stripes and the hat still needed a little something, so I added some highlights to the hat with white and some PINK to the black stripes! Then…last but not least, I decided my hat needed a SPIDER’S WEB! I absolutely adore the end result of this painting.
Oh yeah. I forgot to mention that at the end of the painting, while some of the highlights were still wet, I added iridescent glitter!


