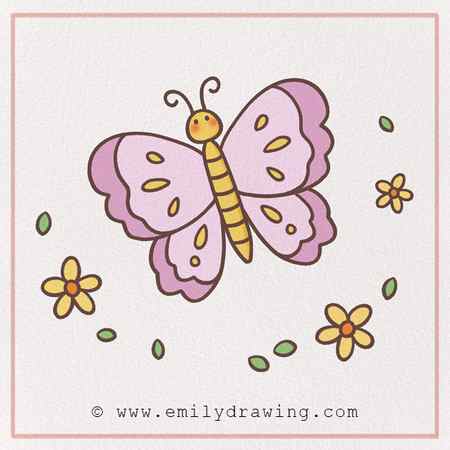
Easy Instructions on How to Draw a Butterfly

Butterflies are the perfect drawing subject when learning how to draw. Their wings alone hold a certain pattern that once mastered, it’s very easy to emulate. Would you like some help on learning how to draw a butterfly step by step? Teachers and Homeschool Moms everywhere will appreciate these easy instructions on how to draw a butterfly!

How to Draw a Butterfly Step by Step
At first glance, butterflies may seem a bit difficult to teach preschoolers how to draw. Yet, your child can draw the perfect butterfly with very little effort. You just need the right tools!
You’ll be amazed how easy it is after you watch how to draw a Butterfly step by step. With my simple video tutorial below, it’s easy as 1-2-3! Plus, this downloadable FREE How to Draw a Butterfly Printable is a valuable incremental guide. Let’s get started!
Step 1: Download your FREE Butterfly Template
Download the FREE How to Draw a Butterfly Template and print a couple of copies for extra practice. It is likely your students will want to make multiple butterflies of all different sizes.

Step 2: Gather Writing Utensils
Choose your preferred method of drawing, whether it’s coloring pencils, crayons, or erasable markers. And, don’t forget to include a black marker, crayon, or pencil to trace the butterfly.

Step 3: Watch How to Draw a Butterfly Step by Step Tutorial
Watch the How to Draw a Butterfly Step by Step Video tutorial. Doesn’t it make drawing a butterfly so much easier.

Are you convinced now that the How to Draw a Butterfly Template is right for you? It builds a ton of confidence in you and your child as you grow and learn tracing, drawing, and patterns together!

What an engaging, but simple way to teach your child that they can draw anything with just a little practice! Plus, the How to Draw a Butterfly free printable encourages your preschooler to develop fine motor skills, visual analysis, improves eye coordination, and builds creative problem solving!
Directed Drawing: Draw & Write

Did your student enjoy this easy step-by-step drawing worksheet? Be sure you check out our Draw and Write Activity pages for more fun! Children follow the six-step drawing guidelines to create their own fun characters. Drawing builds small motor skills, increased confidence and provides writing opportunities for children to create stories for their creations.

Looking for more butterfly resources? You’ll find everything you need right here including coloring pages, art projects, life cycle worksheets, math worksheets, and SO much more! Find out more about our Butterfly Preschool Printables here!
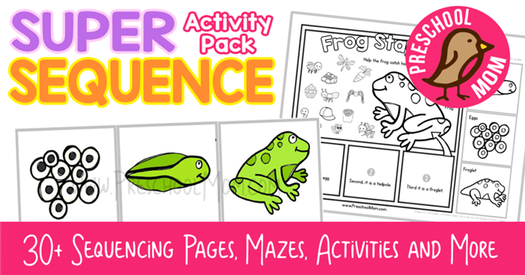
Did your kids enjoy designing the butterflies? If so, you may want to take advantage of their excitement and get this HUGE 30 page activity pack! It includes not only life cycles of butterflies, chickens, and frogs, but also plant stages, make a rainbow, and much more!
How to Draw a Butterfly
Welcome to our easy-to-follow and fun ten-step drawing tutorial on how to draw a butterfly!
Butterflies are beautiful and elegant little insects. If you’ve ever seen them in person, you’ll know how interesting they are—different butterflies have all sorts of unique markings.
Scientists think that there are about 15,000 species of butterflies!
Monarch butterflies are especially well known, as they are known for their long migration. Every year, monarch butterflies travel a long way— sometimes over 4000 kilometers! Then, females lay eggs and the next generation of monarch butterflies travel the long distance back.
Alright, let’s get started. Find some drawing materials and let’s get started!
How to Draw a Butterfly — Let’s get started!

- a piece of paper
- a pencil for the guiding lines and sketching
- an eraser
- a black sharpie or a pen for the outlines
- markers or colored pencils for coloring
- our printable drawing guide (Join my Email List below to get this Tutorial)
Get the FREE Printable Drawing Guide

Here are my RECOMMENDED Art Supplies!
- Crayola Coloring Set (140 Pieces – Mega Value!)
- 24 Colored Crayon Set
- A4 Printer Paper
- Crayola Coloring Pencils
- HP Home Printer with Instant Ink!
Time needed:
Step 1 – Draw the butterfly’s head.
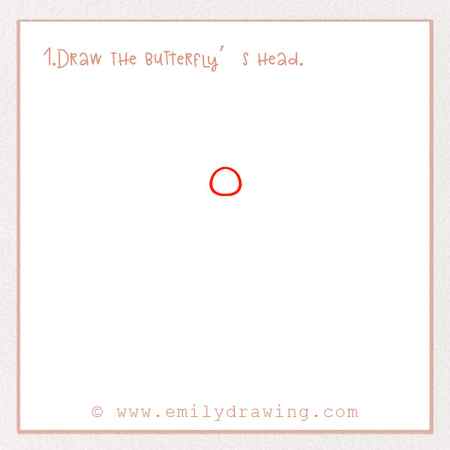
Let’s start to draw the butterfly by starting with the head. Draw a small circle about an inch wide. Place it three-quarters of the way up on the page.
Step 2 – Form the body.
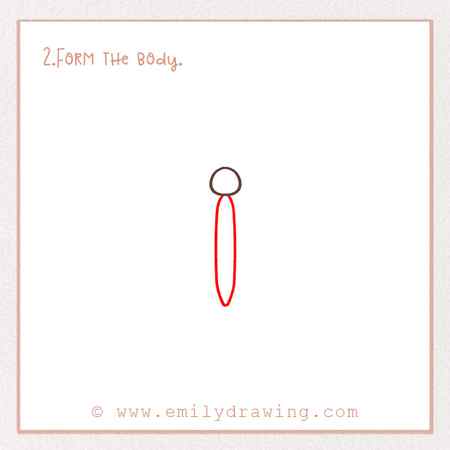
Underneath the head, draw a long skinny oval. This is the body, also called the abdomen when talking about butterflies.
Leave a few inches below the abdomen to finish the drawing. It should be the same width of the head.
Step 3 – Draw the face and antennae.

Like many creatures, butterflies have antennae. These are sensory in nature and help a butterfly smell and balance. Let’s add them now!
Draw two curly lines on top of the head. The two curls should face away from each other. Check out the photo!
Also, add two small dots close to the top of the head for the eyes. Did you know that butterflies are especially good at perceiving fast-moving objects.
Step 4 – Add detail to the body.
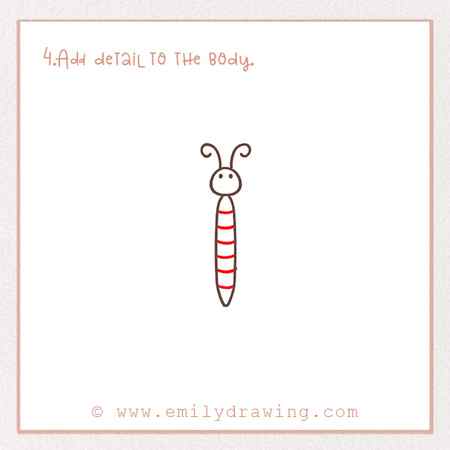
Next, we are going to add some lines to the body. Throughout the abdomen that we drew in Step 2, add a bunch of skinny horizontal lines close together. They should be evenly spaced apart.
Step 5 – Start drawing the wings!
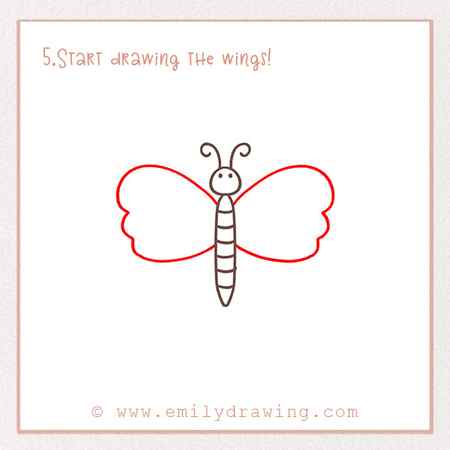
One of the most beautiful parts of butterflies are, of course, their wings. Did you know that butterfly wings are actually transparent? Next time you see one in real life, you might notice sunlight shining through their wings. They also help protect them because they blend in with their surroundings when their wings are folded up.
Just underneath the head on the right side, start drawing a large curved line extending outwards. Continue the curve about an inch from the edge of the page. Bring it back to the abdomen. Check out the photo! The wing should be several inches wide.
Then, do the same exact thing on the left side to make the wings look identical.
Step 6 – Finish the wings.
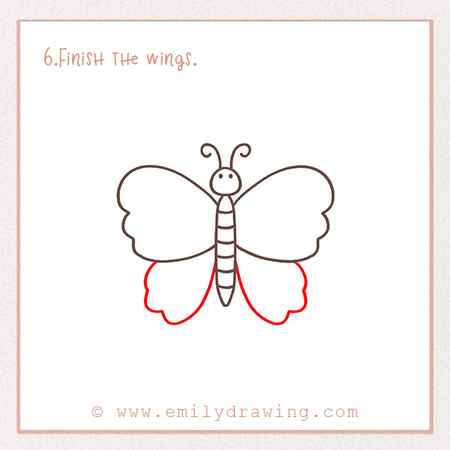
Butterflies actually have four wings! The wings closer to the head are called the forewings and the rear ones are called the hindwings.
So, in this step, we’re going to draw the hindwings. Underneath the wings from the last step, draw more curves that come back to the body. The outline is unique so look at the photo! It has basically incorporated scalloped lines to make a pretty curved line. The hindwings should be a bit smaller than the forewings.
Step 7 – Add detail to the wings!
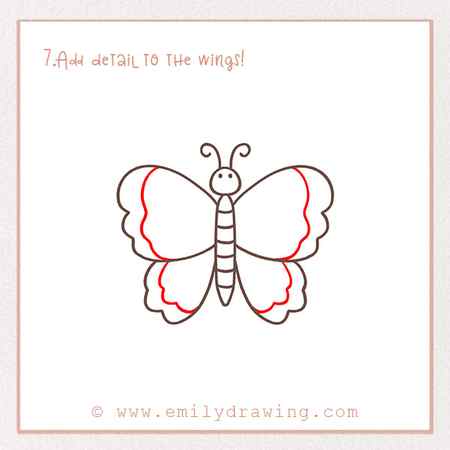
We’re going to add more detail to all four of the wings. Right inside the outer edges, draw similar lines to the outline itself. It should look like the wings have stripes on the sides.
Step 8 – Draw the markings on the wings.

This is a fun step! Butterflies have really beautiful markings that can look very different depending on the species. Scientists think that these markings can help with defensive mechanisms against predators. For example, one theory is that butterflies that have bold spots evolved to appear like the eyes of a bigger animal.
So, let’s add markings now! Draw three ovals on each of the top wings. Make them slightly different sizes to add some visual variety to your butterfly.
Step 9 – Add some more markings!
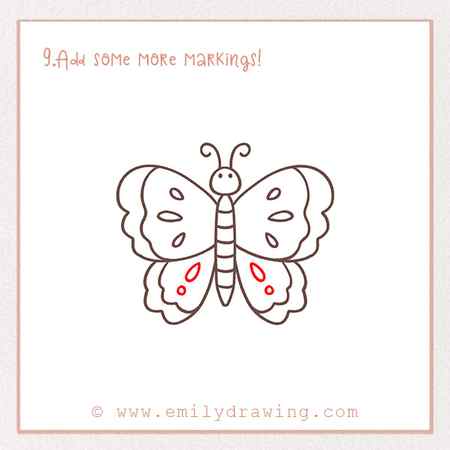
We’re almost done! Draw two small rounded shapes on each bottom wing.
That completes the pretty markings. Good job!
Step 10 – Color in your butterfly!
Now it’s the fun part. Find some colors and fill in the butterfly! Make the butterfly markings a different color than the rest of the wings to make them pop out!
Fill in the background, too!
Pin it now, Draw later!

Good job! You’re all done.
We hope you absolutely loved this tutorial, learned some drawing techniques, and discovered some interesting facts about butterflies. If you liked this art tutorial, you might enjoy the ladybug and caterpillar ones we also have on here!
Share this drawing tutorial with friends who you think might enjoy this! You can tell them about it in person or you can also digitally share this tutorial with the social icons on this page.
Thanks for following along, and see you next time!


