Although blue jays are really smart birds, what makes them so attractive is the fact that they actually aren’t blue in color. It’s actually a light trick that makes it seem like it’s blue.
How to Draw a Blue Jay
Learn how to draw a great looking Blue Jay with easy, step-by-step drawing instructions, and video tutorial.
By following the simple steps, you too can easily draw a perfect Blue Jay.

Complete Blue Jay drawing
Blue jays are backyard birds that are common across North America. They eat nuts, seeds, fruits, and insects. The blue jay’s scientific name means “crested blue chatterer.”
Blue jays are one of about 40 species of jays, so named due to their bold, raucous, and garrulous manner.
Most jays live in North or South America, but a few can be found in Europe or Asia. Jays are large and noisy, often chasing other birds from the birdfeeder.
Blue jays have long been a part of popular culture. The animal is credited in some legends as helping create land by bringing bits of dirt.
African American folklore has sometimes painted the blue jay as a collector of kindling at work for the devil, helping to stoke the fires of the underworld.
Scroll down for a downloadable PDF of this tutorial.
Blue jays are often sports team mascots, including American and Canadian baseball teams. Ace is the mascot of the Toronto Blue Jays.
Would you like to draw a noble blue jay? This easy, step-by-step animal drawing tutorial can show you how.
All you will need is a pencil, an eraser, and a sheet of paper.
If you liked this tutorial, see also the following drawing guides: Eastern Bluebird, Robin, and Hummingbird.
Step-by-Step Instructions for Drawing a Blue Jay
How to Draw a Great Looking Blue Jay for Kids, Beginners, and Adults – Step 1

1. Begin by drawing a circle. This will help you to form the bird’s head.
Easy Blue Jay Drawing – Step 2

2. Extend curved lines downward from each side of the circle. This forms the bird’s neck.


Easy Blue Jay Drawing – Step 3
3. Use a series of curved lines to sketch the triangular beak, overlapping the original circle. Draw a line down the center of the beak to distinguish the upper and lower portions.
Easy Blue Jay Drawing – Step 4
4. From the top of the head, draw a curved line. Connect it to the back of the head using a series of short, overlapping curved lines. This forms the feathered crest.
MORE DRAWING TUTORIALS:
How to Draw a Cartoon Hawk

How to Draw a Feather
How to Draw a Turkey
Easy Blue Jay Drawing – Step 5
5. Use a series of curved lines to sketch the wing just below the neck. Note how the lines converge at a soft point at the tip.
Easy Blue Jay Drawing – Step 6

6. Erase the guide lines left by the original circle.
Easy Blue Jay Drawing – Step 7

7. Extend a pair of long, curved lines from beneath the wing, and double them back upon themselves. Allow the doubled-back portions to meet in the middle, forming the tail. then, sketch the belly. Notice the two protuberances near the tail. These are the upper portions of the legs. Texture each leg with short lines.
MORE DRAWING TUTORIALS:
How to Draw an Easter Chick
How to Draw a Phoenix

How to Draw a Cardinal Bird
Add More Details to Your Blue Jay Picture – Step 8

8. Detail your blue jay with its characteristic plumage. For the eye, draw three successively smaller circles, one within the other. Then, using short lines that meet jaggedly, enclose patches behind and in front of the eye, and lines across the neck. Draw a set of scalloped lines across the wing and a pair of curved lines below it. Loop a curved line through the tail, and texture the belly with a series of short, connected lines.
Complete the Outline of Your Blue Jay Drawing – Step 9
9. Band the tail with curved lines. Use additional curved lines to outline the feet and tree branch.
Color Your Blue Jay Drawing
Color your blue jay. Their backs are bright blue and their bellies are white. They have white and black markings on the wings and face.
Ready to do some bird watching? You’ll find that birds of a feather flock together among our animal drawing guides.
For more great Drawing Ideas tutorials, see the 100 Drawing Ideas Art Projects for Kids post.
Easy, step by step Blue Jay drawing tutorial
Click HERE to save the tutorial to Pinterest!
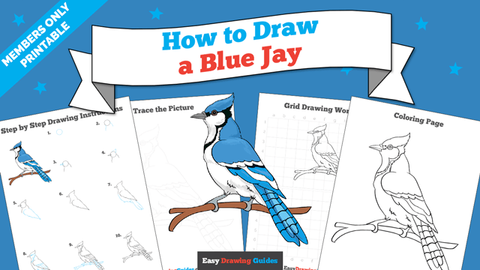
Blue Jay Drawing Tutorial – Easy & Fun Printable Pages
Join now and get immediate access to thousands of printable drawing instruction and practice pages!

MEMBER TROUBLESHOOTING
Still seeing ads or not being able to download the PDF?
First, check that you’re logged in. You can log in on the member login page.
If you’re still not able to download the PDF, the likely solution is to reload the page.
You can do this by clicking the browser reload button.
It is a circular arrow-shaped icon at the top of the browser window, typically found in the upper-left side (you can also use keyboard shortcuts: Ctrl+R on PC and Command+R on Mac).
Reference
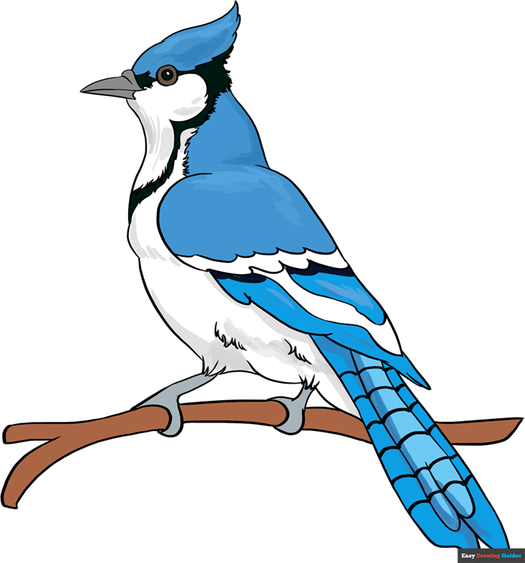
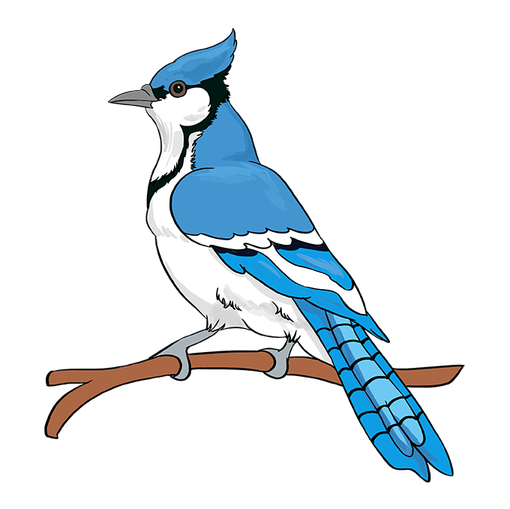
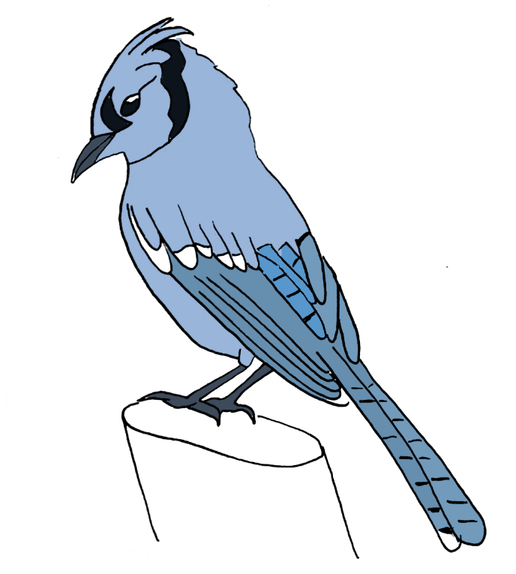
For this drawing, here’s the blue jay that we will be attempting to draw.

It has a beautfiul set of feathers with lines that run down. It’s head is a mixture of different colors and shades that make it look like a pattern. It has a relatively short beak compared to other birds.
For this drawing, we’ll start by drawing the beak, moving onto the head, the feathers, and then the feat.
We will also include the wood that the bird is standing on just for extra details.
Steps For Drawing A Blue Jay Bird
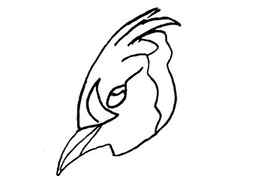
Step 1

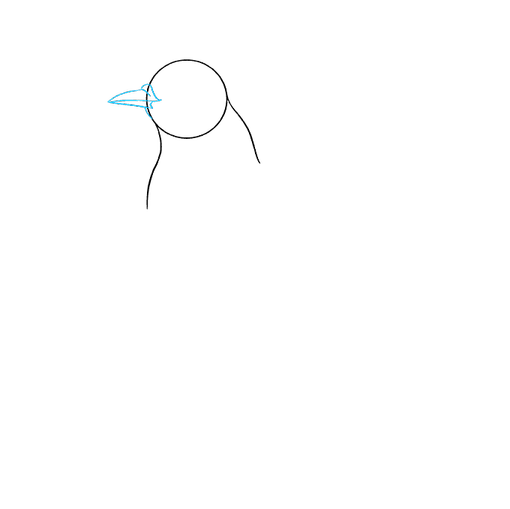
As mentioned, we’ll begin by drawing the beak of a blue jay. Draw a leaf shape as shown above and draw a line in the middle.
Step 2

From the top of the beak on the left point, draw a curved line coming out for the head and then draw a another pointed shape like this.
On the lower end of the beak, draw a line in an angle making sure it’s aligned with the line of the beak.
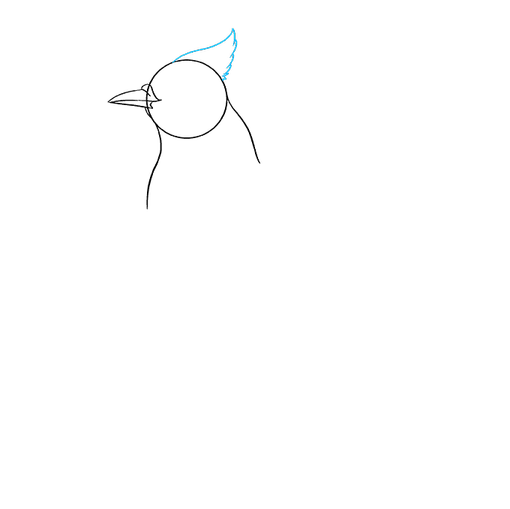
Step 3

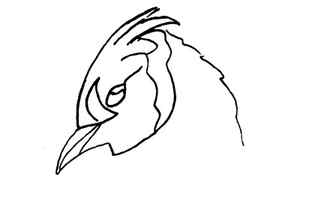
Now connect this line to the top of the head by drawing a line like this. You’ll notice that it’s not a perfectly curved line but it does become wavy in certain places.
Step 4
Then next thing we should do is add details to the head to make it look like the actual bird. You can do this by drawing an almond shape for the eye and then filling the head with these lines.
Step 5
Head over to the top of the head again and draw this uneven line going down.
Step 6

Now it’s time to work on the actually body of the blue jay.
Begin by continuing the line you had just drawn in the previous step and then head over to the left side and draw a line that curves in and then curves out.
Try to leave a good distance in between these two lines.
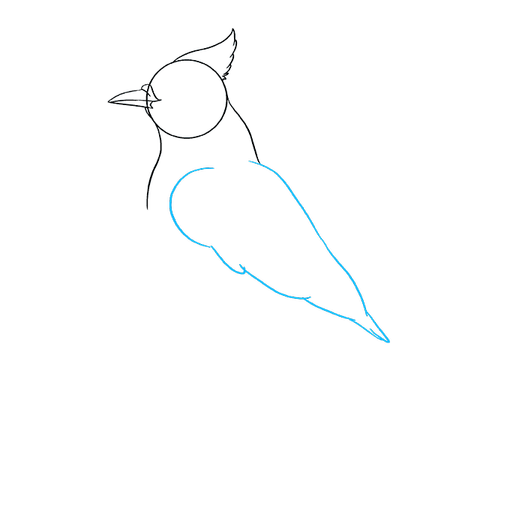
Step 7

Continue extending these lines by drawing them further down but also making them narrow in towards each other. This part of the bird is going to be smaller than the rest of the body.
Step 8

You’ll then want to start drawing the tail of the bird. You can do this by drawing a set of lines but making one look like it’s resting on top of the other.
You’ll then want to add a bit more detail to the tail by drawing a few horizontal lines down these feathers..
Don’t forget to draw the line below that to indicate the other part of the blue jay’s body. On that line, draw two lines to indicate the starting of the feet.
Step 9

Go ahead and add these long lines for the bird’s feet. You can see one that is more angled than the other.
Step 10

Finish off your blue jay bird by drawing the rest of the feet as done over here.
As you can see, the second foot is slightly hidden by the first so be sure to add in this detail and your bird is almost complete (there’s still the feather details to add).
If you want to stop here, you absolutely can but if you want to make it look like this blue jay is standing on something, go ahead to the next step.
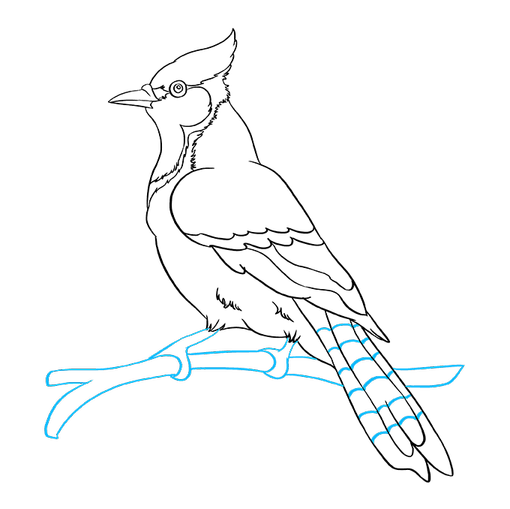
Step 11

To draw the wood piece that the blue jay is standing on, draw an uneven oval making sure to connect the feet lines to it.
Step 12

Draw two lines down that come into an angle on either side of that oval.
Step 13

The last step is to add in the feather details of the body. As you can see, there are a few curved shapes drawing in over here to make it look like the feathers.
There are also a few details added such as the horizontal lines to continue the pattern to make the bird resemble the reference.
Go ahead and add these details to make your blue jay drawing look complete and you’re done.
Step 14
Here’s what your blue jay will look like if you had to add a bit of color. I chose to go with a light shade of blue/purple while alternating between a few darker shades here and there.
With or without color, this bird drawing still looks gorgeous and I think you made an excellent choice in choosing to draw this bird along with us.
Pin This For Later

Drawing a blue jay was easier than I thought even though there is quite a bit of detail that is required. I would say the hardest thing about this drawing is getting the feathers right.
But overall I’m pleased with the way this drawing turned out. If there are other birds you would like to learn to draw, leave us a comment and let us know your options.
I hope you found this tutorial on how to draw a blue jay easy enough.
Before I let you go, I would love to recommend a few more drawing tutorials that you might find interesting as well: