Make bigger eyes. Just take out some of the stripes and put in a bigger eye and maybe add sparkles in the eye.
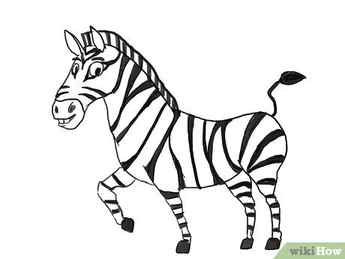
How to Draw a Zebra
This article was reviewed by Kelly Medford. Kelly Medford is an American painter based in Rome, Italy. She studied classical painting, drawing and printmaking both in the U.S. and in Italy. She works primarily en plein air on the streets of Rome, and also travels for private international collectors on commission. She founded Sketching Rome Tours in 2012 where she teaches sketchbook journaling to visitors of Rome. Kelly is a graduate of the Florence Academy of Art.
This article has been viewed 290,947 times.
Below, we have the steps to drawing a zebra. Let’s begin!
Steps
Method 1
Method 1 of 2:
A Cartoon Zebra

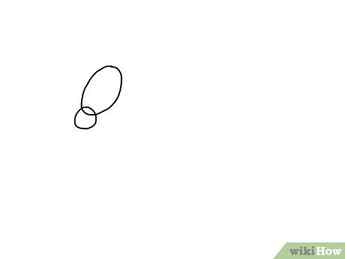
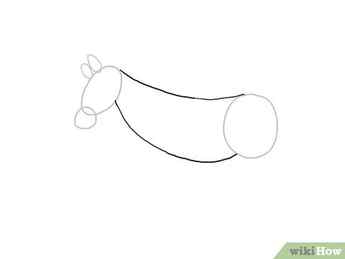
Draw two circles, make one circle bigger than the other. [1] X Research source [2] X Research source
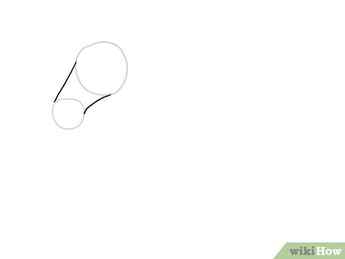
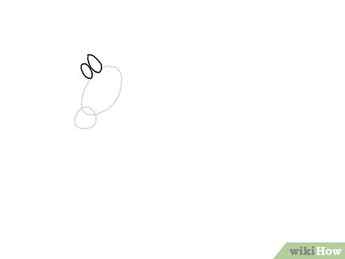
Connect the two circles by drawing curves to make the head.
Advertisement
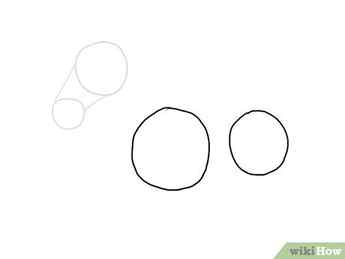
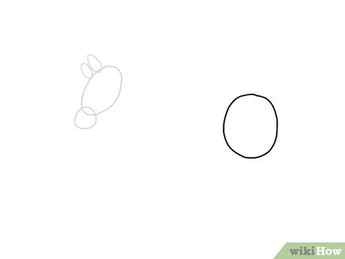
Draw a bigger circle followed by a smaller one for the body. [3] X Research source
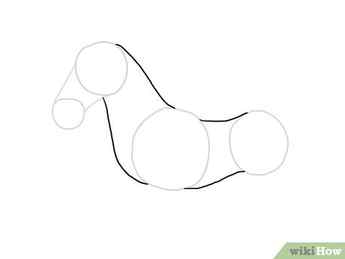
Draw curves connecting the body with the head. [4] X Research source
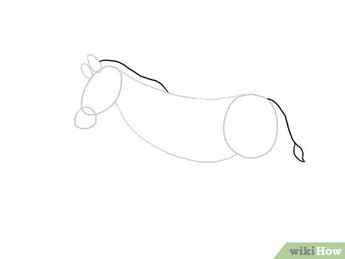
Draw pointed ovals for the ears and tail, draw a curve to connect the tail with the body.

Draw a series of wide ovals above elongated thin ovals for the legs.
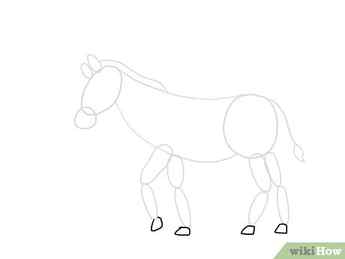
Draw blocky irregular rectangles for the hooves.

Add the face by making ovals for the eyes and nose; draw curves for the eyebrow and mouth; add two blocks below the mouth for the teeth. [5] X Research source
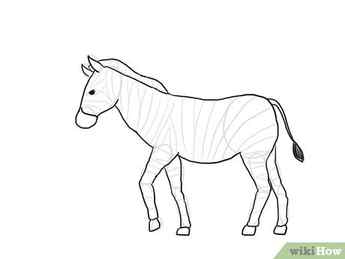
Draw stripe outlines all over the body of the zebra. [6] X Research source [7] X Research source
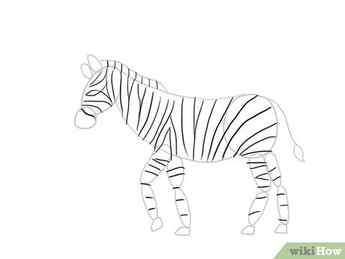
Based on the outlines, draw the main body of the zebra. [8] X Research source

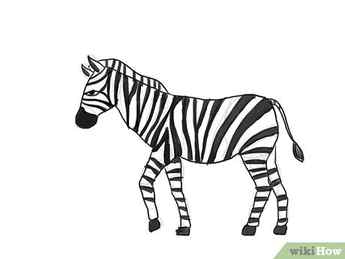
Shade the stripes and hooves of the zebra.
Erase the unnecessary outlines.

Color your zebra! [9] X Research source
Advertisement
Method 2
Method 2 of 2:
A Realistic Zebra
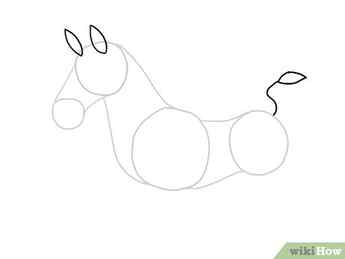
Draw an oval connected to a circle for the head.
Draw two ovals above the head for the ears.
Draw a circle for the rear body.
Draw curves connecting circle drawn previously to the head.
Draw curves for the mane and tail. Add a pointed oval to complete the tail.

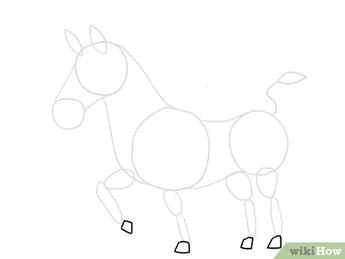
Draw a series of elongated ovals for the legs.
Draw irregular blocks below the legs for the hooves.
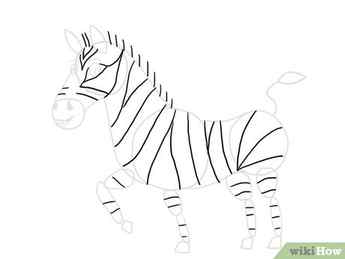
Draw the stripes all over the body of the zebra.
Based on the outlines, draw the body of the zebra. Add a shaded oval for the eye.
Shade the stripes, mouth area, ear, mane, tail and hooves.
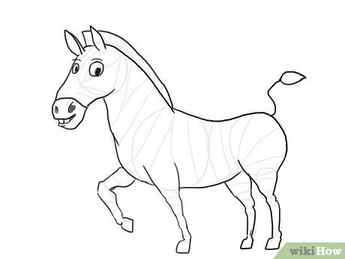
Erase the unnecessary outlines.
Advertisement
Video .
By using this service, some information may be shared with YouTube.
How To Draw A Zebra
In this quick tutorial you’ll learn how to draw a Zebra in 6 easy steps – great for kids and novice artists.
The images above represent how your finished drawing is going to look and the steps involved.
Below are the individual steps – you can click on each one for a High Resolution printable PDF version.
At the bottom you can read some interesting facts about the Zebra.
Make sure you also check out any of the hundreds of drawing tutorials grouped by category.
How to Draw a Zebra – Step-by-Step Tutorial

Print Tutorial
Step 1: First draw the cone-shaped snout. The bottom line has a little bump halfway along it and is longer than the top line.

Print Tutorial
Step 2: Continue a short line starting at the end of the top snout line. Add a triangle-shaped ear at the top of the head. Behind the ear draw a curved line for the rest of the head.

Print Tutorial
Step 3: Continue to add a long curved line for the back. It curves down toward the middle of the back, curves up and then down again at the rump. Draw a shorter line in the front to make the neck.

Print Tutorial
Step 4: Starting at the bottom of the neck line draw the long thin front leg. Don’t forget the hoof at the bottom. There is a tiny indent or bump in at the heel. Draw the line back up. Then draw the belly line, curving it up almost to the end of the back line.

Print Tutorial
Step 5: From the back of the belly line draw a diagonal line back to start the back leg. Then draw a line straight down to the hoof. Don’t forget the small indent on the heel. Draw another line straight up, making a thin back leg. Keep drawing a curved line toward the rump.

Print Tutorial
Step 6: Add another front leg right behind the first front leg. It should also be straight. Right in front of the hind leg add another hind leg. The top part is on a diagonal and the bottom part is straight down. Finally, add the fluffy mane on the top of the back line and the tail. You can also add the zebra markings on the face.
Interesting Facts about Zebras
Zebras live in Africa and belong to the Equidae family, which includes donkeys and horses. They are recognized by their series of white and black stripes and each zebra has its own unique pattern of stripes.
Zebras began to evolve about 4 million years ago and today, there are three species; the mountain zebra, the plain zebra and the Grevy’s zebra.
Did you know?
- Zebras tend to live in small groups and large herds because they are quite social.
- Zebras have never been domesticated like donkeys and horses have.
- The most common zebra is the plains zebra.
- The largest zebra is the Grevy’s zebra, which is also the rarest and is considered an endangered species.
- A zebra’s stripes may serve as identification among a group and may also serve as a protective measure against horse flies and blood-sucking flies by confusing them.
- Most zebras communicate by whinnying and barking, the Grevy’s zebra makes brays like a mule.
- Baby zebras are born brown and white.
In African societies, zebras are often the subject of folk tales about how zebras got their stripes. They are also popular in art and their stripes are popular in fashion and interior design.