When you’re happy with the background, leave the paint to dry completely.
Halloween Watercolor Painting Ideas (Spooky Step by Step Paintings!)

The other day my daughter said we should get some pumpkins so we could make jack o’lanterns. I admit, this is probably my favorite activity at Halloween. But this year I decided to extend the fun and do some Halloween watercolor paintings ! You can follow along in the step by step tutorials below… And I reckon these paintings will take you less time than to scoop out and carve a pumpkin !
For each of these scary paintings I’ve provided templates which you can download so you can paint your own versions (you’ll find a link below the video to my website where you can download all the templates and reference material). So grab your brushes and get ready. But do try not to let your hand shake too much !
Watercolor Jack O’lantern

Try this painting for yourself ! Click the button below to download the worksheet for this painting.
Before we get into the painting process I just wanted to talk quickly about the composition of these jack o’lanterns. Notice for example, that I chose to paint 3 lanterns. Grouping in odd numbers like this generally improves compositions. There’s something about odd numbers which is pleasing to the eye. Notice also how the lantern faces get progressively bigger. This gives an impression of movement as if the lanterns are coming towards us. And it helps lead the eye to the biggest face which becomes the focus of the painting.

I mention this because I think that if you keep little composition tricks like this in mind when you plan your projects it can go a long way to improving your paintings.
Begin by transferring the outline of the subject onto watercolor paper, then fix the sheet down onto a flat board with masking tape. This just helps stop the paper moving around while you paint and it will produce a nice white margin around the finished painting.
Start by painting the eyes, nose and mouth shapes with a cool yellow color.
For example I’m using Daniel Smith Lemon yellow for this – For reference here’s a list of all the colors used in these paintings (Please note, these are affiliate links):
- Hansa Yellow Deep – Pigment number: PY65
- Lemon yellow – Pigment number: PY175
- Phthalo Green BS – Pigment number: PG7
- Phthalo blue GS – Pigment number: PB15:3
- French ultramarine – Pigment number: PB29
- Quinacridone rose – Pigment number: PV19
- Burnt umber – Pigment number: PBr7
- Paynes gray – Pigment number: Pb29/PBk9
While the first layer of paint is still wet, add a warmer yellow color to the outer edges of the eyes, mouth, and teeth. Adding color like this is a wet-on-wet technique known as “dropping-in” or “charging-in”, and it’s a way of blending colors to produce a soft diffused edge.
Next use a blotted brush to remove some of the color in the brightest parts of the mouth and eyes. This is a technique known as “lifting off”.
The objective is to paint a gradient of warm colors ranging from light to dark orange, to reproduce the glowing appearance of the jack o’lanterns.
Paint the other lantern faces using the same method. Start will a wash of cool yellow, then charge-in some warmer yellow paint. When you’re finished leave the paint to dry completely.
Mix up some orange paint and start painting the teeth and the outer edges of the eye and mouth shapes. Use a blotted brush to blend out the edges of your brush marks. Refer to the reference photo to help locate the areas to paint.
Again let the paint dry. As a final touch mix up a neutral orange color and deepen the tonal values of the teeth and the inside of the eyes.
Tips & Tricks: by the way, the term “values” simply refers to the lightness or darkness of a color.
This time don’t blend the edges of your brush strokes. Leave the hard edges of your brush marks to add some more texture to the painting.
Now that the eyes and mouths are finished you can move on to painting the faces.
We want the faces to be darker because they should fade into the dark background like in the reference photo. For this you need to mix up a more neutral orange color. To achieve this kind of hue, start with an orange mixture and add another paint color to lower the saturation, such as a small amount of blue or burnt umber.
Paint around the eyes and mouth, then dip you brush in your rinse water and begin to blend out the edges of the face. Keep dipping your brush in the rinse water and blend the color outwards into the background.
Don’t worry at this stage if your brush marks are noticeable. When you paint the darker background these will be mostly masked by the stronger paint color.
Again leave the paint to dry. At this stage I took advantage to add some detail to the faces to represent the vertical segment lines on the surface of the pumpkin. Use the tip of a clean damp brush to make vertical brush strokes. This is another example of a lifting technique.

The background is painted using a wet-on-wet technique (this is when you apply wet paint to a damp surface). The reason for using this method is because I wanted the edges of the background color to blend smoothly around the glowing eyes and mouths of the jack o’lanterns.
The difficulty with painting backgrounds in watercolors is that if you don’t work quickly enough your paint will dry and you end up with visible brush marks. So to avoid this problem I started by pre-wetting the surface of the paper with clear water, being careful dampen everything except the eye, mouth and nose shapes.
For the background mix up a dark purple color.
Tips & Tricks: Rather than using black for the background you can create a more harmonious result by using purple. Purple is closer to red and yellow on a color wheel and this results in an analogous color harmony.
To mix this color I used a combination of warm red and warm blue. (E.g: french Ultramarine and Pyrrol Scarlet).
Notice when you apply the purple paint to the damp paper the color diffuses more evenly across the surface. You can use your brush to push the paint pigments around and achieve a nicely blended edge around the faces.
When the background dries you’ll notice that the color looks lighter than when you were painting. this is one of the characteristics of watercolor paint.
So to deepen the value of the background we can simply apply the same same process again.
Re-wet the background with clear water, making sure not to wet the eyes or mouths. Then add another layer of purple to the background.
When the paint was completely dry I added some final touches by lifting off some more paint to reinforce the vertical ribs on the pumpkins.

Halloween Watercolor Tutorial – Bats Composition

This next painting idea is a simple composition of blood sucking bats !
Notice that I arranged the flying bats so that they describe an “S” shape. Artists discovered long ago that this type of S shaped curve generates a kind of leading line which adds a sense of movement to a painting. This works particularly well on vertical compositions like the one I used here.

To increase the sense of movement of the bats I also gradually decreased the tonal value of each bat shape so that as they get smaller and smaller they fade into the background. This creates a sense of depth which reinforces the impression that the bats are flying out of the paper !
As before, begin by tracing the outline of the bats onto watercolor paper then fix your paper down to a board.
Begin by mixing a fairly strong mixture of gray paint. A good way to do this if you use paint tubes is to put a spot of paint onto your mixing palette and add only a small amount of water at a time. I used Payne’s gray as the main color for the bats, but to make the painting a bit more interesting I also charged in a hint of purple as well.
While the paint is still wet, drop in some purple color to one side of the bat shape. The color will blend evenly into the first wash of paint.
Paint the second bat with a slightly diluted gray mixture. Add a small amount of water to your puddle of gray paint to dilute the color and make it lighter. Do this a small amount at a time. You want the change from dark to light to be progressive.
Then charge-in some purple while the shape is still damp to create a bit of color variation.
Do the same thing for the next bat down. Add a small amount of water to dilute the paint, fill in the bat shape with the gray color, then drop in some purple wherever you like.
Keep moving down the page, making your paint lighter and lighter in value until you’ve painted the final bat at the bottom of the composition.

Easy Peasy Halloween Cat Painting Tutorial
Excite your little ones with this easy peasy Halloween cat painting tutorial. With just a few bush strokes your little artists will be painting their very own black cat.
This is a great art project for the classroom and it will make the most wonderful Halloween display.


*This post contains affiliate links*
With Halloween fast approaching, there is no such thing as too much Halloween craft and art ideas! Have kids learn with our changing emotions witch craft or make Halloween paper mosaics.
If the kids are excited about todays project and cats in general, also use our how to draw a cat tutorial.
How to Paint the Easy Peasy Halloween Cat Painting
What you need:
- pencil
- orange color construction paper
- tempera or acrylic paint (black, purple, and yellow)
- paintbrush
- white chalk marker or white paint
Grab your tools and follow our “how to paint a cat easy” tutorial for a stress-free painting experience.
Step by Step Tutorial
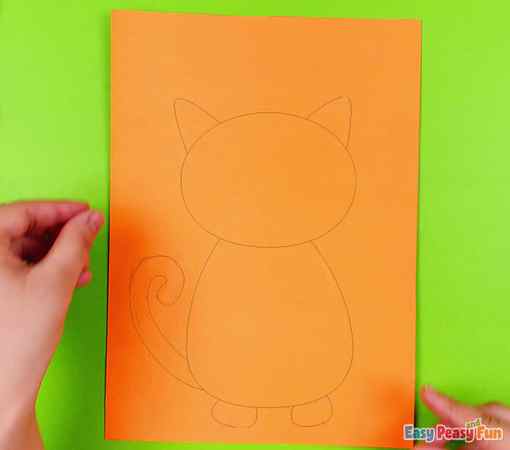
Take a sheet of orange construction paper. You can draw an outline of the cat with pencil or you can skip this step and go straight into painting. Start with the oval shape for the head and work your way from there.
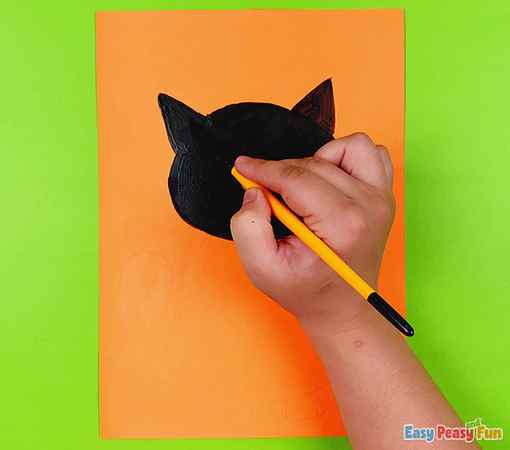
Use black paint and color an oval shape for the head.

Paint two triangles for the cat ears.
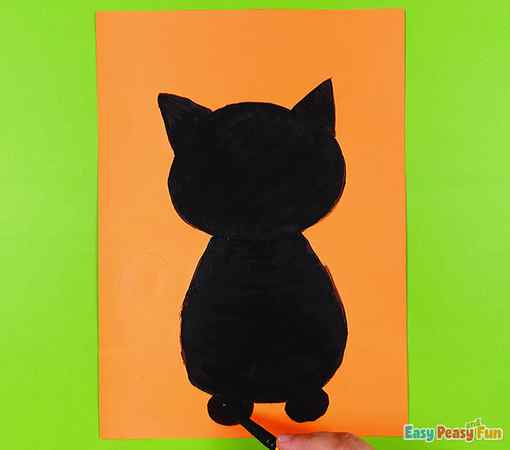
Paint an oval shape for the body.

Next, paint two oval shapes at the bottom of the body to make the cat’s paws.
Paint the cat’s tail.
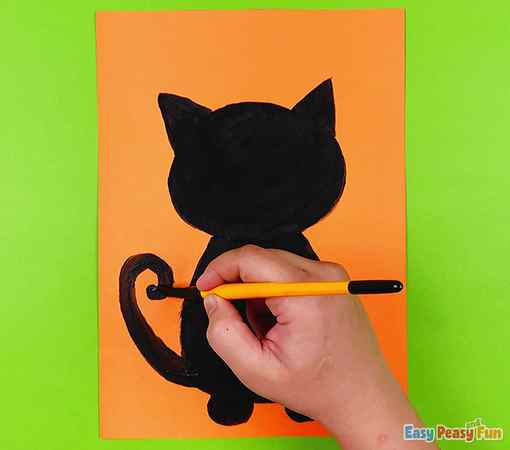
Wait for the paint to dry.
For the next step you can make a quick sketch with a pencil – draw the inner ears, eyes, nose, and mouth. Or you can just go in with the paint, without sketching in the details.
With purple paint, color in the inner ears. Also, paint an oval shape for the nose.
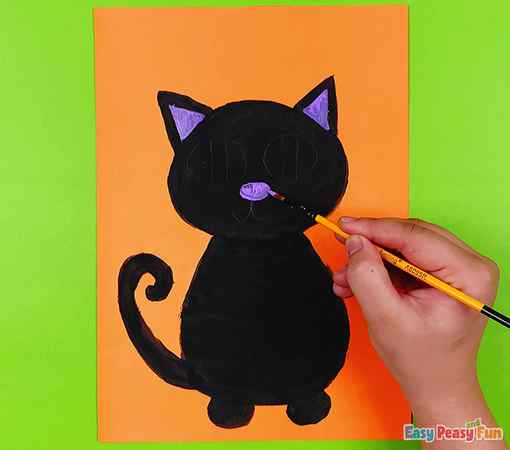
Paint the semicircles of the eyes with yellow paint.
If working with younger kids, you can have them paint a yellow circle first and paint it over with black paint later on.
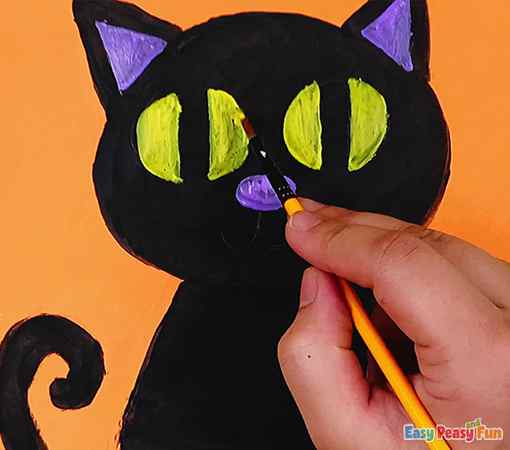
Use a white marker to draw the mouth and claws.
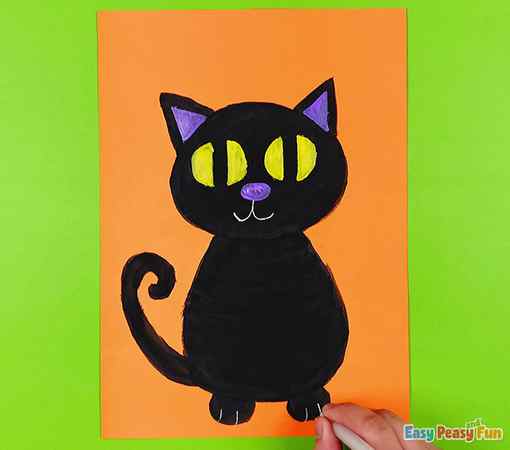
Your Halloween cat is finished!
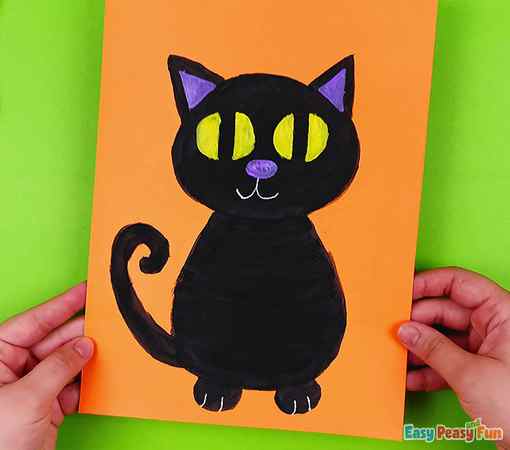
We hope this Halloween cat painting tutorial will be a fun and simple Halloween art project that kids can easily make for Halloween.
Want instant access to all of our printable crafts, activities, and resources?

With thousands of crafts, activities, worksheets, coloring pages, and drawing tutorials to print, you will always have just the resource you need at your disposal. Perfect for parents and teachers alike!
Sign Up Now and Start Printing!
Related Posts

Black Cat Paper Craft Love cats? Why not make this lovely little black cat paper craft? This makes a…
Halloween Handprint and Footprint Art Got creative little footsies and hands? Why not make these two Halloween handprint and footprint…
Handprint Black Cat Craft There is still enough time do plan a quick Halloween craft for kids – make…
Bat Silhouette Halloween Art A splash of color and a few dabs on the paper and you have an…
Cat Corner Bookmarks – Halloween Origami for Kids If you are looking for a fun craft to make for Halloween or are just…
Insanely Fun Halloween Printables for Kids Halloween is sneaking in! Are you ready? Need something cool to keep the kids busy?…
SUPER easy Halloween painting!
I love painting & drawing so I have a lot of ideas in my Pinterest Board and I do them myself obviously but if you love painting do it! Check out my instagram- Haileymariek
Halloween Sketchbook Tour! ✨
This is a collection of drawings I’ve made over the fall season and for Halloween! I love fall and therefore have made a ton of art related to the season! I made posts for each drawing so if you have any questions or want to learn more about it please check out my page! Which is yo
pumpkin painting for the ghoulies
Items: ️ grab your pumpkins from wherever acrylic paint, but any kind will do. sealant to make it last & paint smooth ️cheap brushes work. Variety of sizes & sponge brushes are a must! Brand: dollar tree, target, Walmart ect… Price: $10-$20 Pros: super easy designs, activ
halloween paints
i am SUCH a halloween girly and i’m so excited for this year! here are some of my recent paintings #paintideas #halloween #spookyseason #halloweenforever #ghostfacefans #horror2023 #unaesthetic #dayinmylife
EASY HALLOWEEN MAKEUP IDEA ⬛
In need of some Halloween inspiration? I got you This look would be perfect for any halloween parties or celebrations! All you need is : Eyeshadow Palette This can be any colour scheme u like, or if you don’t feel like doing any.. you don’t have to! Facepaint or Eyeliner Either work
My Painted Pumpkin
Jack the skeleton inspired pumpkin. #halloween #paintingideas #fall2023 #pumpkinseason
last minute Halloween costume! ⬛
if you’ve procrastinated your costume and need to come up with something quick, try this easy 10 minute cat make up! It is so much fun and so cute n sassy! ✨ #lazygirlmakeup #lazygirl #lastminutecostume #halloween #halloweencostume #halloweenmakeup #diyhalloween #diyhal
Molang Bullet Journal Theme
Since it was October, I wanted to keep up with doing another Halloween setup for my bullet journal. This year, I decided to do a theme based on the character Molang and make it halloween-themed. I first started with the cover page and went with a simple drawing of Molang jumping out of a pumpki


