Next, I tone the paper using a thin wash of three primary colors. I used cadmium red, cobalt blue and yellow ochre…but really you can use any three you want. The yellow and blue blend seemlessly into green. Do not worry about where the colors are at this stage. Be as careless as you please and simply blot the areas that you want to make your white trees.
How to Paint Fall Trees Effortlessly
wikiHow is a “wiki,” similar to Wikipedia, which means that many of our articles are co-written by multiple authors. To create this article, volunteer authors worked to edit and improve it over time.
Fall or autumn is characterized by cool weather making deciduous trees turn brilliant colors in many parts of North America. While watercolor is the perfect medium to express the beauty of fall trees you can also use other water-based materials. They all require few supplies and no special talent. Begin today celebrating autumn on paper, in a work of art.
Steps
Method 1
Method 1 of 3:
Preparing
nLicense: Creative Commonsn”>
Prepare by looking at actual fall trees. Alternatively, you could go to internet sites to see photographs of fall trees. Or you could just use your imagination and think of a scene where colorful trees are on display.
nLicense: Creative Commonsn”>
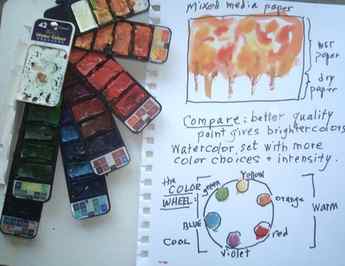
- Using a good quality watercolor paint will give you more intense colored foliage.
Advertisement
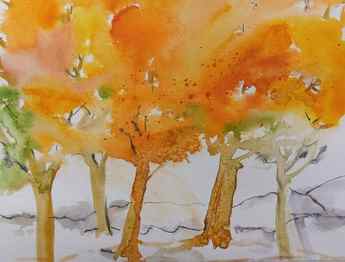
Envision your artwork. Hold a piece of watercolor paper in either alignment and imagine that the entire top three-quarters of the composition will be the colorful foliage of masses of trees. The only other element will be straight, vertical lines of the tree trunks and they will take up the lower portion of the page.
Set up your painting space with craft brushes and watercolors. You will want a pointed one for details and a larger brush to cover large areas fast. Open and activate your watercolors with a few drops of water. For rinsing brushes, use a container that holds at least of cup or more of clean water. Put out a few tissues for controlling drips. Work where there is good light.
A Pretty Talent Blog
This blog is about empowering everyone who has a talent for making pretty things, be it a latent or developed one. I bring you practical tips and tricks to make and do the things you’ve always wanted to.
Using a Fan Brush to Paint Trees Effortlessly
In the previous blog I showed you how to paint effortless trees using a Filbert Brush. Today I will be using largely the same techniques to paint yet another tree, but this time I will be using a Fan Brush. Using the Fan Brush will give a whole different effect that will open a range of new possibilities. Combining the two brushes widens the scope even more. While I’m at it, I will also show you quickly how to use the Fan Brush to paint waving grasses. The Fan Brush is a flat brush where the bristles spread out in the shape of a fan. It comes in a wide range of bristles and work well with all paint mediums.

I start by stretching a sheet of sketch paper over a backing, using masking tape. The paper I am using is only 120 gsm. Normally this would be too light weight for watercolors, but the technique calls for using a very dry brush and therefore the paper will not warp or buckle when the watercolors are applied.

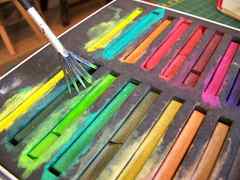
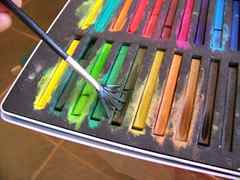
Instead of using watercolor paints, I will be using Derwent Inktense Blocks in much the same way as watercolor pans.

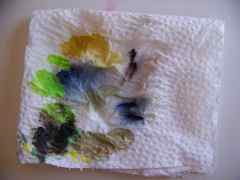
I will be using a dry brush technique and will continually be dabbing the brush dry on a paper towel, so be sure to keep one handy. This is what mine looked like at the end of the painting.
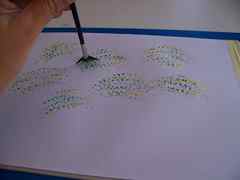
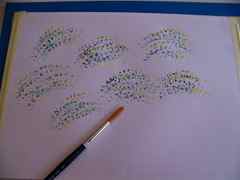
I start with a bright green as the middle tone for the today’s tree painting.

After dabbing the brush dry on a paper towel, I touch the paper very lightly with the tips of the bristles. This leaves a stippled, semi-circular pattern on the paper. Group these in clusters, as leaves often grow in clusters on trees, since they are attached to branches that separated the clusters from each other.

Finding the first color very light and sunny, I select a darker green for the second color to add shadow to the leaves.

I once again simply dab the tip of the brush to the paper.

Now I select a bright yellow to add vibrant sunlight to the leaves.

The same technique is used to add this color.
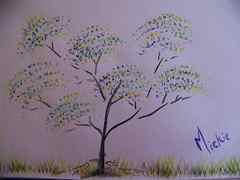
My last color adds a surprise element. There are plenty of trees in nature that has surprising color schemes. Even though I did not set out to paint a Jacaranda, it occurred to me that I could show you how to easily add purple to the tree to create the impression of those thousands of purple flowers that adorn the beautiful signature trees. If I were to develop this idea fully, I would add shades of purple, and even blue to the tree. As it is, the tree canopy is already full and I’ll simply leave you with this introduction to the idea.

The purple is also dabbed on with the tip of the brush. I would probably opt to use both a Filbert and a Fan brush when painting a tree like the Jacaranda. Perhaps some of you would like to share your ideas in the comments?

With the tree canopy in place, I now switch to a round brush with long bristles. It has to have a finely tapered point to be successful.
I pick up a dark grey to paint the tree trunk and branches.

I use broken and wavy lines to paint the trunk and branches. The broken areas will create the impression of light reflecting off the branches.

I then use a dark brown to introduce a softer shade to the trunk, creating a side that is hit by the light source. Remember to add some roots to anchor the tree to the ground, or it will appear to be floating in space.

I switch back to the fan brush from before to show you quickly how to paint wild waving grass. I pick up a bright green to start with.
Grass grows in clusters and in all directions. Keep this in mind when painting it. Touch the paper lightly with the tip of the brush and sweep upwards in quick short movements.

Alternate the direction in which you are painting constantly so the grass will lie cross each other.

The second color I choose is a darker green that will add shadow to the grass.
I then opt for a reddish brown color to include some dry grasses.

I keep adding all of the colors in exactly the same fashion as the first color, with short upward sweeps of the brush.

Lastly I add a dark blue for the deeper shadows in the grass.

In no time at all you will find that you have painted a very believable tree. Now, find yourself a good reference photo of an actual tree (or a live specimen), and use these techniques to paint the tree, paying close attention to the shapes on the tree. Different species of trees have very distinct attributes and you should pay close attention to these. Above all, enjoy what you are doing!
For more crafty ideas and great products, visit APrettyTalent.com.
Remember to keep nurturing your TALENT for making PRETTY things.
You can subscribe to this blog and receive regular updates by email by simply registering your email address at the top of the current blog.
Mask the trunks
Next, I mask out the trunks with low tack artist tape. Masking tape might rip and ruin your paper so I do suggest you seek out the low tack artist tape– you will find this in the drafting area of the art supply store. I ripped the tape to vary the thickness of the trunks.
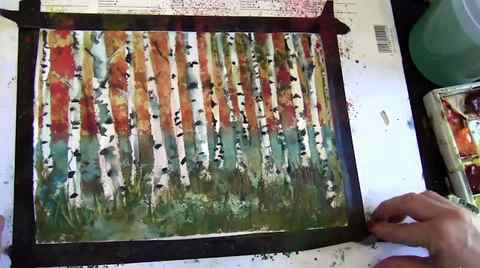
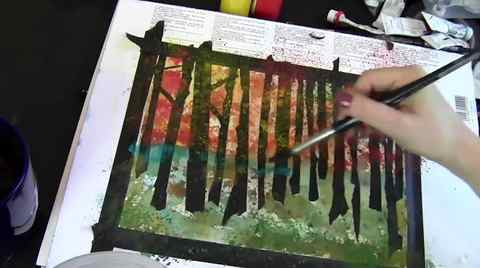
Now, you can have more fun. I kept the forest floor green and the area above the horizon line is red. You can do whatever you want. This is your landscape!
Finishing Details

Carefully remove the tape and now add details. The dark paint will help make the white stand out and give the illusion of more detail than there really is.
How To Mix Green Paint
Are you making these 3 mistakes with your watercolor paintings?
How to Paint Sand
On Pinterest? I’ve created this pin just for you to share…

–
Download your FREE ultimate watercolor supply list to get the exact list of paints, brushes and paper I use everyday to create my watercolors!
Hey, I’m Miriam Schulman and I create mixed media art to tell stories. I also teach other people how to craft their stories with art. I give them the techniques they need to get the results they desire which brings more joy to their lives.
My art has been published by Somerset Studio, Art of Man and the New York Times among others and collected by an international audience. When I’m not working on art in my studio, you’ll find me in a museum spending time with friends or family. Explore my art at SchulmanArt.com or join the fun at TheInspirationPlace.net


