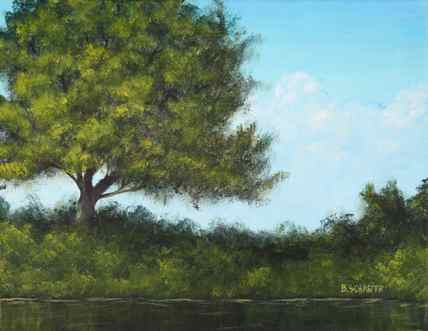
In this step, add the lightest accents and other flare to make it your own. I added some small strokes of saturated yellows and blues to give more of an impressionistic color effect. Take note of natural and realize that it is full of variety and color, do your best to incorporate these elements into your work.
Landscape Painting 101: How to Paint Trees in Acrylics

August 17, 2014 By Brandon Schaefer filed under Art Blog.
Creating a landscape painting can be a daunting task at first, especially if you are unfamiliar with painting trees — one of the most common elements within a landscape painting.
Learn the basics of how to paint trees with acrylics.
Set up your canvas and prepare your paints and brushes. I’m trying out this skinny canvas panel, just to try something new and experiment. For this tutorial, I’m chose to use Ultramarine Blue, Cadmium Red, Cadmium Yellow and Titanium white paint. I like to soak my brushes in warm to hot water anywhere from 5 to 10 minutes before starting my painting.

Step 2: Create a tree structure.
All trees have different branch and trunk structures, so it’s important to study different types of trees and how they are naturally built. Keep in mind that almost all trees are made up of V-shapes. There are also many different tree trunk colors and styles depending on which type of tree you wish to paint. Have fun and experiment!

Let’s paint TREES – Acrylic Painting for Beginners

You always wanted to paint landscape, but didn’t, coz you don’t know to paint trees? Then, this is the class you are looking for!!
In this class, I will show you how to paint beautiful trees using Acrylic colors. The class is loaded with a lot of tips and tricks that would help you to get started.This class is perfect for anyone who likes to begin his/her journey in acrylics and also for those who knows the basics, but want to experiment more. Acrylics might seem challenging, since it dries too fast. But, it just takes a little bit of practice. That’s it!
- I start off with the supplies you’ll need;
- We will do some fun exercises together to improve your flexibility and we will quikly go through some basics.
- Then you’ll be painting with me 5 simple and tiny trees. This would give you an idea what the technique is all about.
- Then I will teach you to paint 2 advanced trees- Umbrella Pine and Birch Tree. This would give you confidence to paint any tree of your own by just observing its form and structure.
This is absolutely a fun class!
- Canvas Board or Canvas pad [But any surface would be fine- Acrylic painting paper, wood ]
- Paints (Scroll down for colors)[I used Camlin Kokuyo and W&N acrylic paints. You can use any good brand]
- Painting brushes
- Waste cloth
- Water Jar
- Palette
- Burnt Umber – Tree Trunk
- Yellow Ochre – Trunk Highlights
- Olive Green – Shadows
- Phthalo Blue – Shadows
- Sap Green – Midtone
- Permanent Yellow Deep- Highlights
- Permanent Red
- Permanent Orange
- Flat Brush – 2
- Angle Brush – 10
- Hog Bristle Flat Brush -2, 4, 6
- Detail Brush (Optional)
Read more
Instructions
1. Paint the background a dark colour. Here I am mixing blue with a small amount of red to create a dark blue/purple using a large flat brush. I am leaving a few brush strokes but feel free to do the background any way you would like. Let it dry.


3. Now you can add a bit more blue to your green you are currently using to make a darker green. Go over parts of the tree using the same flicking motion. Using a darker green will add shadows and depth. Continue building up the branches until you are happy with the results!

4. Using a smaller flat brush pick up some white paint. Holding your brush vertically, stamp and pat the white onto the tree to create snow. Think about how snow naturally falls on trees noting that snow usually rests on top of branches.

5. Add snow by mixing a tiny amount of water into some white paint. Hold your brush horizontally over your painting and tap your brush. Tapping your brush will bounce and splatter paint off the brush and onto your painting creating small dots like snow.
6. Use white paint to add snow on the ground or any other details you would like and you are done!


